Setting Optimal Exposure for Log Recording
If optimal exposure is not achieved during Log recording, loss of detail in highlights or shadows, noise, and other artifacts may occur. Set an optimal exposure when shooting, as these issues are difficult to correct in post-production. This section explains how to set optimal exposure with the wave-form monitor or zebra display feature using an 18% gray color chart as a reference.
Setting Exposure Using the Wave-Form Monitor
N-Log Videos
-
Display the wave-form monitor in the shooting display.
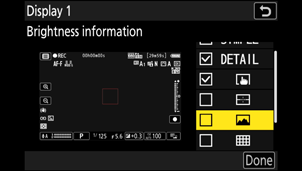
Select (M) [Brightness information] for Custom Setting g [Video] > [Custom monitor shooting display].
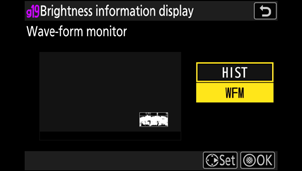
Select [Wave-form monitor] for Custom Setting g [Video] > [Brightness information display] and press J.
-
Press 2 to display [Size], [Transparency], and [Position] options for the wave-form monitor.
-
-
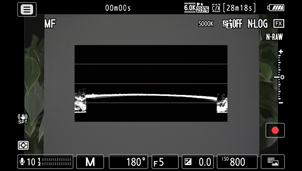
The wave-form monitor will appear in the shooting display.
-
Place an 18% gray color chart in the same position as the subject.
-
Set the optimal exposure.
Adjust the exposure while viewing the wave-form monitor so that the waveform appears around the center of the third row from the top (approximately 35% luminance level). For 10-bit code values, adjust the exposure to a value around 372.
Caution: Importing N-Log Videos in Premiere Pro
N-Log videos are loaded as Log3G10 videos when imported into Premiere Pro. In that case, select the optimal exposure value for N-Log videos.
Log3G10 Videos
-
Display a wave-form monitor in the shooting display.
-
Select (M) [Brightness information] for Custom Setting g [Video] > [Custom monitor shooting display].
Select [Wave-form monitor] for Custom Setting g [Video] > [Brightness information display] and press the center of the multi selector.
-
Press the multi selector right to display [Size], [Transparency], and [Position] options for the wave-form monitor.
-
-
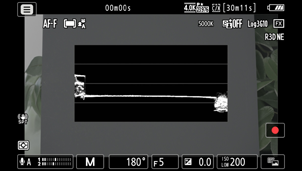
The wave-form monitor will appear in the shooting display.
-
-
Place an 18% gray color chart in the same position as the subject.
-
Set the optimal exposure.
Adjust the exposure while viewing the wave-form monitor so that the waveform appears around the center of the third row from the top (approximately 33% luminance level). For 10-bit code values, adjust the exposure to a value around 341.
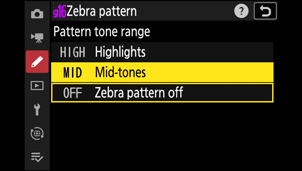
Setting Exposure Using the Zebra Display
N-Log Videos
-
Display zebra patterns in the shooting display.
Select [Mid-tones] for Custom Setting g [Video] > [Zebra pattern] > [Pattern tone range] and press J.
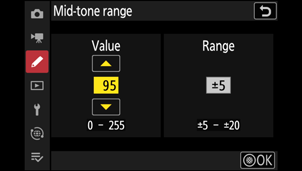
For Custom Setting g [Video] > [Zebra pattern] > [Mid-tone range], set [Value] to [95] and [Range] to [±5].
-
Areas with detected luminance levels will be indicated by zebra patterns.
-
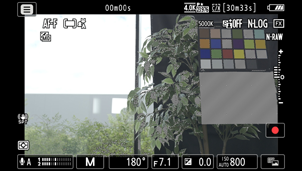
Place the 18% gray color chart in the same position as the subject.
-
Set the optimal exposure.
While viewing the shooting display, adjust the exposure so that zebra patterns appear on the 18% gray color chart (luminance level of approximately 95).
Caution: Low ISO Sensitivities
The maximum output level for videos recorded at low ISO sensitivities drops due to the decrease in highlight data. We recommend that you select a low value for Custom Setting g [Video] > [Zebra pattern] > [Highlight threshold] when using the zebra pattern feature. A highlight threshold around [230] is recommended for Lo 0.3 to 1.0 and [200] for Lo 2.0.
Log3G10 Videos
-
Display zebra patterns in the shooting display.
Select [Mid-tones] for Custom Setting g [Video] > [Zebra pattern] > [Pattern tone range] and press the center of the multi selector.
For Custom Setting g [Video] > [Zebra pattern] > [Mid-tone range], set [Value] to [85] and [Range] to [±5].

-
Areas with detected luminance levels will be indicated by zebra patterns.
-
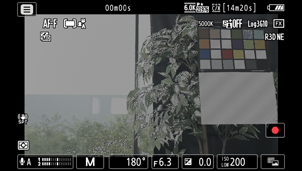
Place the 18% gray color chart in the same position as the subject.
-
Set the optimal exposure.
While viewing the shooting display, adjust the exposure so that zebra patterns appear on the 18% gray color chart (luminance level of approximately 85).
Caution: Using the Zebra Pattern to Set Optimal Exposure for Log3G10 Videos
LUTs affect zebra patterns when [ON] is selected for Custom Setting g [Video] > [3D LUT]. Set [3D LUT] to [OFF] for optimal exposure using zebra patterns with an 18% gray color chart.
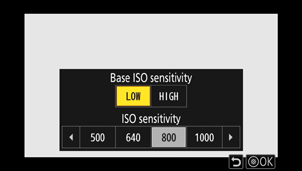
The Base ISO Sensitivity Settings
Base ISO sensitivity ensures the widest dynamic range output from the image sensor. Cameras equipped with sensors that support dual base ISO allow you to select the base ISO sensitivity from either [Low sensitivity] or [High sensitivity].
| Option | Description | |
|---|---|---|
| [Base ISO sensitivity] | [Low sensitivity] |
Set the base ISO sensitivity to ISO 800.
|
| [High sensitivity] |
Set the base ISO sensitivity to ISO 6400.
|
|
-
Select [Low sensitivity] for bright environments and [High sensitivity] for dark environments; note that [Low sensitivity] and [High sensitivity] are designed to provide equivalent noise levels.
Noise in dark areas when selecting [Low sensitivity]
Noise in dark areas when selecting [High sensitivity]
An ND filter is used to obtain the same brightness. Noise is enhanced to make it more visible.
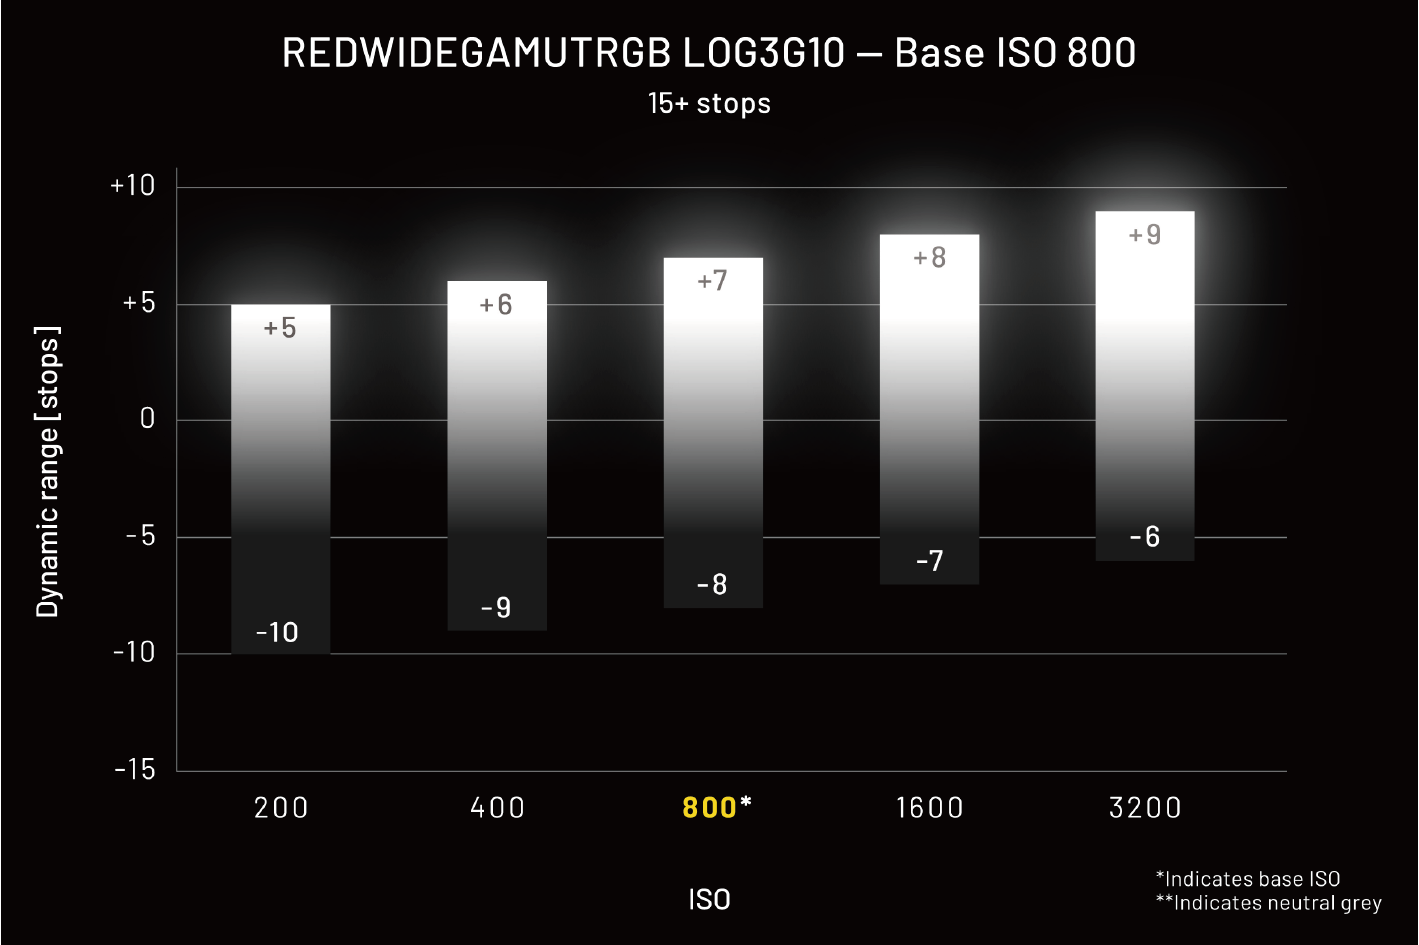
Dynamic Range
A wide dynamic range prevents loss of detail in highlights or shadows, reduces noise, and provides natural and beautiful tonal gradation. It also provides greater flexibility in post-production editing and correction for high-quality results.
-
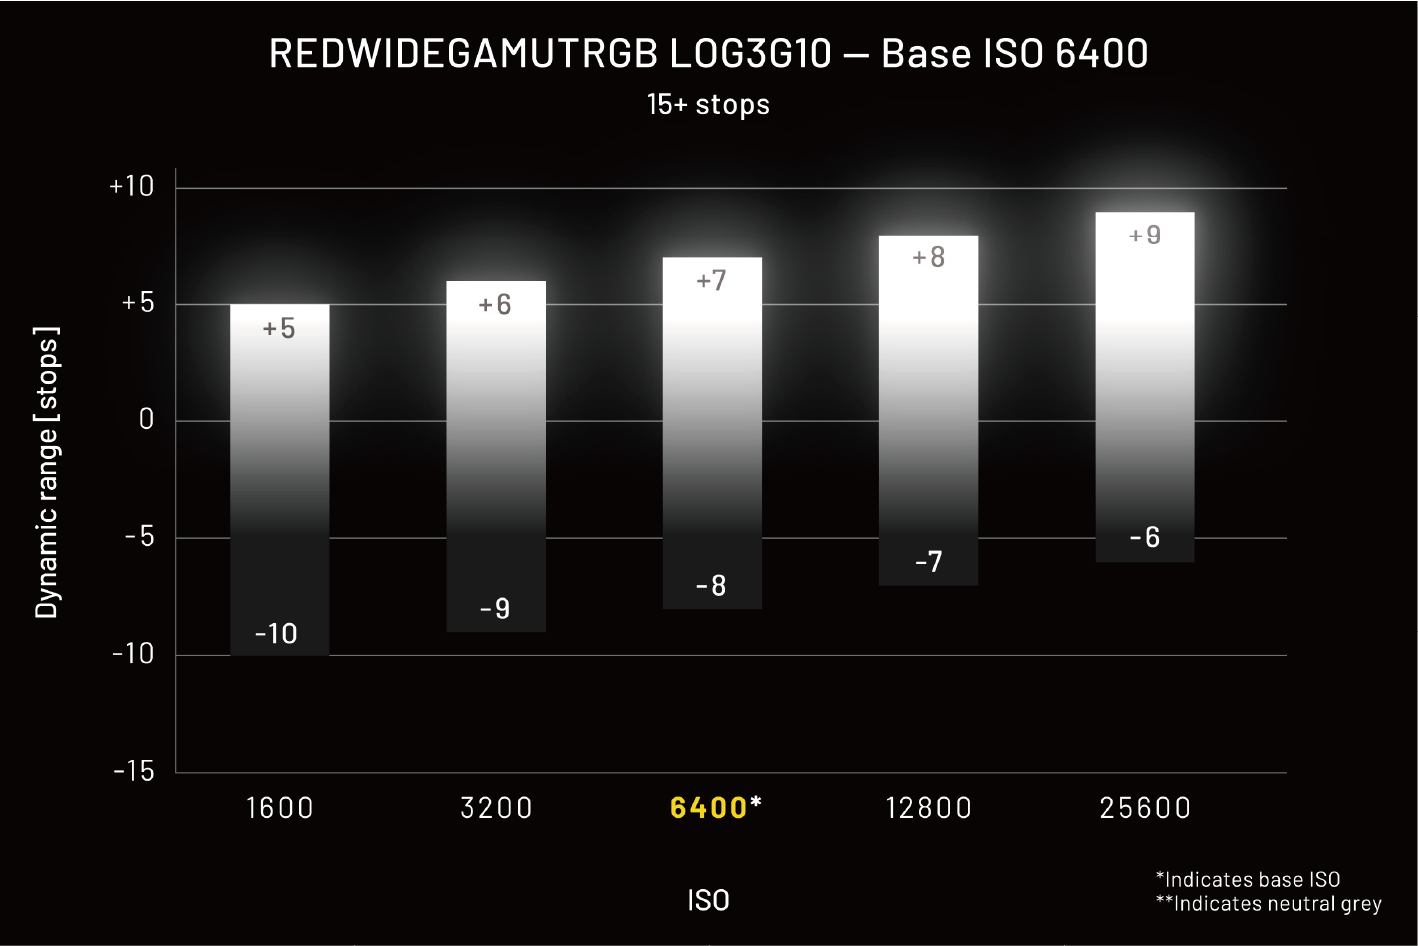
The dynamic range of the Nikon ZR digital camera is as follows:
-
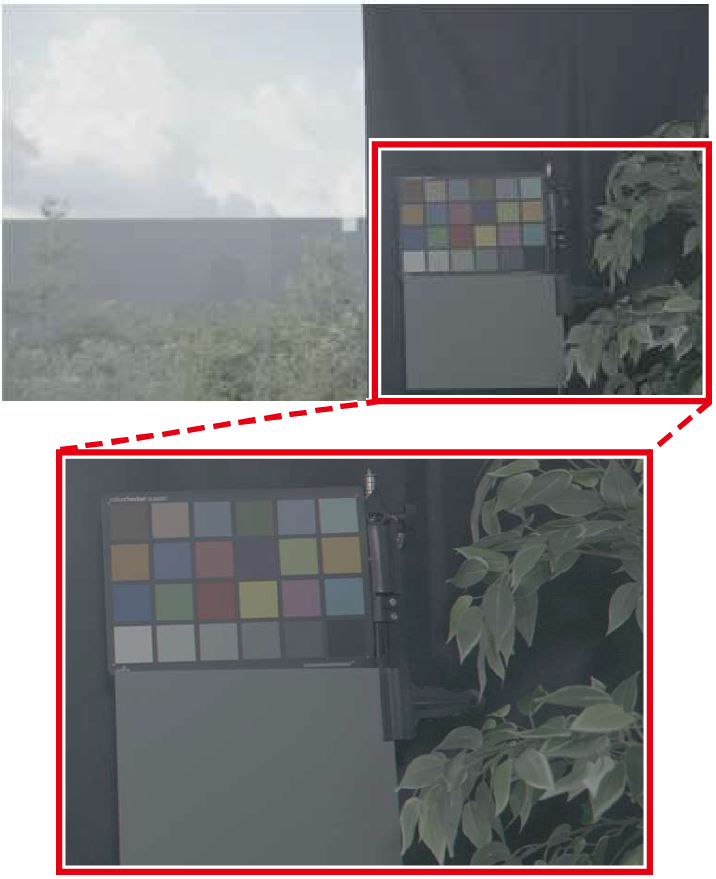
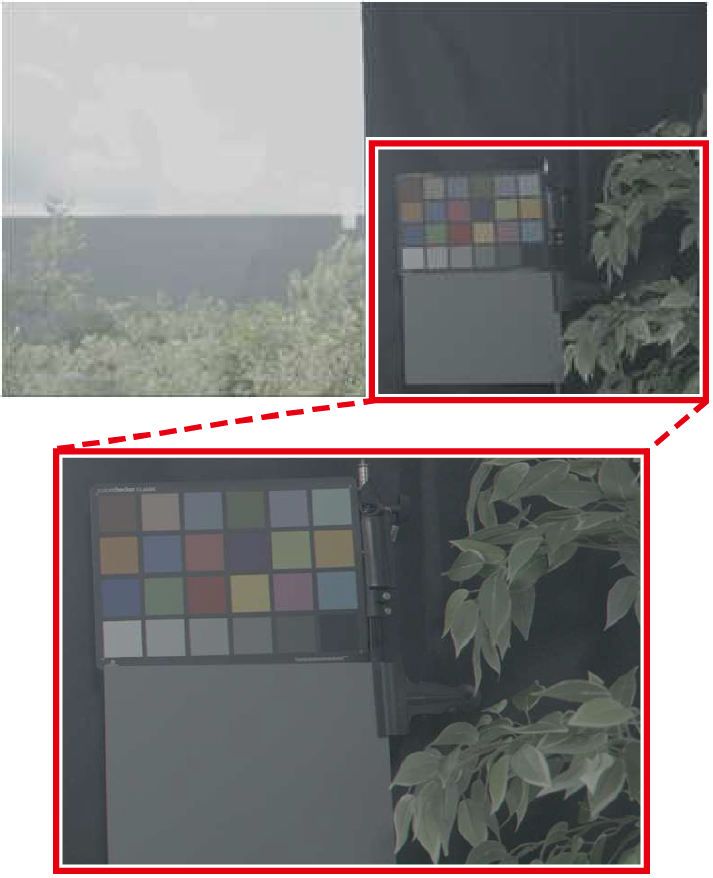
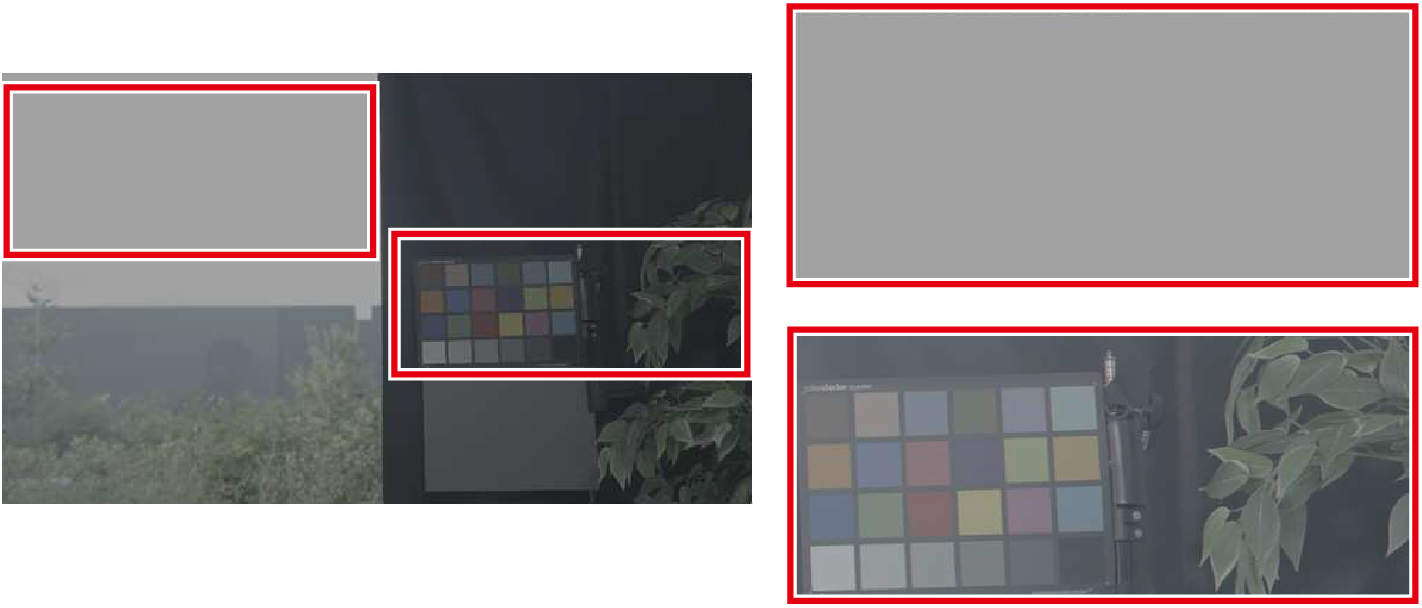
When [Base ISO sensitivity] is set to [Low sensitivity] (ISO 800)
-
The ISO 200 setting narrows the dynamic range in highlights, resulting in loss of details in bright areas. There will be more dynamic range in shadows, preserving detail with less noise.
-
The ISO 3200 setting widens the dynamic range in highlights, preserving details in bright areas. There will be less dynamic range in shadows, resulting in loss of detail in dark areas.
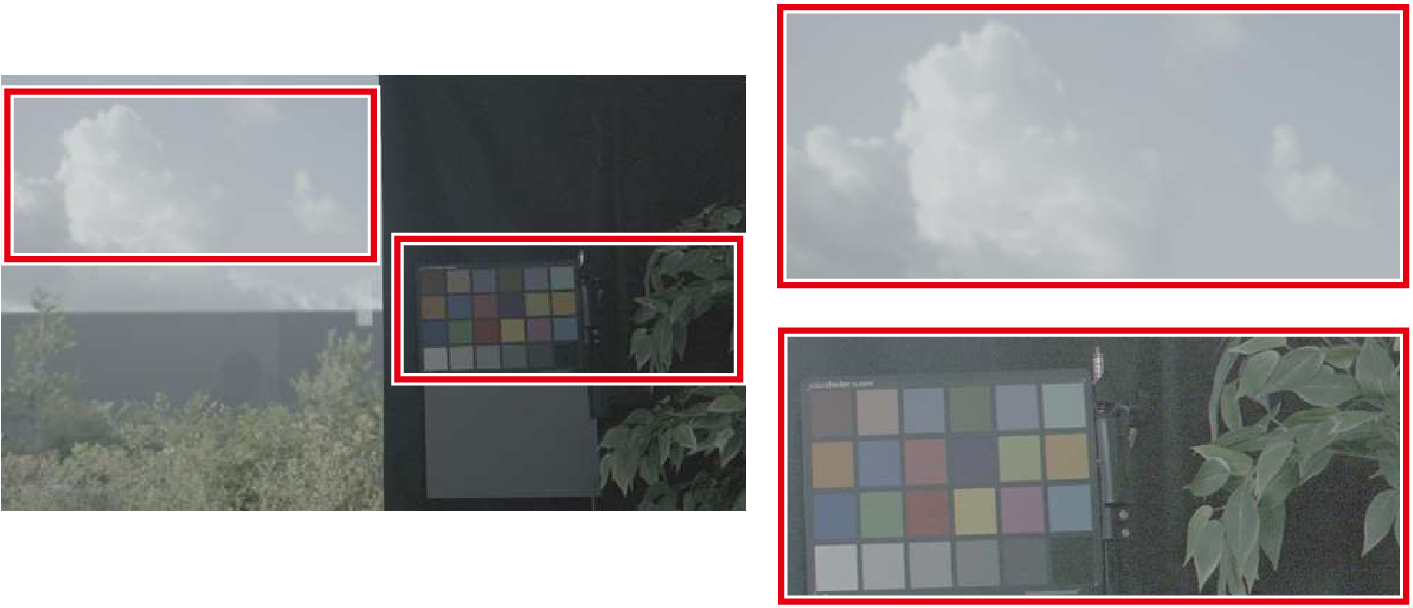
The above images are set to the same brightness level to show the dynamic range characteristics according to the ISO sensitivity settings. The magnified images are enhanced to make the characteristics in shadows more visible.
These dynamic ranges also apply when [High sensitivity] (ISO 6400) is selected for [Base ISO sensitivity].
-
-
When [Base ISO sensitivity] is set to [High sensitivity] (ISO 6400)
-