Edit with DaVinci Resolve
This section provides an example of how to edit N-Log and Log3G10 videos.
- For optimal results, we recommend taking test shots and practicing editing before you start.
- The following information is current as of October 2025.
Edit N-Log Videos
Using the N-Log LUT
Here we will show how to transform color space using technical LUTs.
-
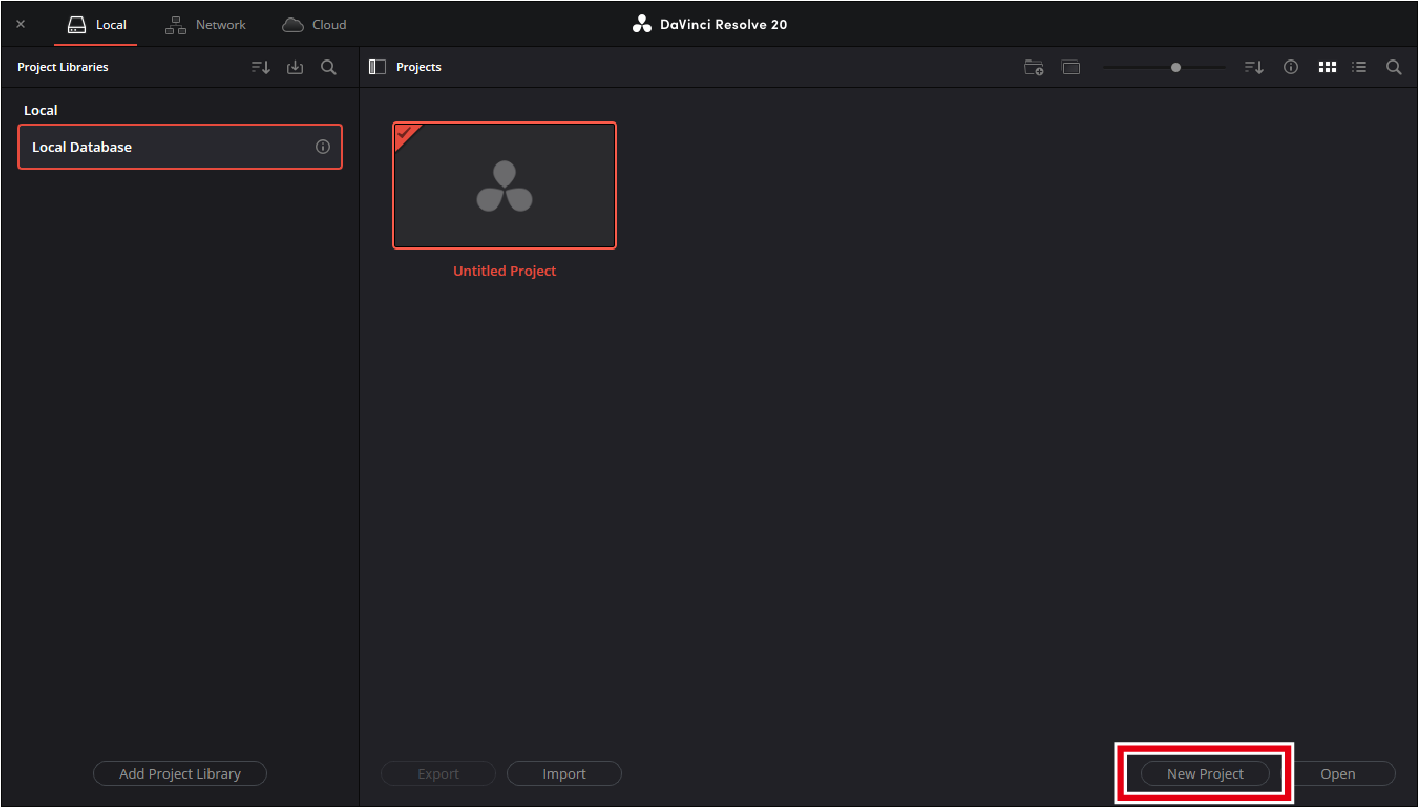
Launch DaVinci Resolve and start a new project.
Click [New Project], enter a project name, and click [Create].
-
Load a LUT.
-
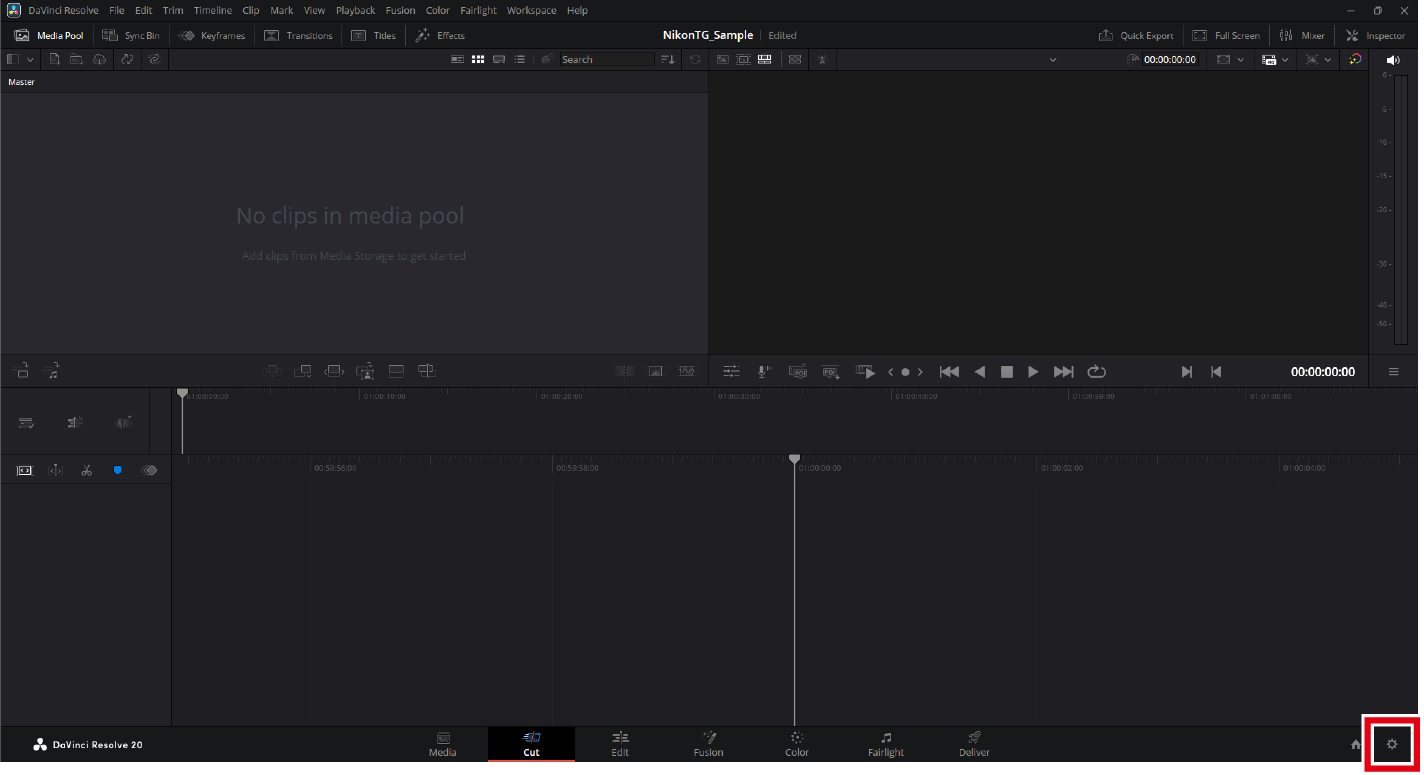
Click the [Project Settings] icon.
-
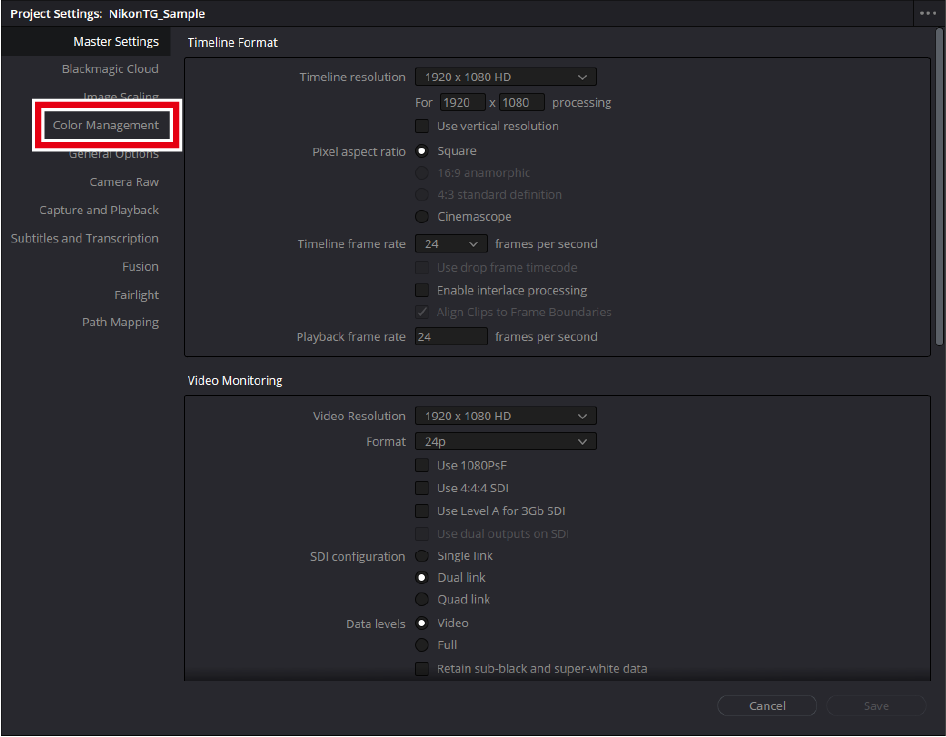
Click [Color Management] in the project settings window.
-
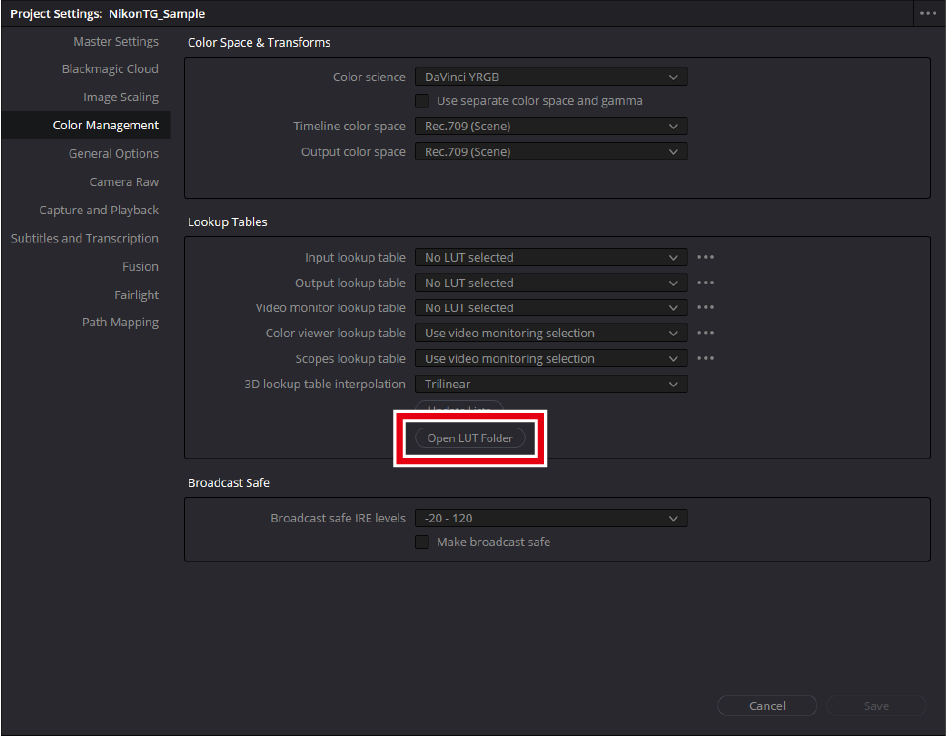
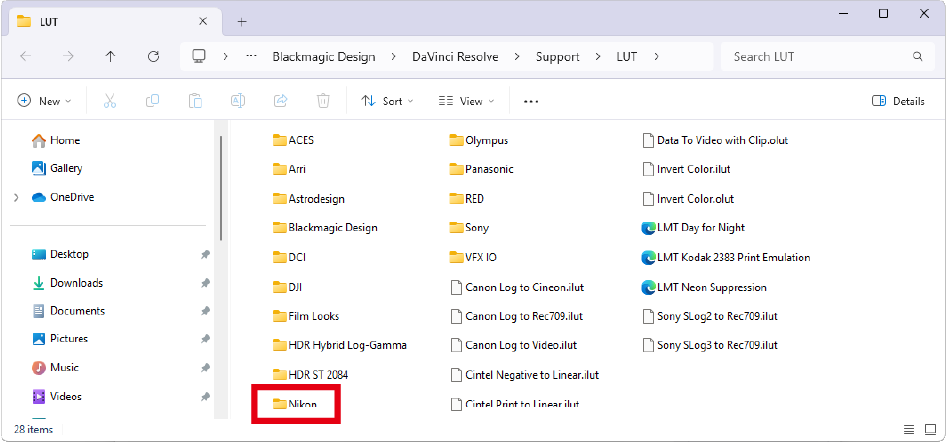
Click [Open LUT Folder].
The LUT folder will open. The folder path is:
-
Windows:
C:\ProgramData\Blackmagic Design\DaVinci Resolve\Support\LUT
-
macOS:
Library/Application Support/Blackmagic Design/DaVinci Resolve/LUT/
-
-
Create a sub-folder under the LUT folder, name it, and copy the N-Log LUT to the new sub-folder.
Here, a "Nikon" folder is created and the downloaded N-Log LUT is copied into it.
-
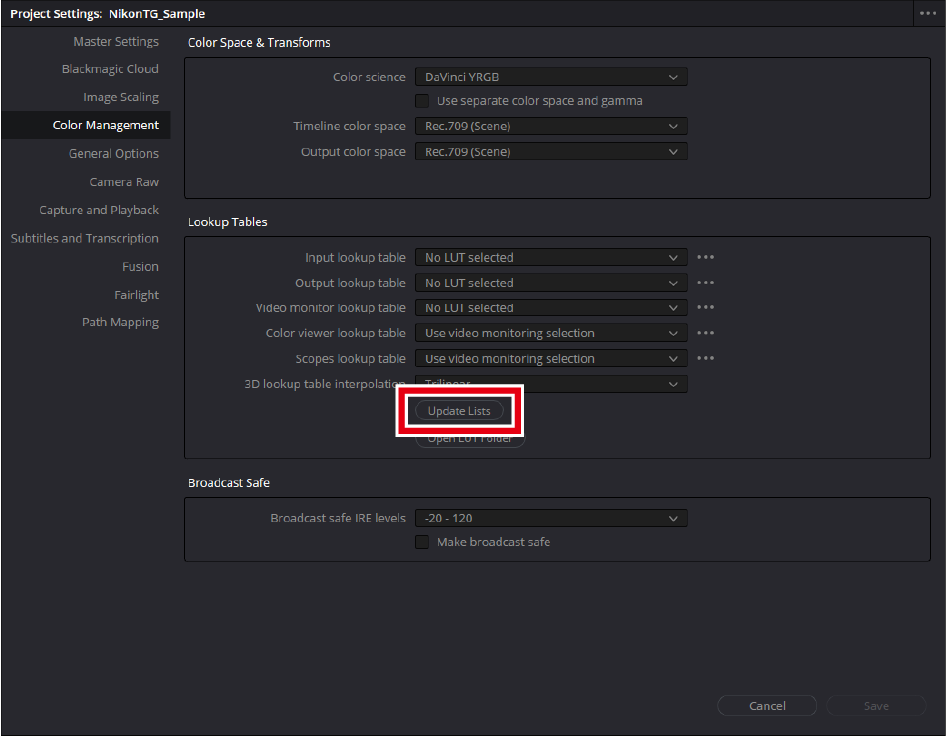
Click [Update Lists].
DaVinci Resolve will load the copied LUT.
-
-
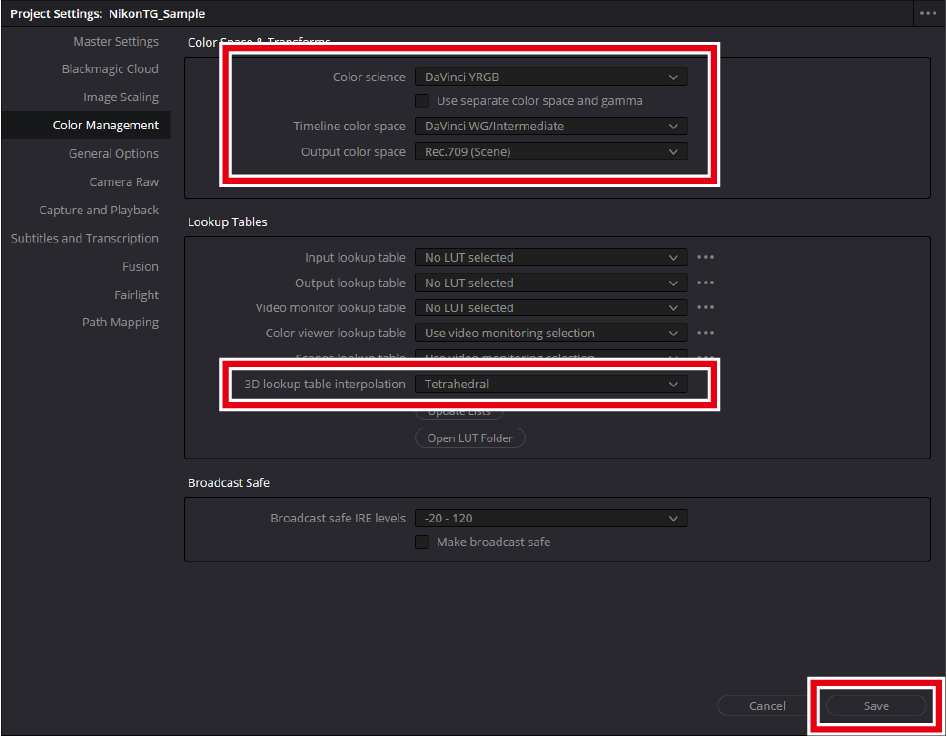
Set [Color Management].
Set the items as follows and click [Save].
- [Color science]: [DaVinci YRGB]
- [Timeline color space]: [DaVinci WG/Intermediate]
- [Output color space]: [Rec.709 (Scene)] (Windows), [Rec.709-A] (macOS)
- [3D lookup table interpolation]: [Tetrahedral]
-
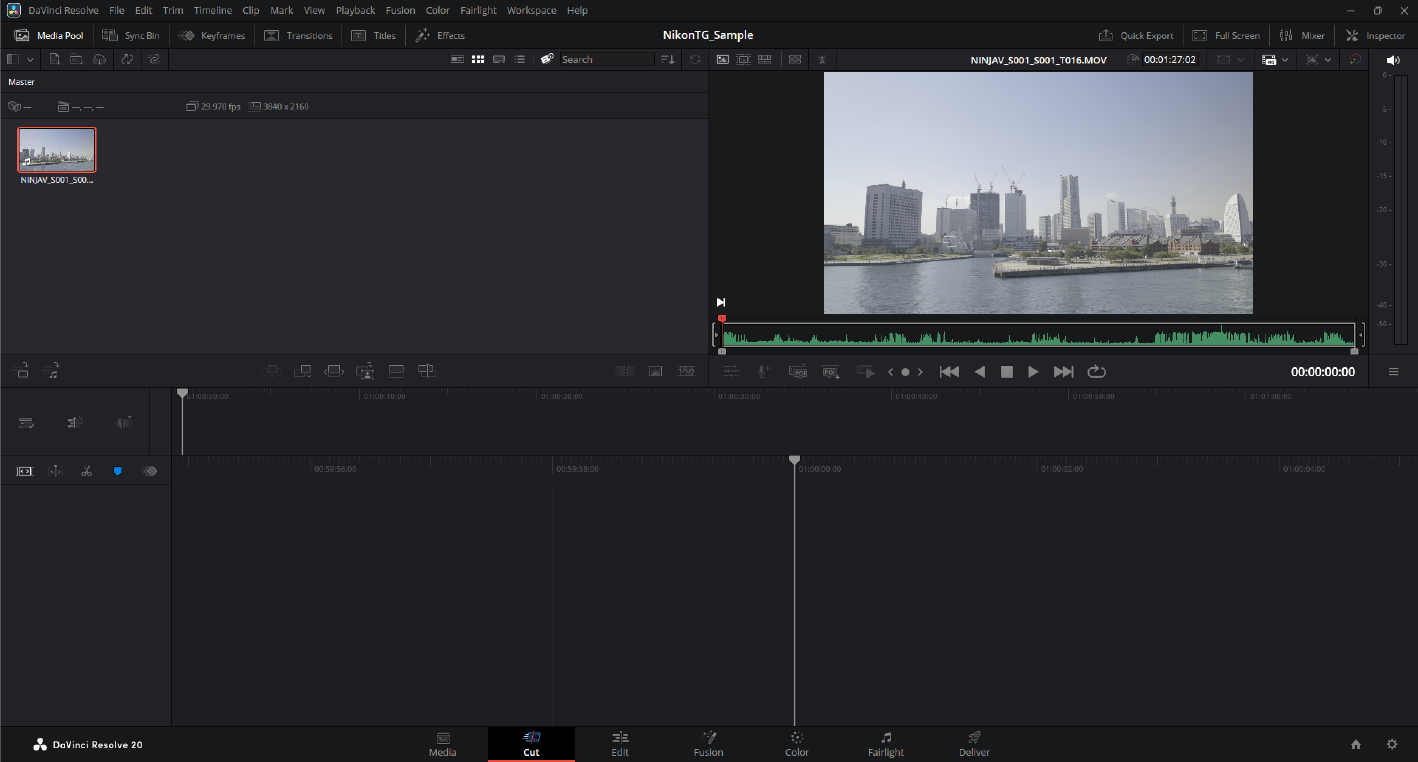
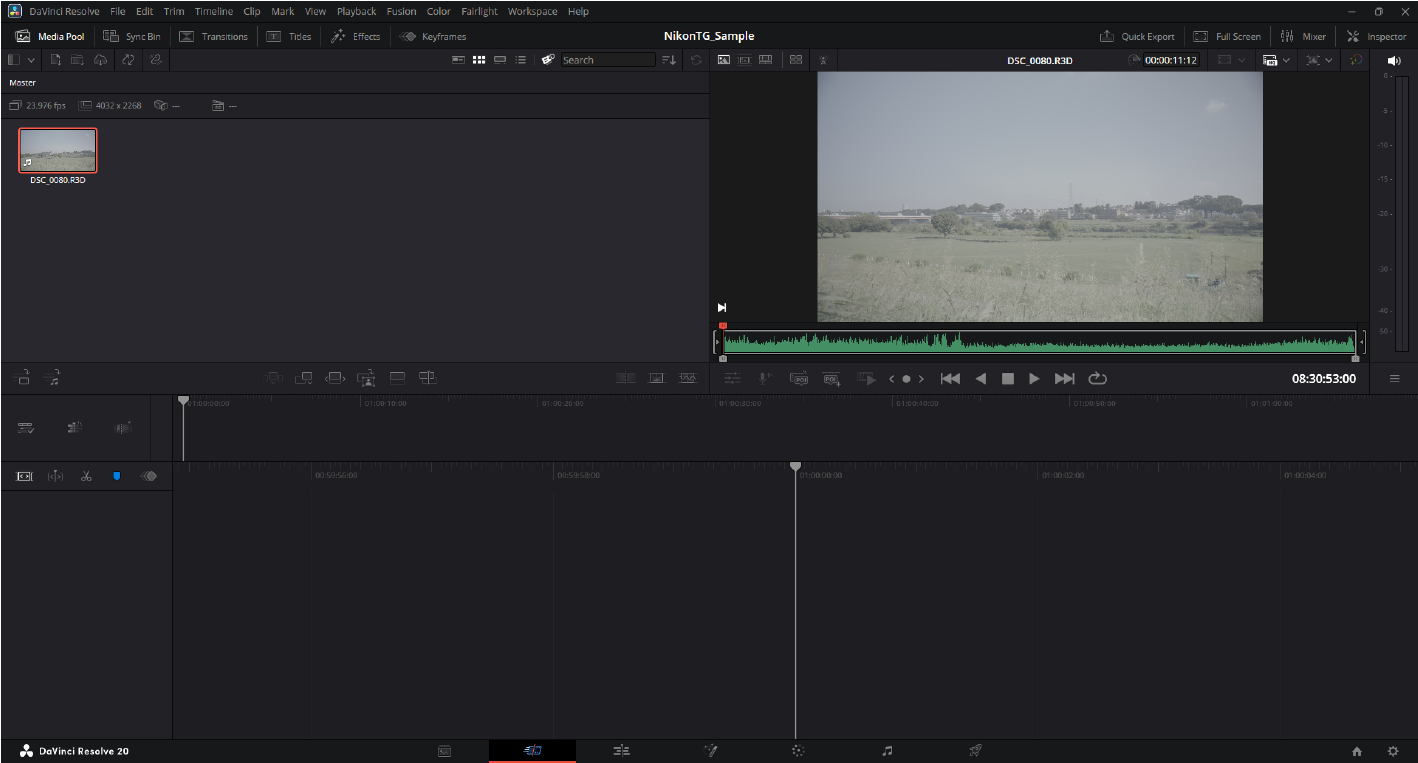
Load the footage.
Drag and drop your footage into the application to load it.
-
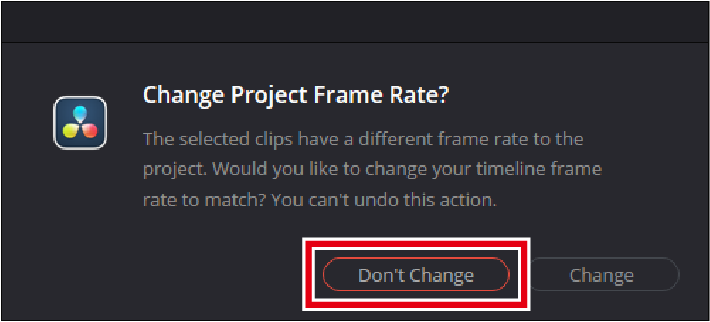
A message appears if the frame rates of the footage and project do not match. Click [Don't Change] to use the project's frame rate.
-
-
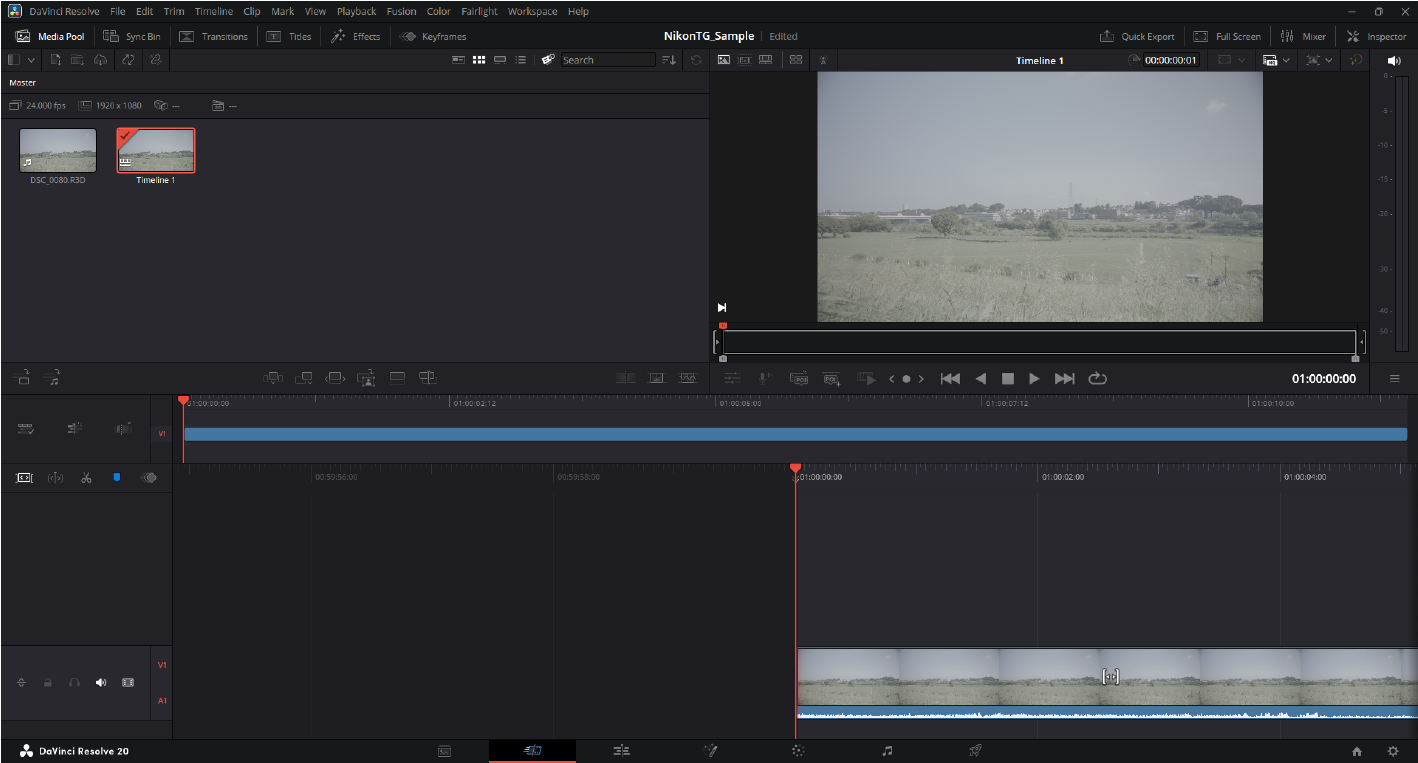
Create a timeline.
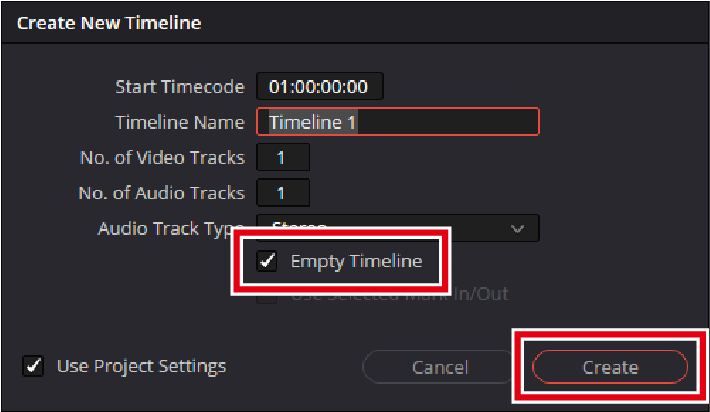
Select [New Timeline] in the [File] menu. Then deselect the [Empty Timeline] check box and click [Create] to create a new timeline using the selected footage.
-
Add nodes.
-
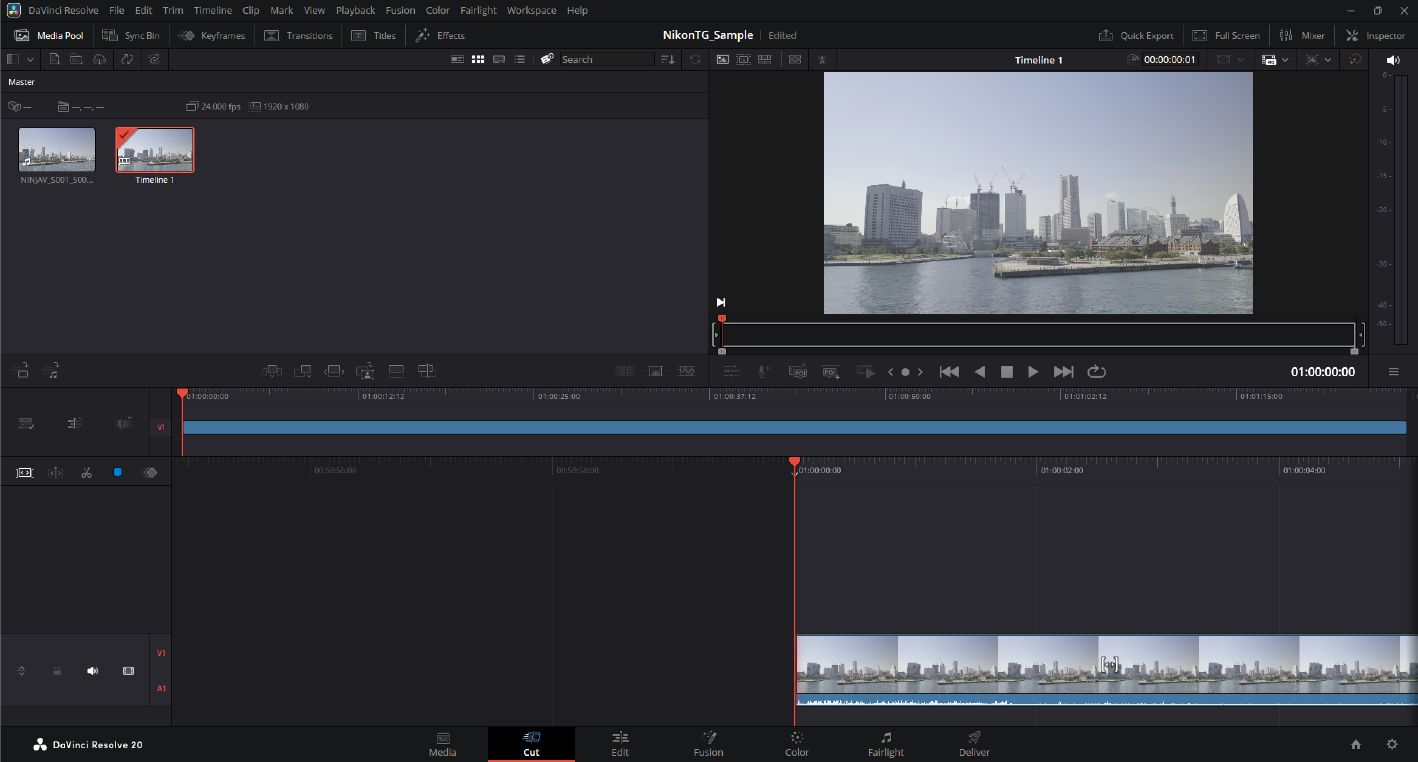
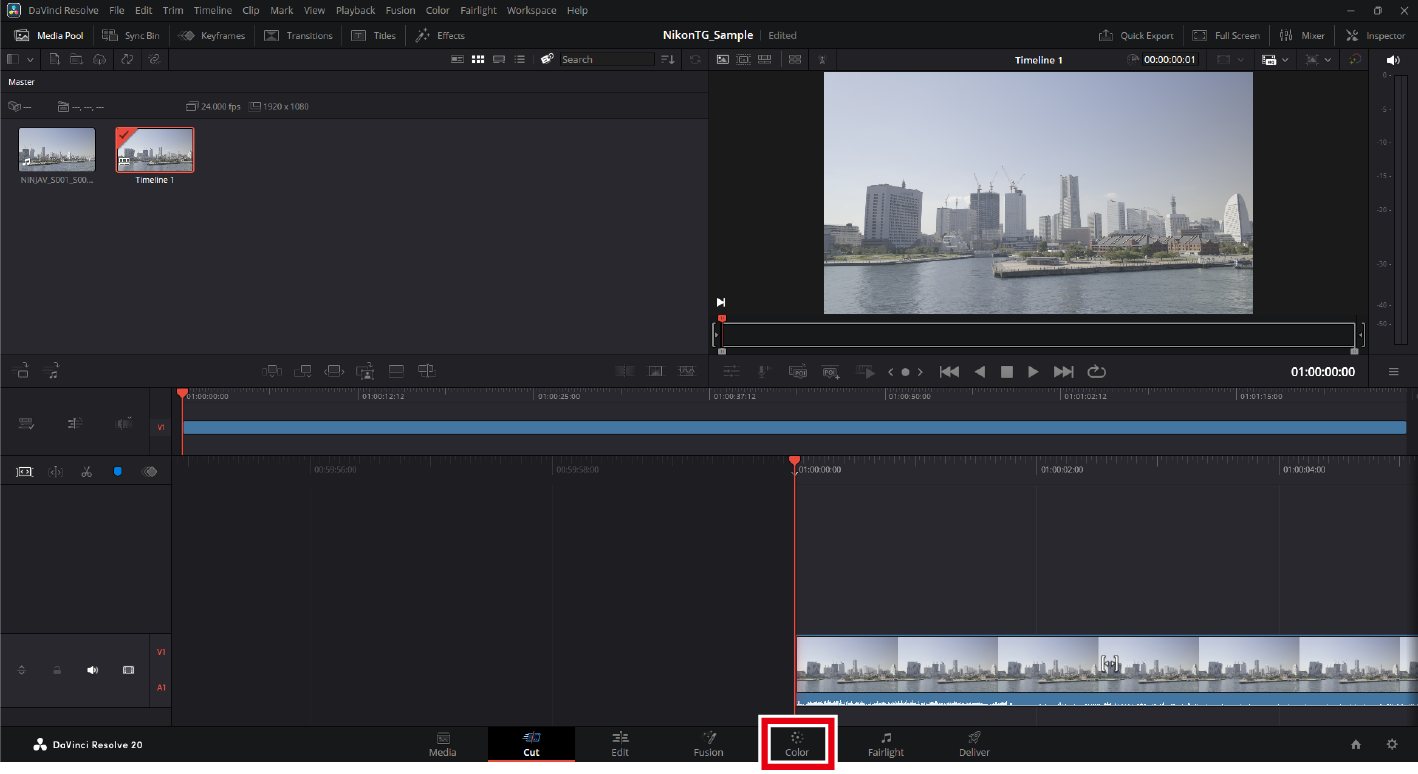
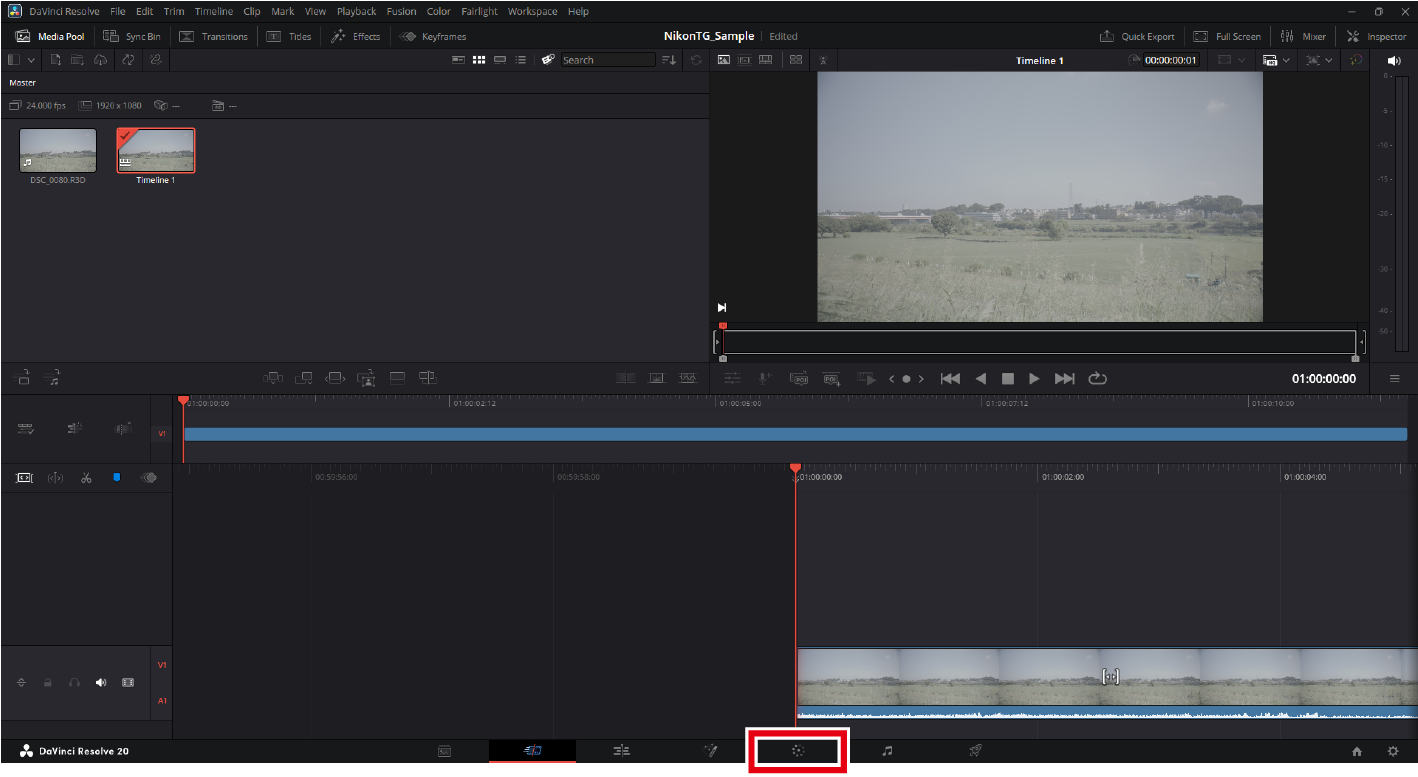
Open the "Color" page.
Click the [Color] button at the bottom of the window to open the "Color" page.
-
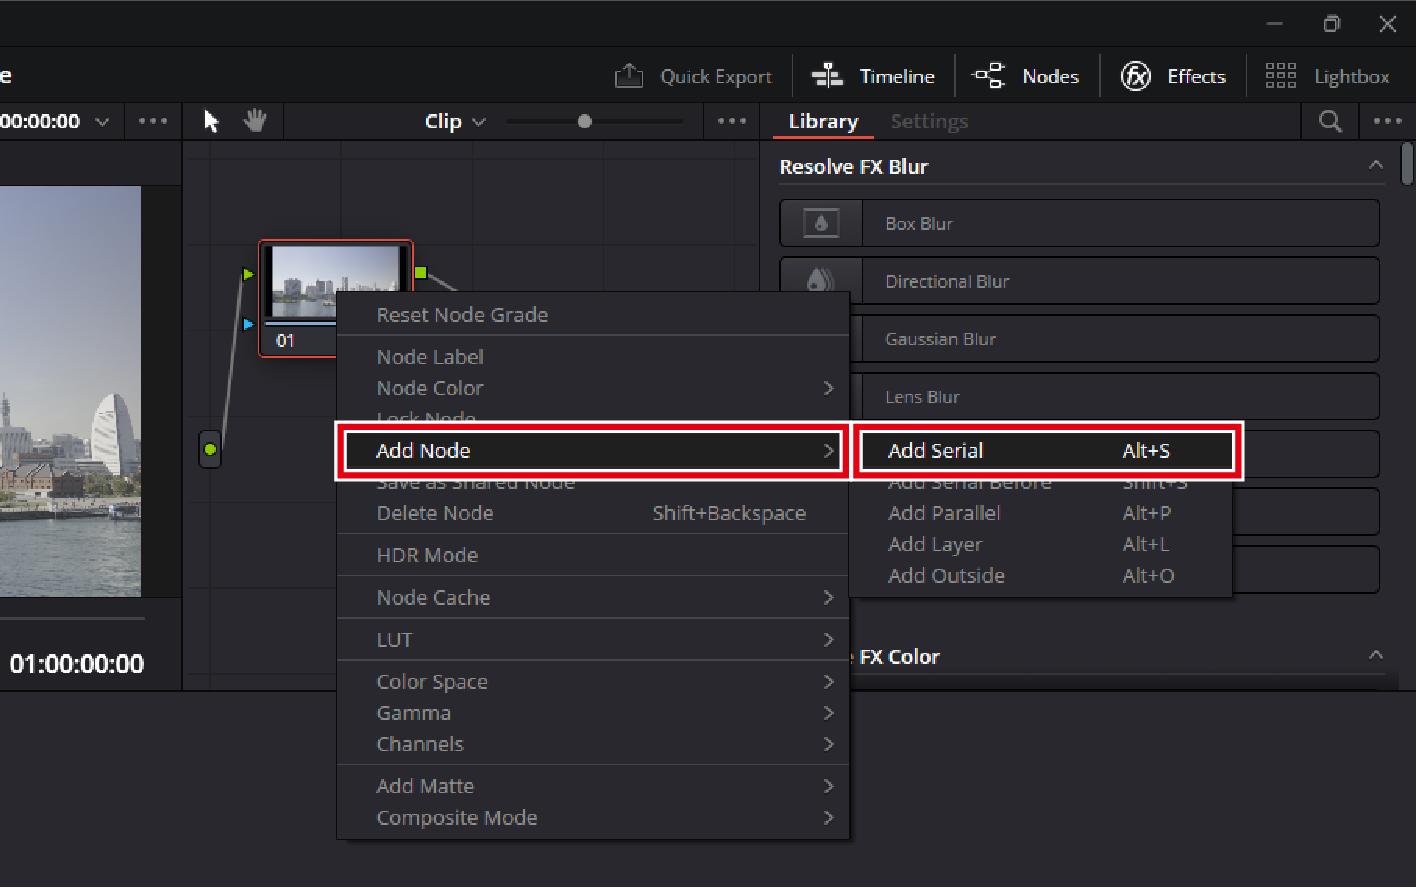
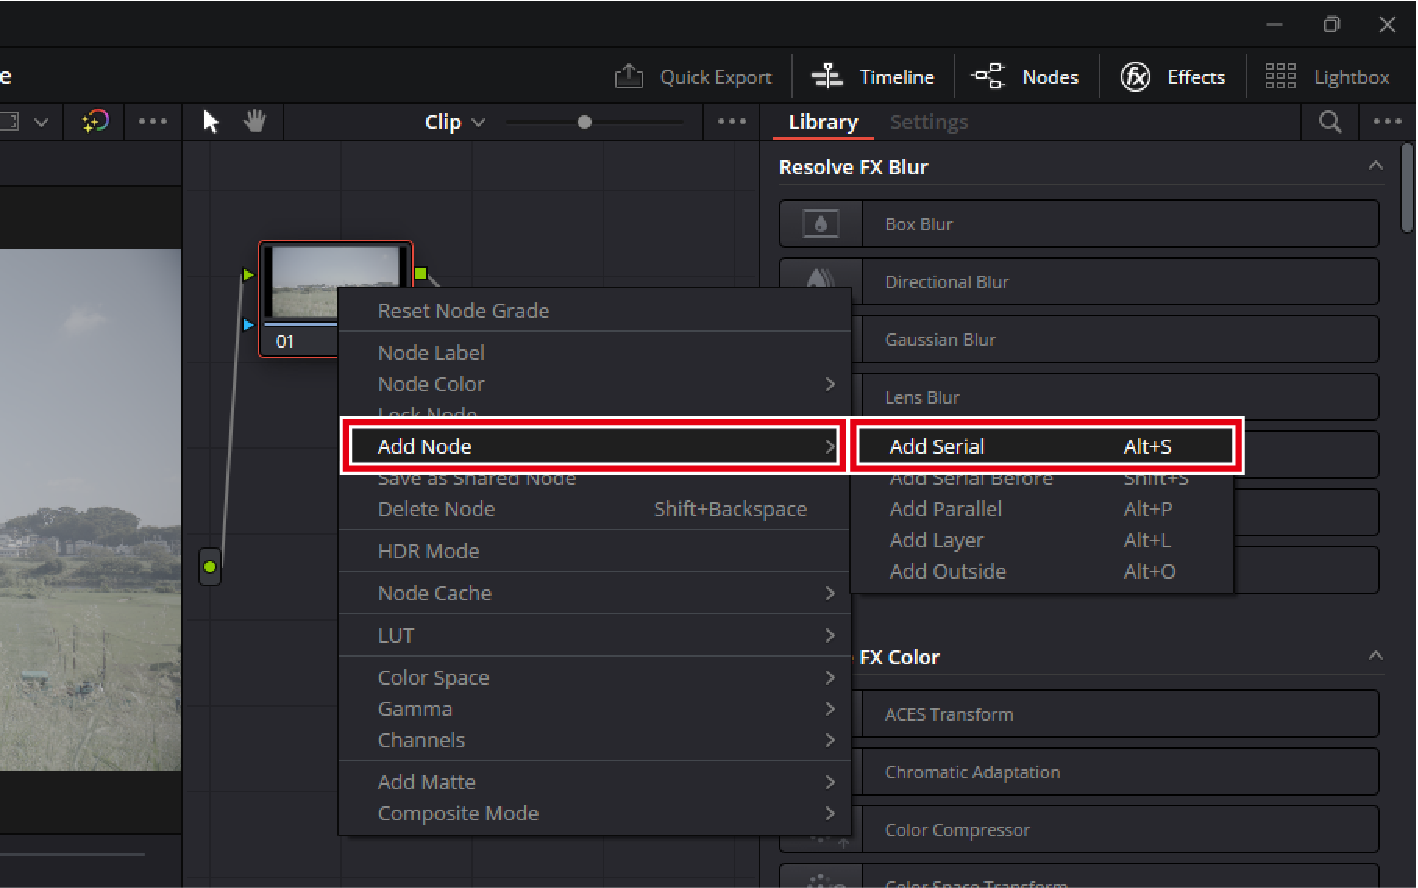
Add nodes.
Right-click a node and select [Add Node] > [Add Serial]. Repeat the step above to create multiple nodes.
-
-
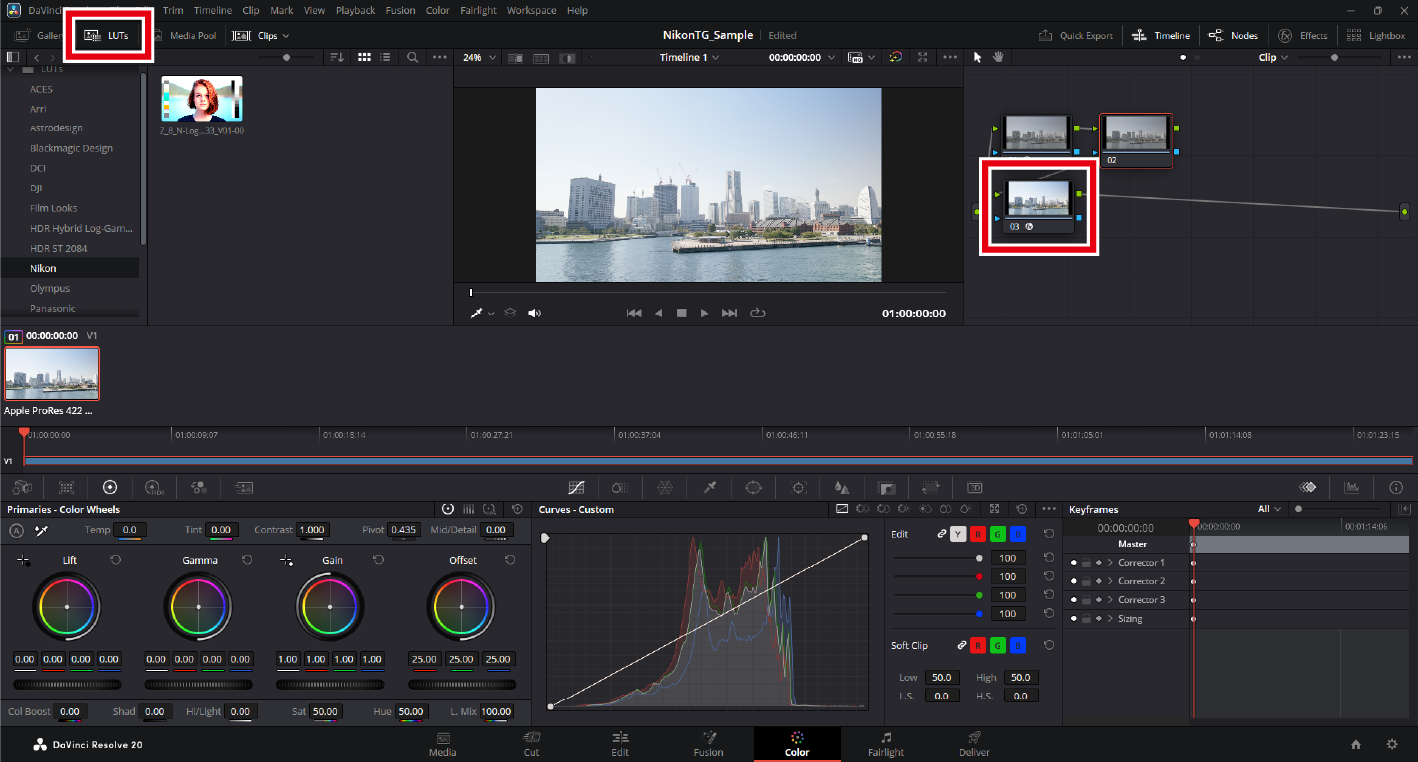
Apply a technical LUT (color space transform).
Apply the LUT for color space transform to the last node. Click the last node, then double-click the N-Log LUT in the [LUTs] browser in the upper left of the window.
-
Perform color grading.
Apply color grading to the nodes located before the node where the technical LUT was applied.
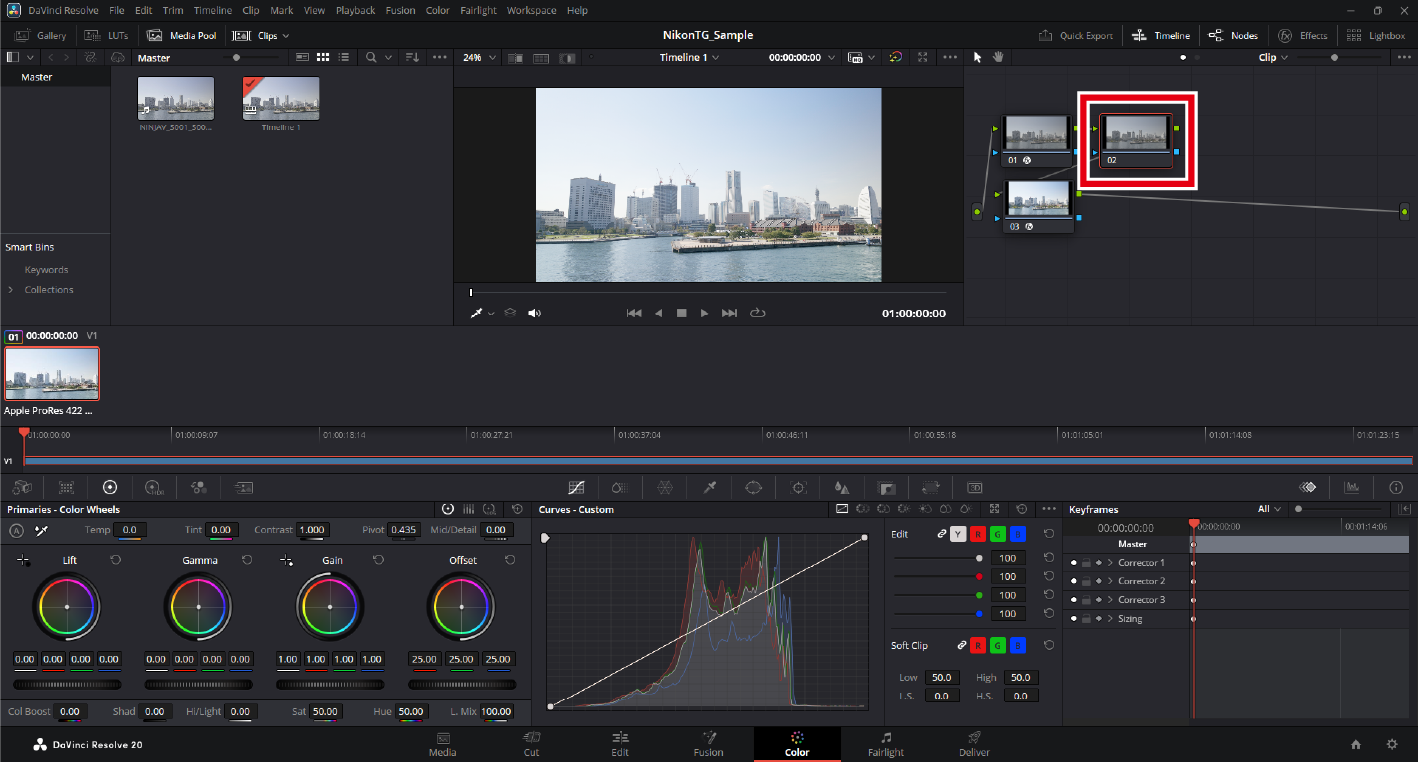
- Add nodes before the node with the technical LUT.
- For more color grading instructions and other additional information, see the online help for DaVinci Resolve or visit the Blackmagic Design website.
Labeling Nodes
Right-click a node and select [Node Label] to assign a label to the node. You can distinguish between multiple nodes during color grading by labeling them with their individual settings.
Using the Color Space Transform Feature
-
Launch DaVinci Resolve and start a new project.
Click [New Project], enter a project name, and click [Create].
-
Set [Color Management].
-
Click the [Project Settings] icon.
-
Click [Color Management] in the project settings window.
-
Set the following items and click [Save].
- [Color science]: [DaVinci YRGB]
- [Timeline color space]: [DaVinci WG/Intermediate]
- [Output color space]: [Rec.709 (Scene)] (Windows), [Rec.709-A] (macOS)
- [3D lookup table interpolation]: [Tetrahedral]
-
-
Load the footage.
Drag and drop your footage into the application to load it.
-
A message appears if the frame rates of the footage and project do not match. Click [Don't Change] to use the project's frame rate.
-
-
Create a timeline.
Select [New Timeline] in the [File] menu. Deselect the [Empty Timeline] check box and click [Create] to create a new timeline using the selected footage.
-
Add nodes.
-
Open the "Color" page.
Click the [Color] button at the bottom of the window to open the "Color" page.
-
Add multiple nodes.
Right-click a node and select [Add Node] > [Add Serial]. Repeat the step above to create multiple nodes.
-
-
Set [Color Space Transform].
-
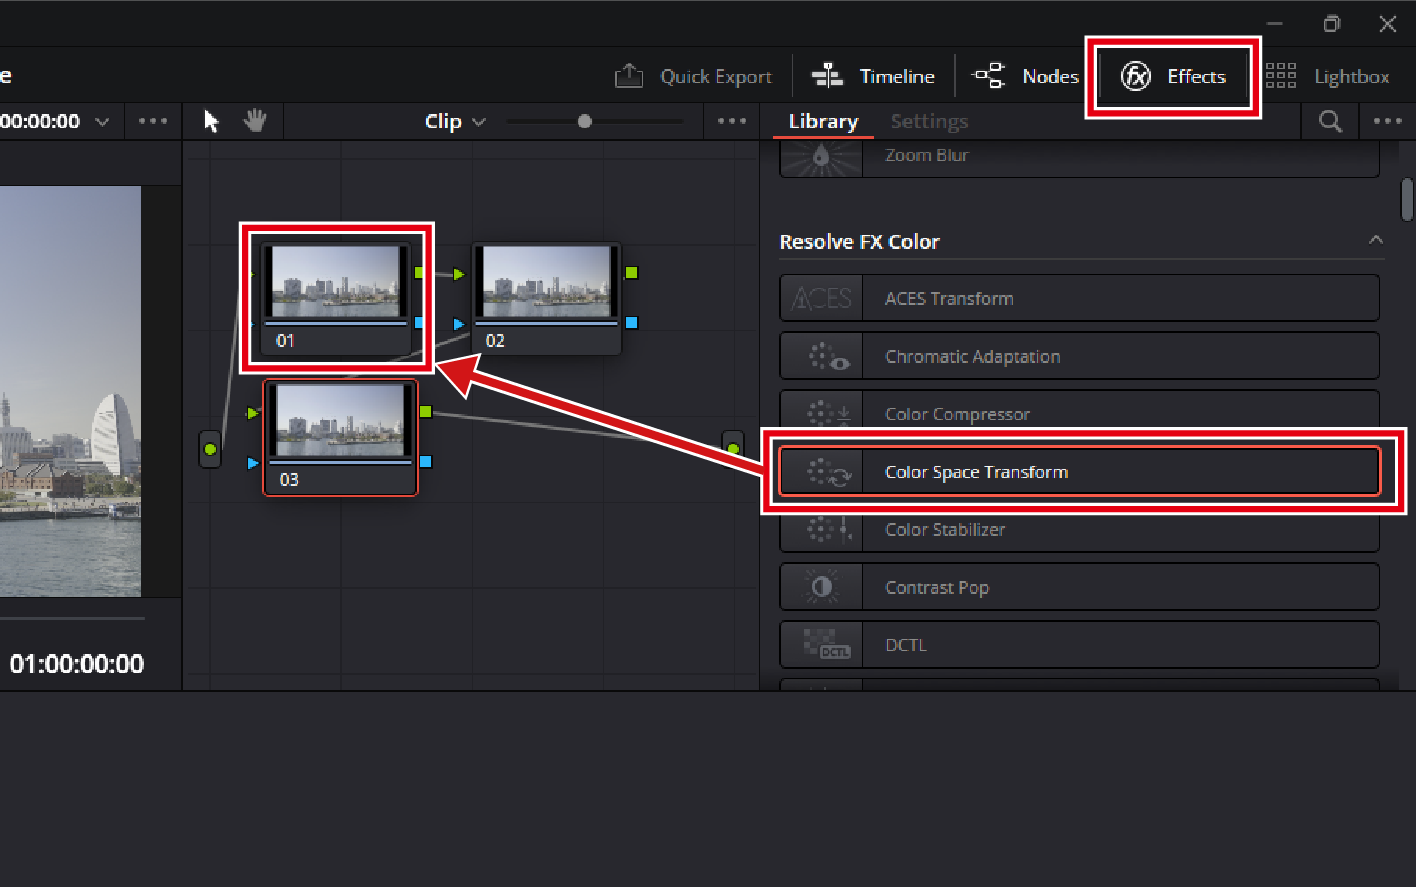
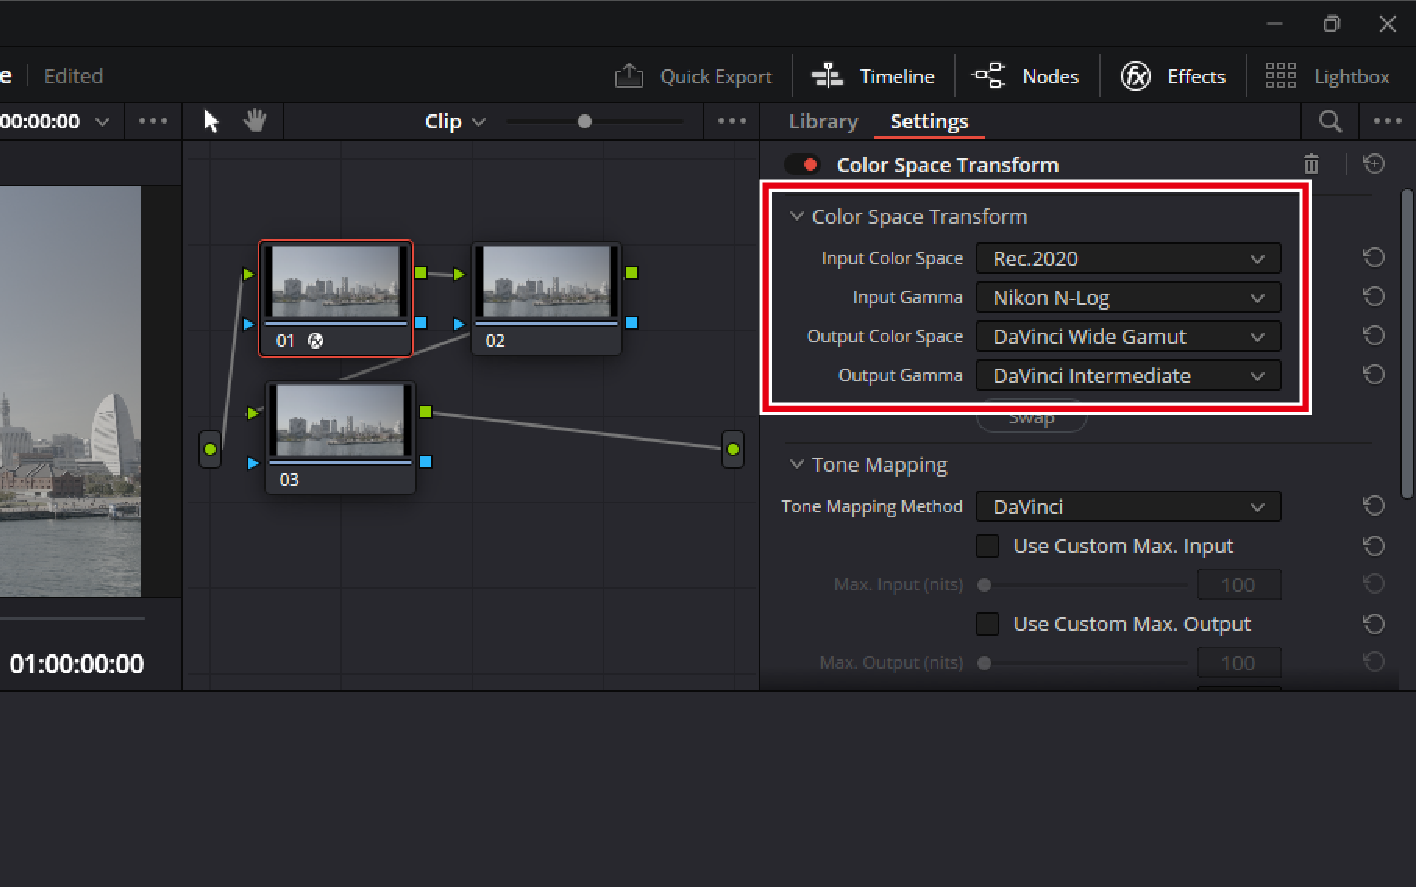
Apply effects to the first node.
Select [Effects], then [Color Space Transform] and drag it into the first node.
-
Configure color space settings for the first node.
Set items as follows:
- [Input Color Space]: [Rec.2020]
- [Input Gamma]: [Nikon N-Log]
- [Output Color Space]: [DaVinci Wide Gamut]
- [Output Gamma]: [DaVinci Intermediate]
-
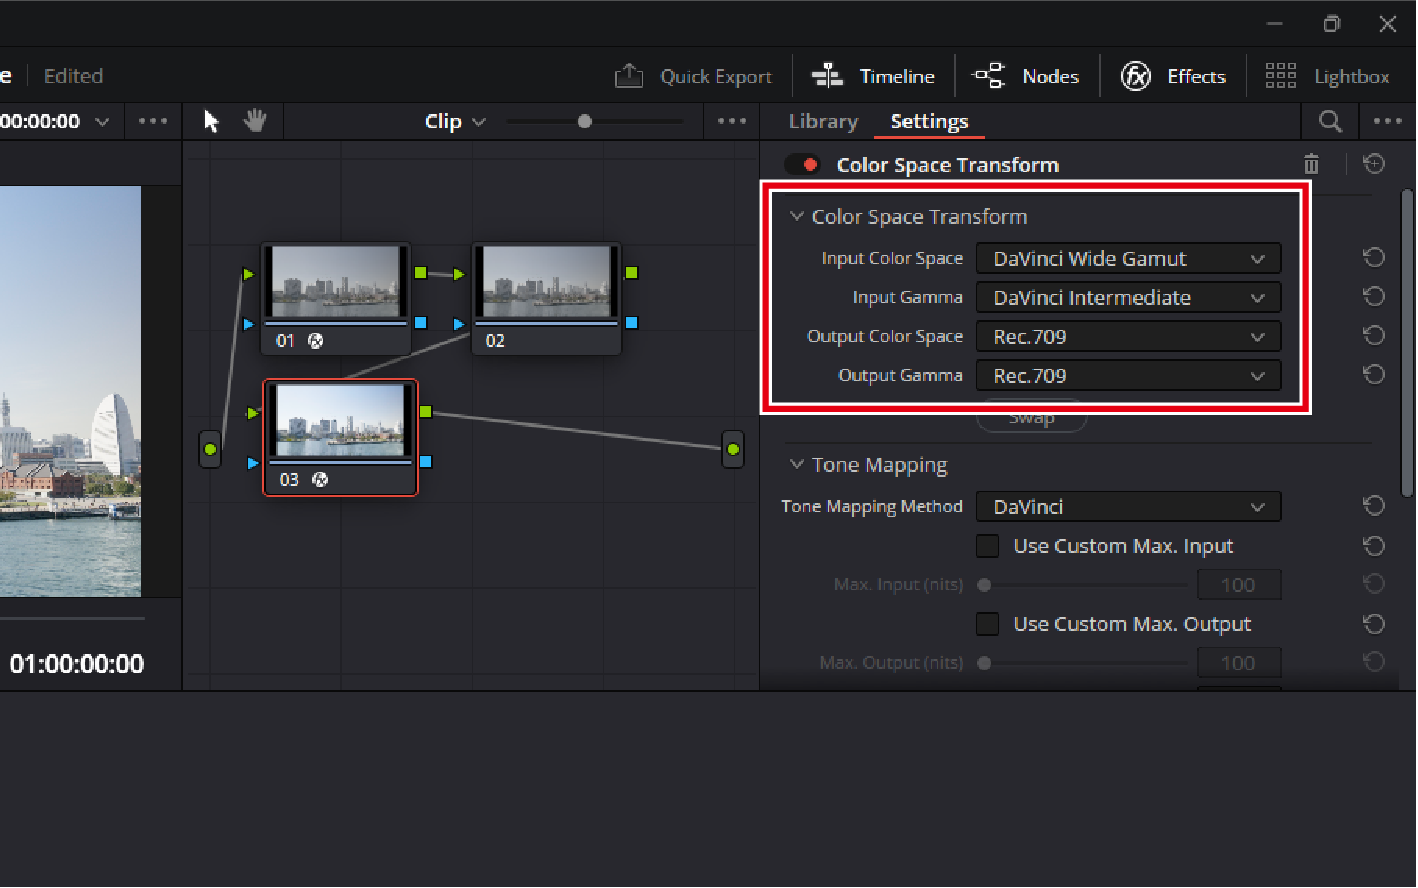
Configure color space settings for the last node.
As with the first node, drag [Effects] > [Color Space Transform] into the last node, and set the following:
- [Input Color Space]: [DaVinci Wide Gamut]
- [Input Gamma]: [DaVinci Intermediate]
- [Output Color Space]: [Rec.709]
- [Output Gamma]: [Rec.709] (Windows), [Rec.709-A] (macOS)
-
-
Perform color grading.
Apply color grading to nodes located between the two nodes where the color space transform was applied.
- Add nodes between the two nodes where the color space transform was applied.
- For more color grading instructions and other additional information, see the online help for DaVinci Resolve or visit the Blackmagic Design website.
Labeling Nodes
Right-click a node and select [Node Label] to assign a label to the node. You can distinguish between multiple nodes during color grading by labeling them with their individual settings.
Edit Log3G10 Videos
Using the Log3G10 LUT
Here we will show how to transform color space using technical LUTs.
-
Launch DaVinci Resolve and start a new project.
Click [New Project], enter a project name, and click [Create].
-
Load a LUT.
-
Click the [Project Settings] icon.
-
Click [Color Management] in the project settings window.
-
Click [Open LUT Folder].
The LUT folder will open. The folder path is:
-
Windows:
C:\ProgramData\Blackmagic Design\DaVinci Resolve\Support\LUT
-
macOS:
Library/Application Support/Blackmagic Design/DaVinci Resolve/LUT/
-
-
Create a sub-folder under the LUT folder, name it, and copy the Log3G10 LUT to the new sub-folder.
Here, a "RED" folder is created and the downloaded Log3G10 LUT is copied into it.
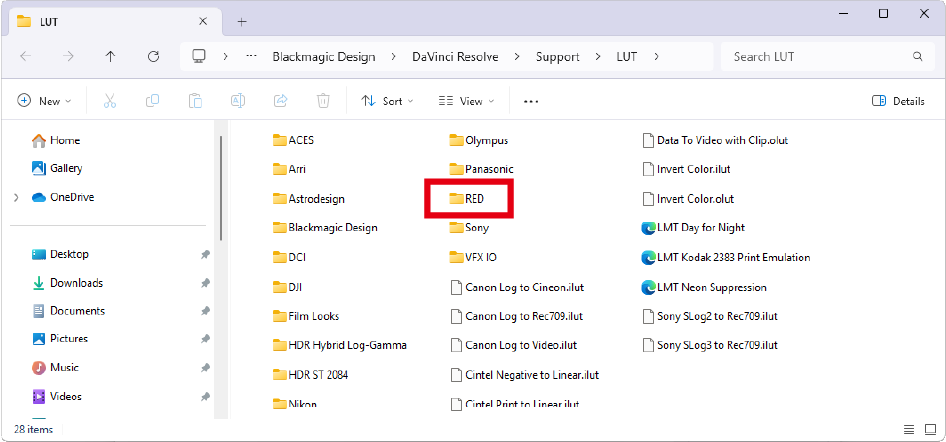
The LUT Pre-installed on ZR Cameras
The ZR comes with a pre-installed LUT, "RWG_Log3G10 to REC709_BT1886 with MEDIUM_CONTRAST and R_2_Medium size_33 v1.13," provided by RED as part of their IPP2 Output Presets, which appears as [REC.709] in Custom Setting g [Video] > [3D LUT] > [Select LUT].
-
Click [Update Lists].
DaVinci Resolve will load the copied LUT.
-
-
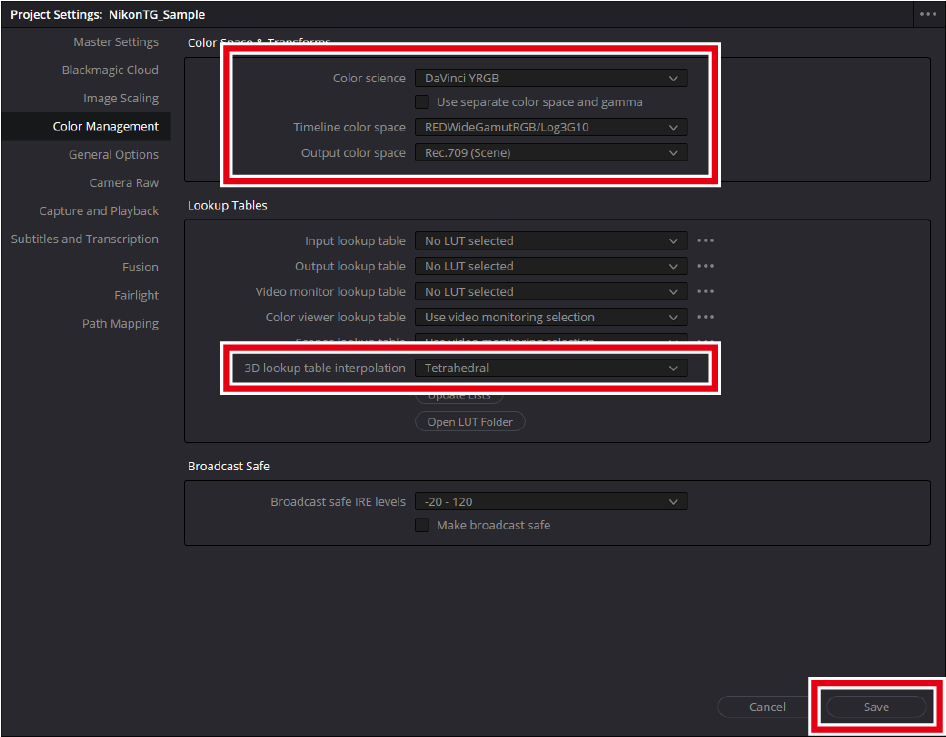
Set [Color Management].
Set the items as follows and click [Save].
- [Color science]: [DaVinci YRGB]
- [Timeline color space]: [REDWideGamutRGB/Log3G10]
- [Output color space]: [Rec.709 (Scene)] (Windows), [Rec.709-A] (macOS)
- [3D lookup table interpolation]: [Tetrahedral]
-
Load the footage.
Drag and drop your footage into the application to load it.
-
A message appears if the frame rates of the footage and project do not match. Click [Don't Change] to use the project's frame rate.
-
-
Create a timeline.
Select [New Timeline] in the [File] menu. Then deselect the [Empty Timeline] check box and click [Create] to create a new timeline using the selected footage.
-
Add nodes.
-
Open the "Color" page.
Click the [Color] button at the bottom of the window to open the "Color" page.
-
Add nodes.
Right-click a node and select [Add Node] > [Add Serial]. Repeat the step above to create multiple nodes.
-
-
Apply a technical LUT.
Apply the technical LUT to the last node. Click the last node, then double-click the technical LUT for Log3G10 in the [LUTs] browser in the upper left of the window.

-
Perform color grading.
Apply color grading to the nodes located before the node where the technical LUT was applied.
- Add nodes before the node with the technical LUT.
- For more color grading instructions and other additional information, see the online help for DaVinci Resolve or visit the Blackmagic Design website.
Labeling Nodes
Right-click a node and select [Node Label] to assign a label to the node. You can distinguish between multiple nodes during color grading by labeling them with their individual settings.
Using the Color Space Transform Feature
-
Launch DaVinci Resolve and start a new project.
Click [New Project], enter a project name, and click [Create].
-
Set [Color Management].
-
Click the [Project Settings] icon.
-
Click [Color Management] in the project settings window.
-
Set the following items and click [Save].
- [Color science]: [DaVinci YRGB]
- [Timeline color space]: [REDWideGamutRGB/Log3G10]
- [Output color space]: [Rec.709 (Scene)] (Windows), [Rec.709-A] (macOS)
- [3D lookup table interpolation]: [Tetrahedral]
-
-
Load the footage.
Drag and drop your footage into the application to load it.
-
A message appears if the frame rates of the footage and project do not match. Click [Don't Change] to use the project's frame rate.
-
-
Create a timeline.
Select [New Timeline] in the [File] menu. Then deselect the [Empty Timeline] check box and click [Create] to create a new timeline using the selected footage.
-
Add nodes.
-
Open the "Color" page.
Click the [Color] button at the bottom of the window to open the "Color" page.
-
Add nodes.
Right-click a node and select [Add Node] > [Add Serial]. Repeat the step above to create multiple nodes.
-
-
Set [Color Space Transform].
-
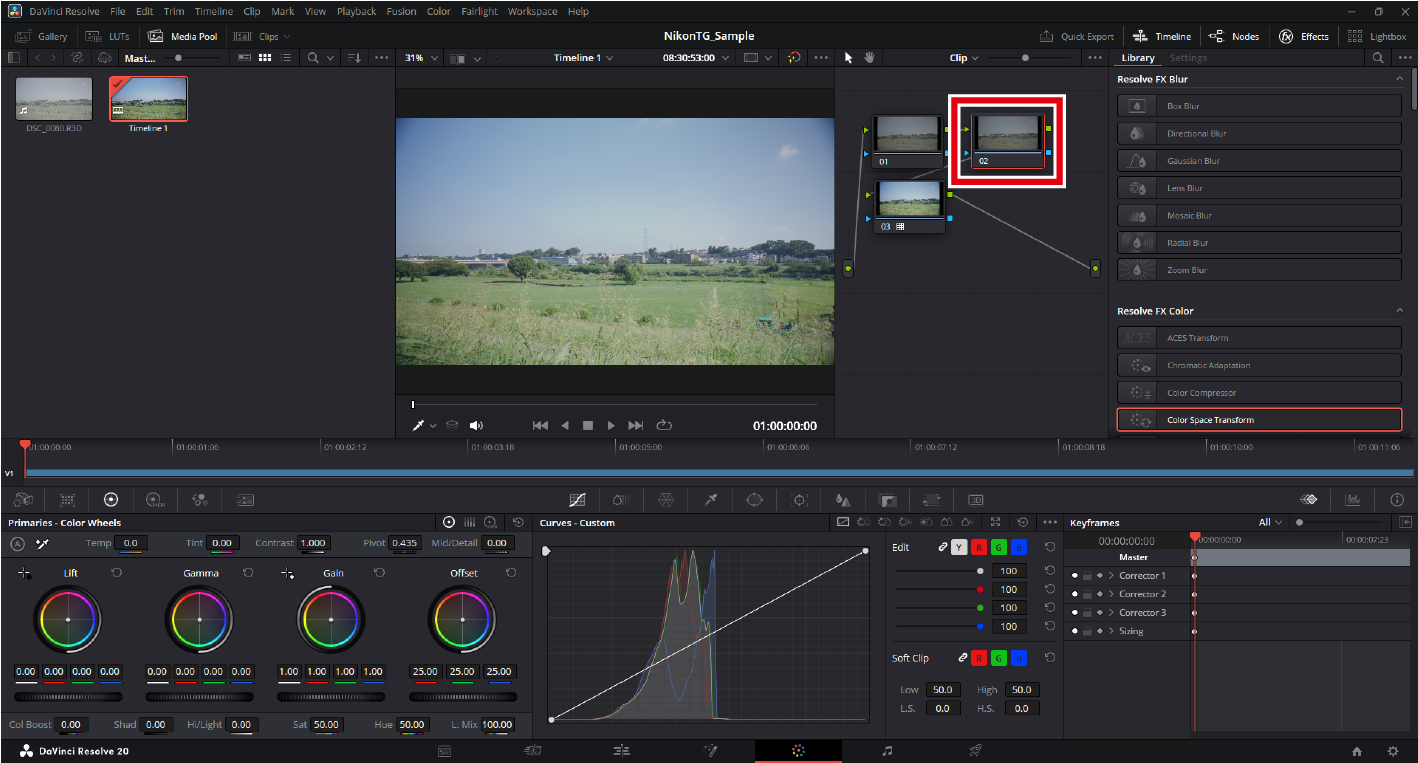
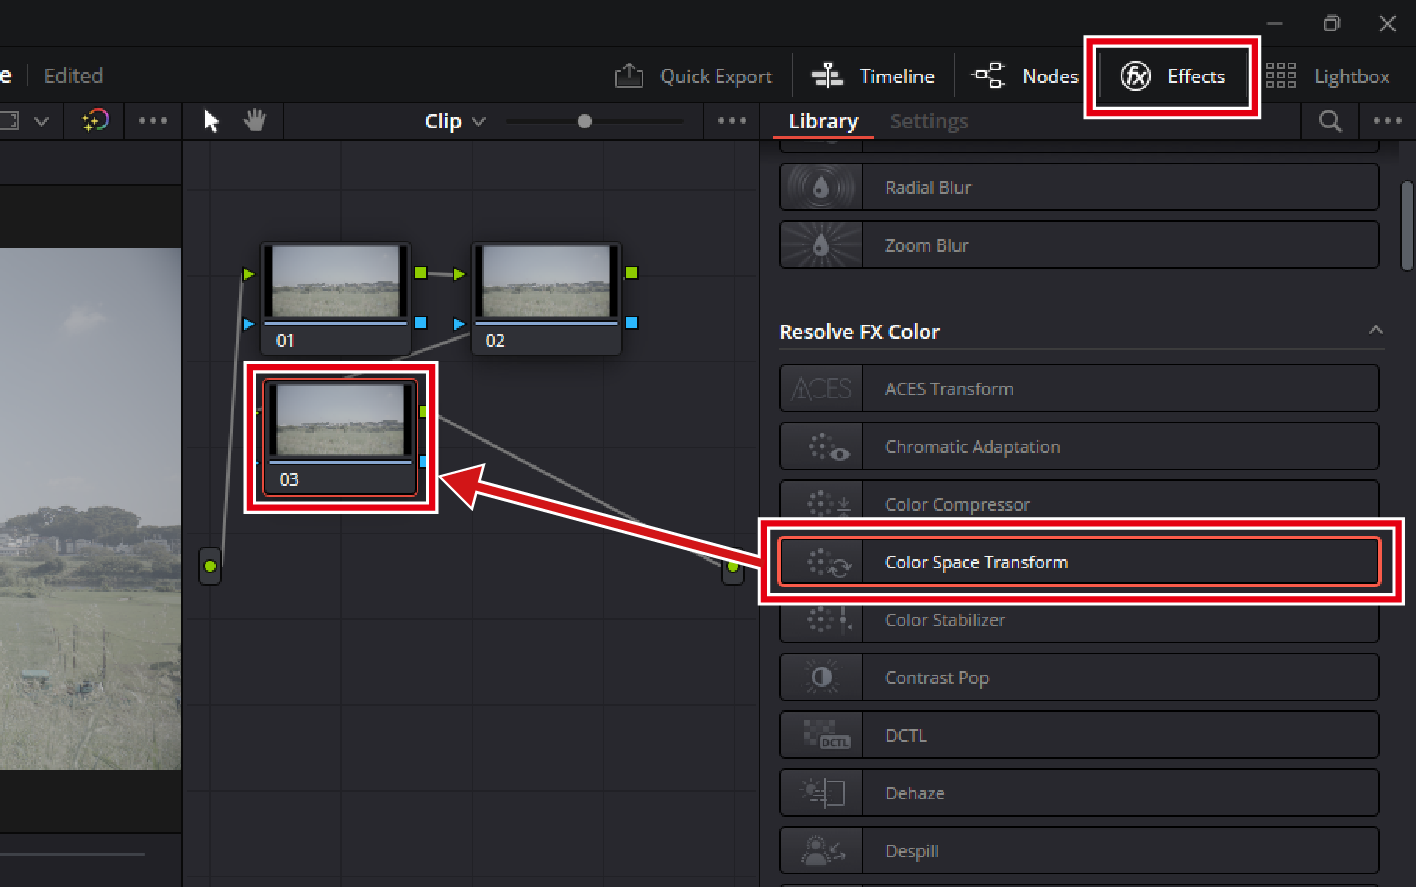
Apply effects to the last node.
Select [Effects], then [Color Space Transform] and drag it into the last node.
-
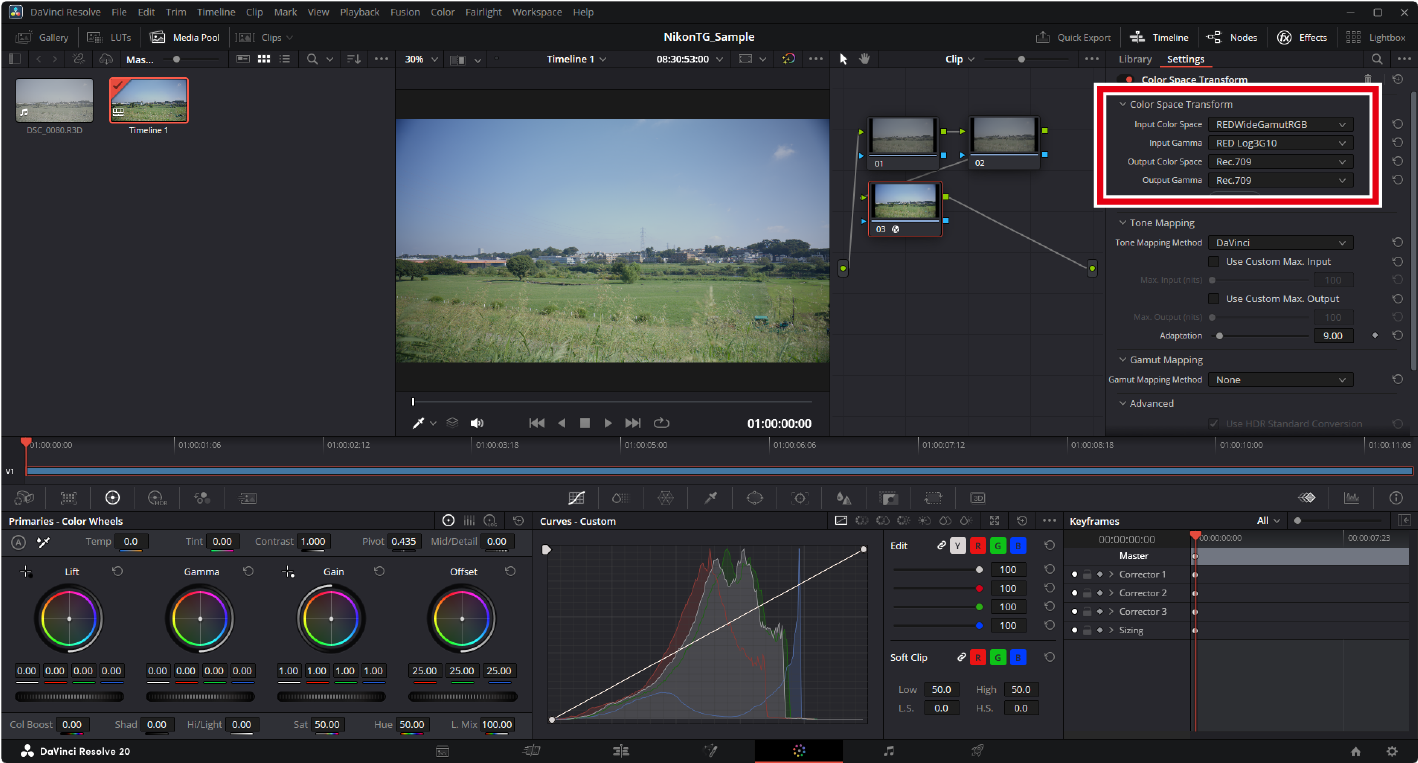
Configure color space settings for the last node.
Set items as follows:
- [Input Color Space]: [REDWideGamutRGB]
- [Input Gamma]: [RED Log3G10]
- [Output Color Space]: [Rec.709]
- [Output Gamma]: [Rec.709] (Windows), [Rec.709-A] (macOS)
-
-
Perform color grading.
Apply color grading to nodes located before the node where the color space transform was applied.
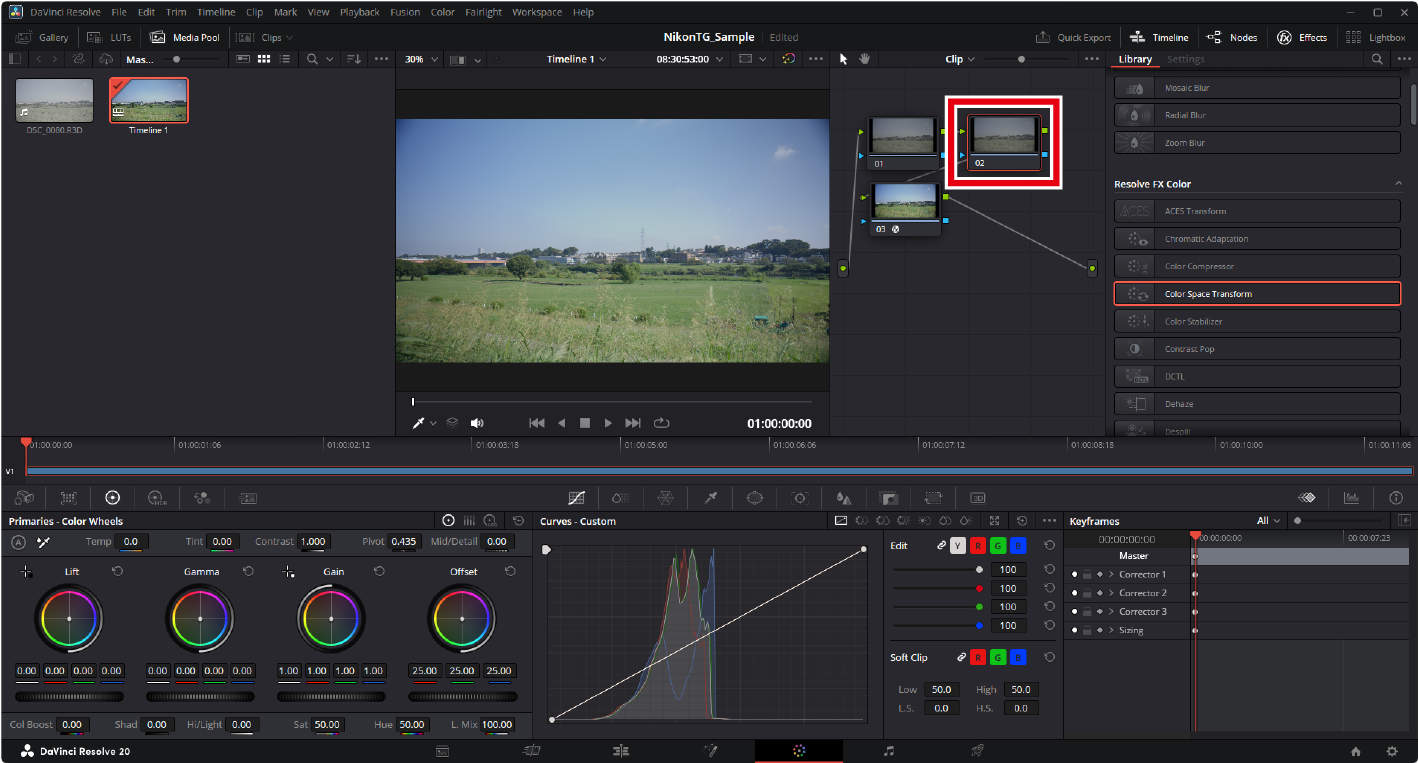
- Add nodes before the node where the color space transform was applied.
- For more color grading instructions and other additional information, see the online help for DaVinci Resolve or visit the Blackmagic Design website.
Labeling Nodes
Right-click a node and select [Node Label] to assign a label to the node. You can distinguish between multiple nodes during color grading by labeling them with their individual settings.