Edit with EDIUS X Pro
This section provides an example of how to edit N-Log videos.
- For optimal results, we recommend taking test shots and practicing editing before you start.
- A paid version of EDIUS X Pro 10.32 or later is required for editing and rendering.
-
Download and install EDIUS X Pro from the URL below.
- The following information is current as of June 2022.
Edit N-Log Videos
Using the N-Log LUT
-
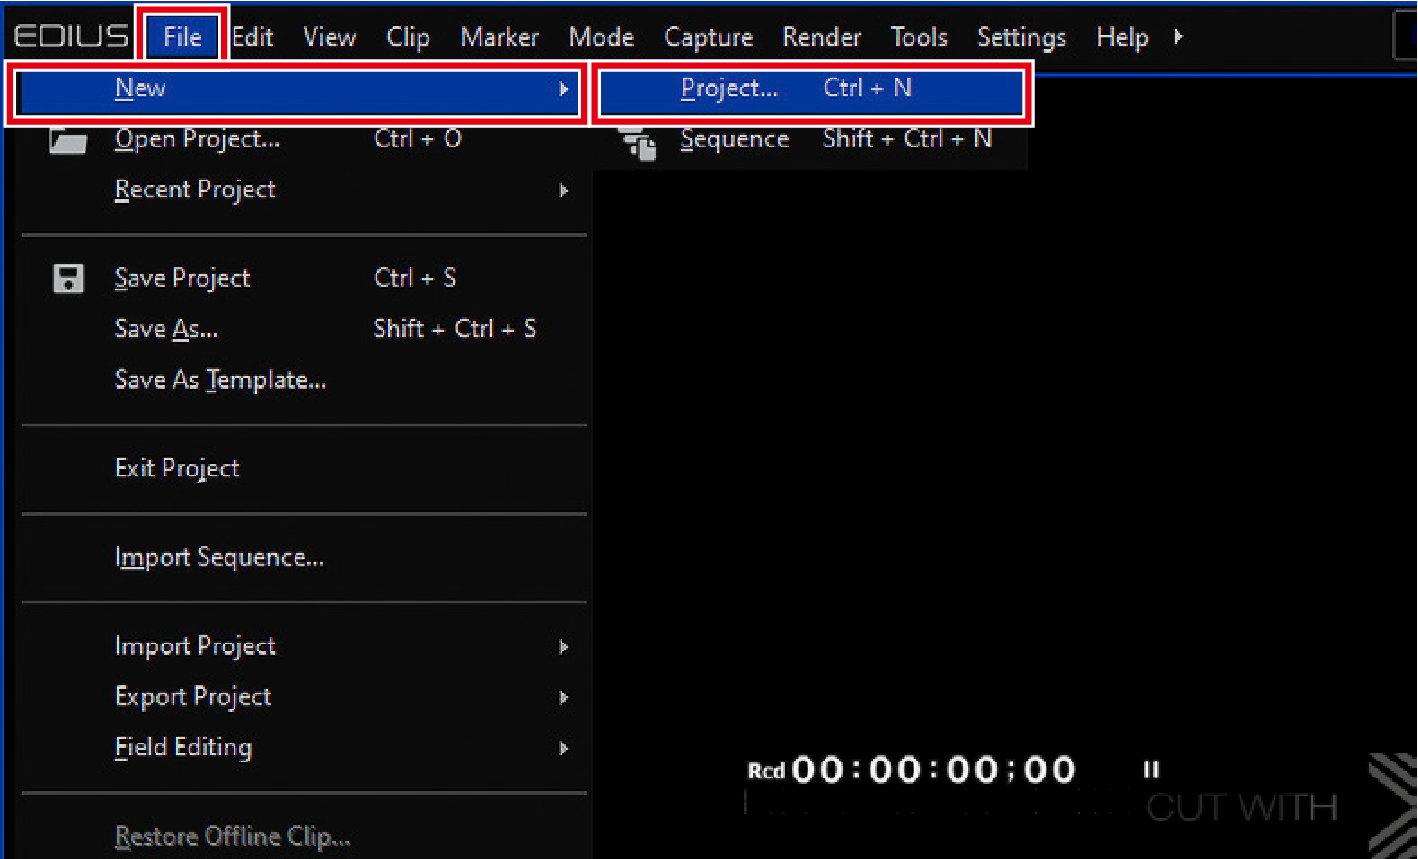
Launch EDIUS X Pro and start a new project.
Click [Project] under [File] > [New] to create a new project.
-
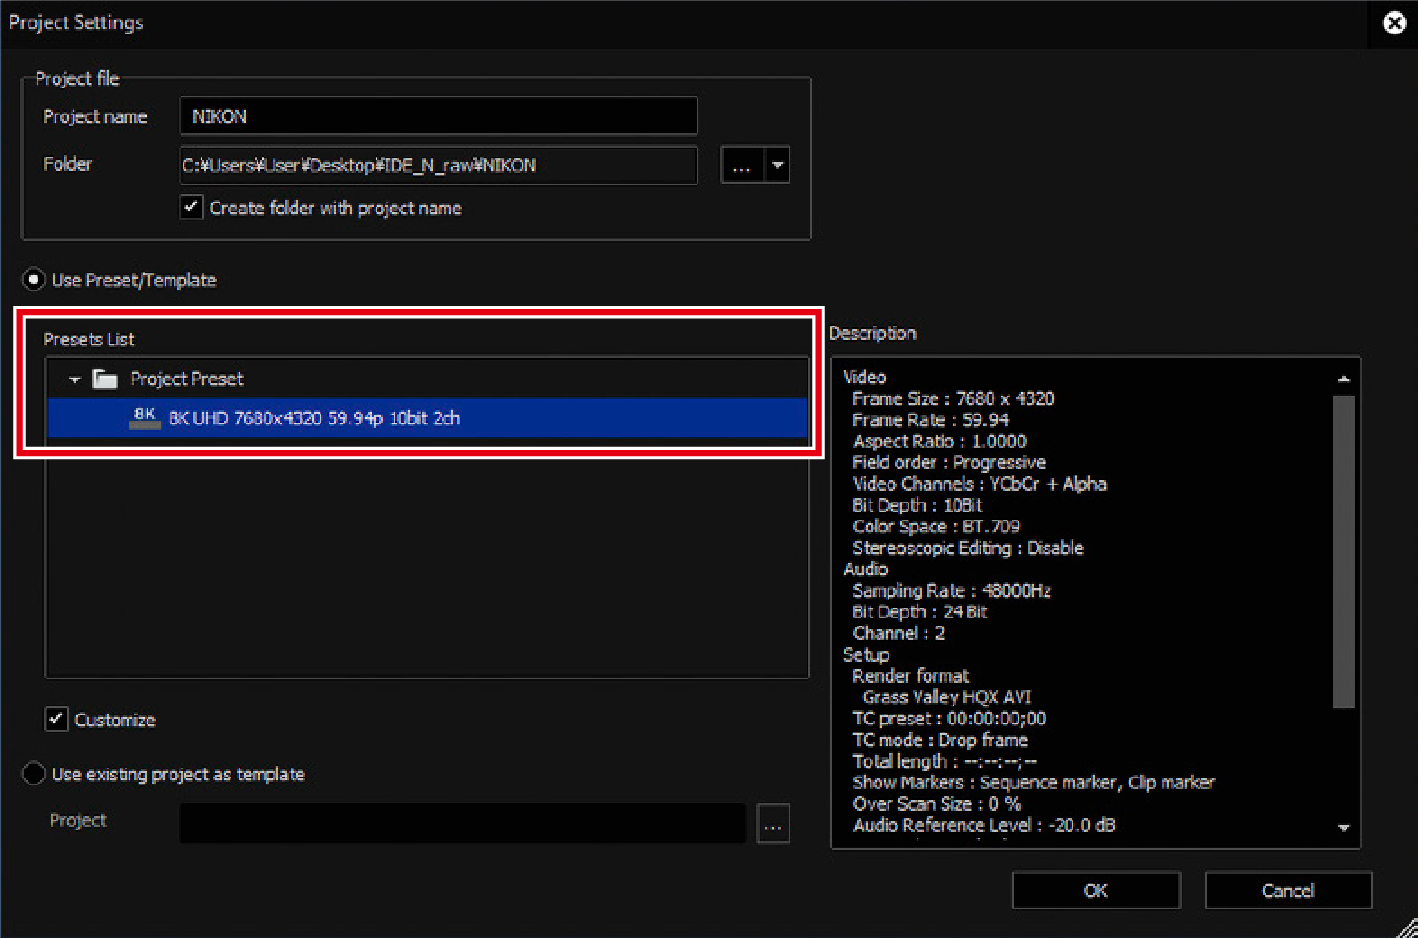
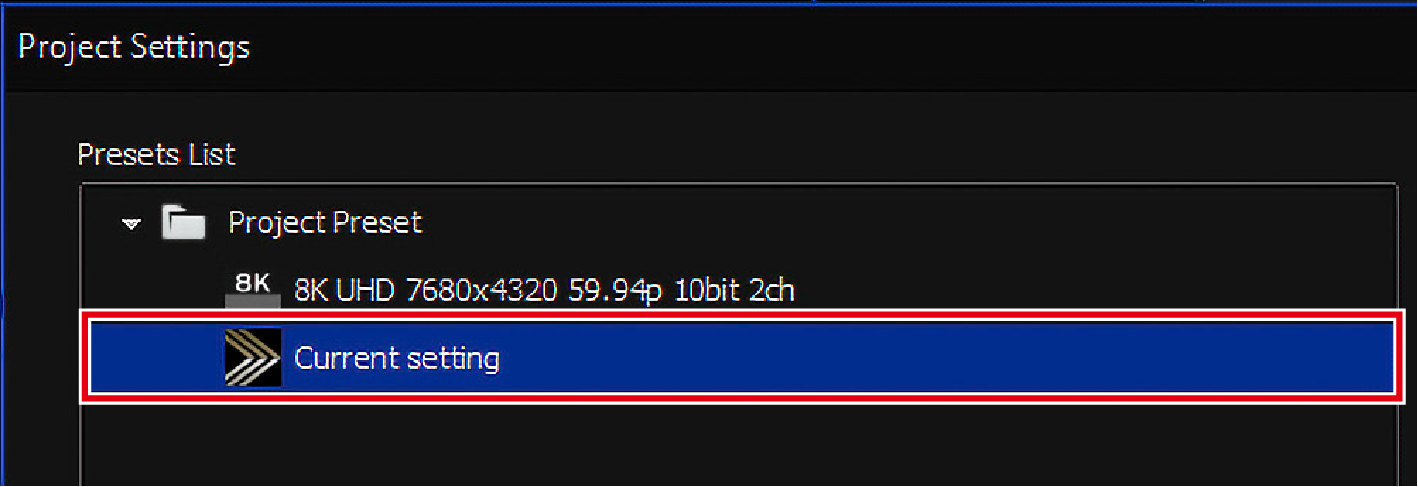
Select a preset.
-
Click the desired preset in [Presets List].
-
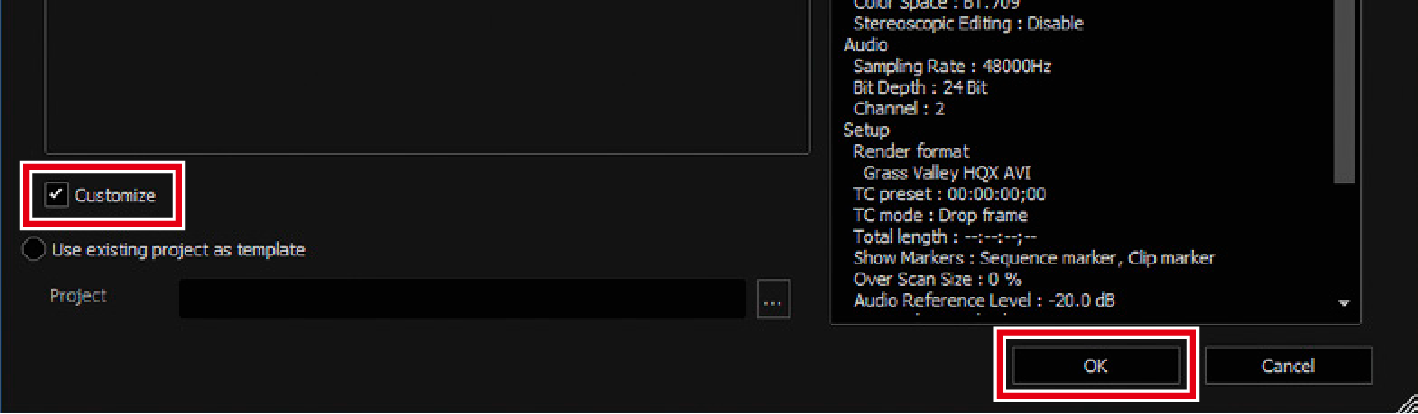
Select the [Customize] check box and click [OK].
-
-
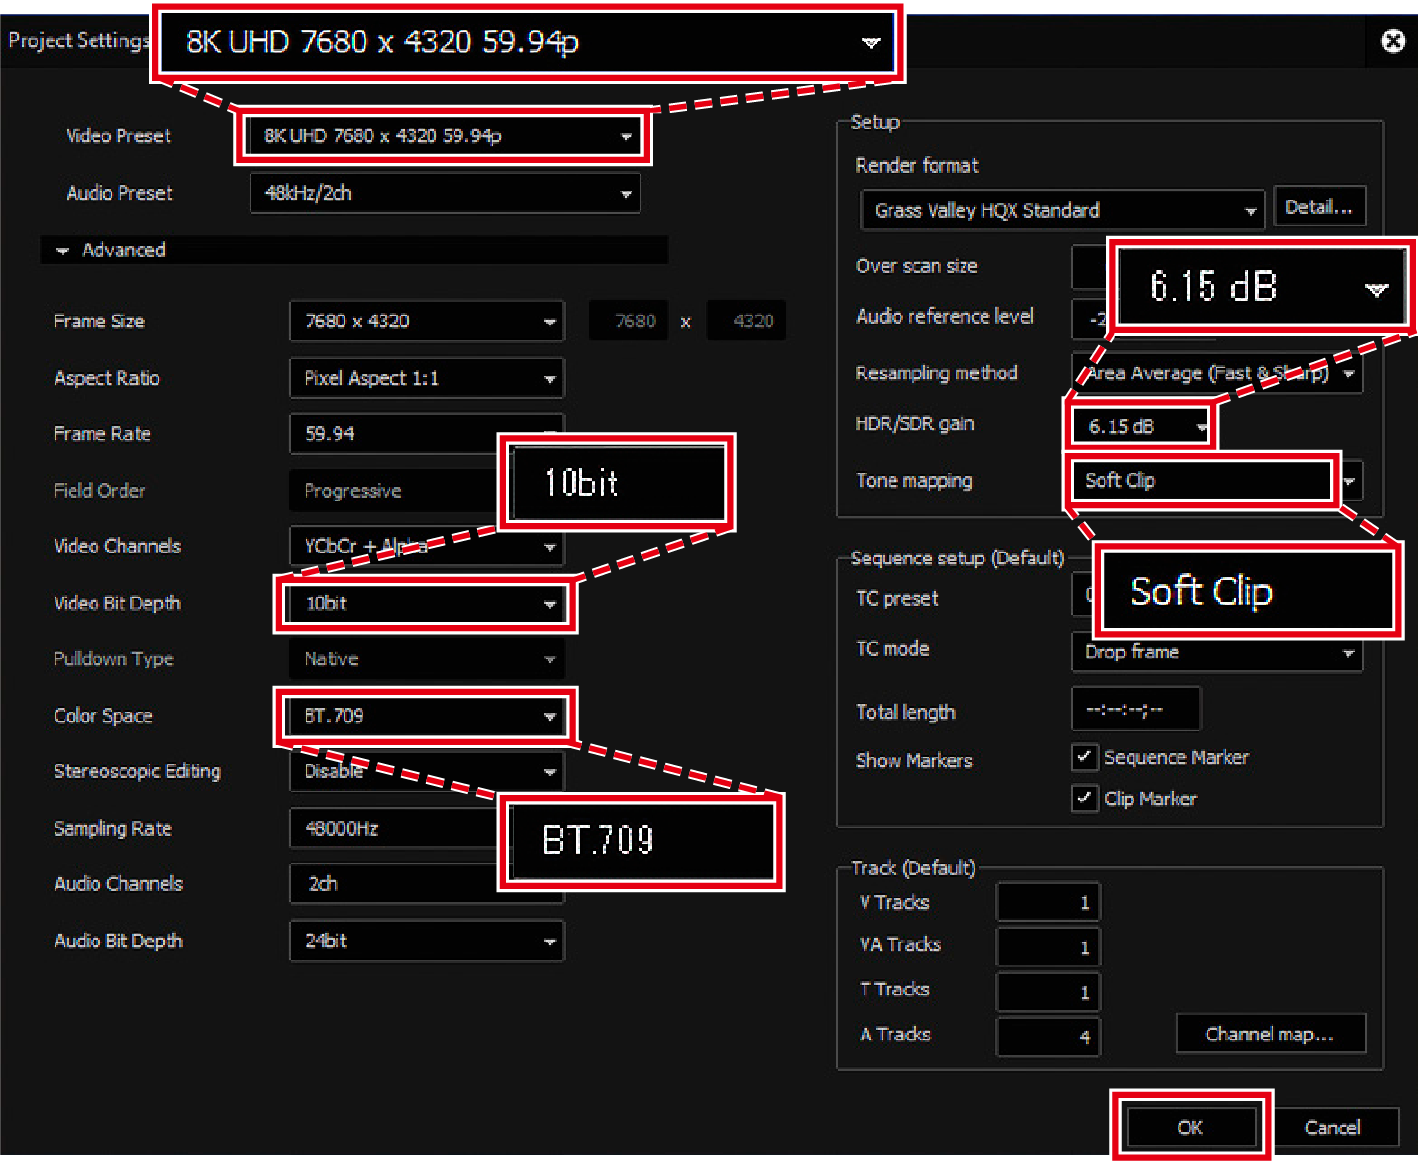
Configure project settings.
Set the items as follows and click [OK].
- [Video Preset]: [8K UHD 7680 x 4320 59.94p]
- [Video Bit Depth]: [10bit]
- [Color Space]: [BT.709]
- [HDR/SDR gain]: [6.15 dB]
- [Tone mapping]: [Soft Clip]
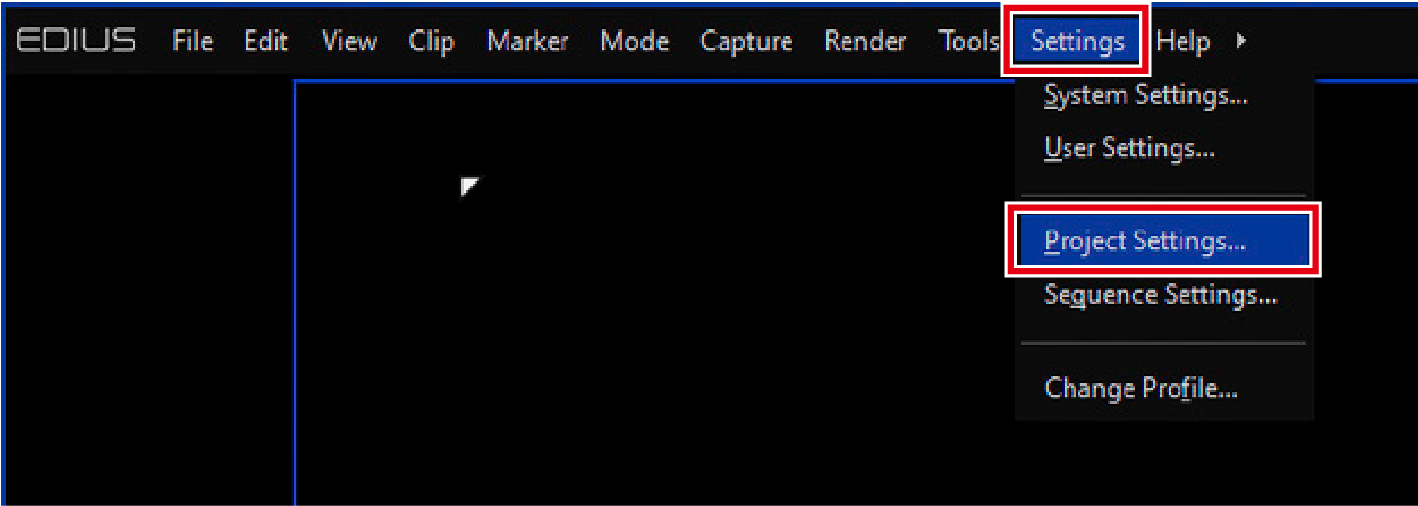
Modifying Project Settings
Click [Settings] > [Project Settings], then click [Current setting]. You can modify the settings in the [Project Settings] dialog box.

-
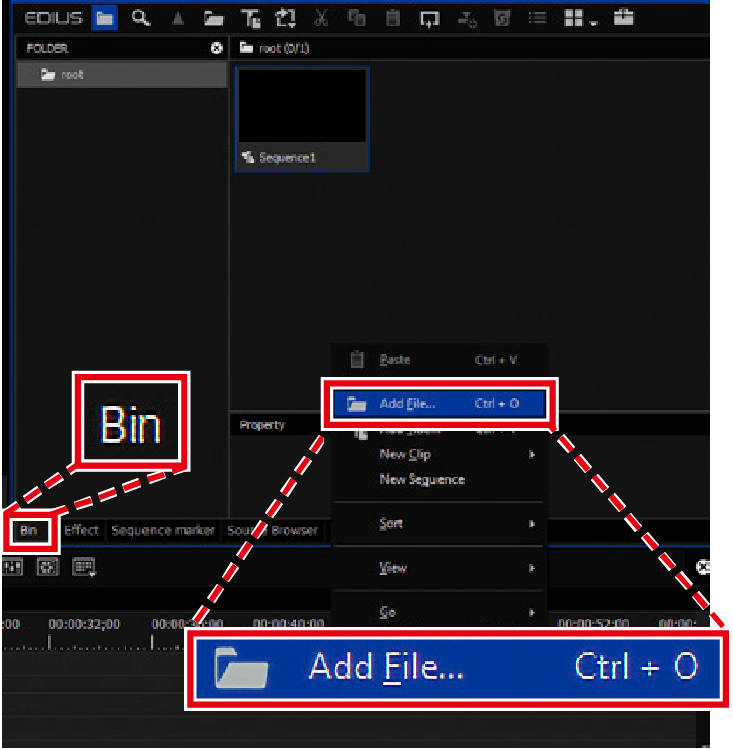
Load the footage.
Here we load proxy files in addition to original footage to use in the EDIUS X Pro proxy mode.
Editing RAW video can significantly increase CPU usage. We recommend using EDIUS X Pro proxy mode.
-
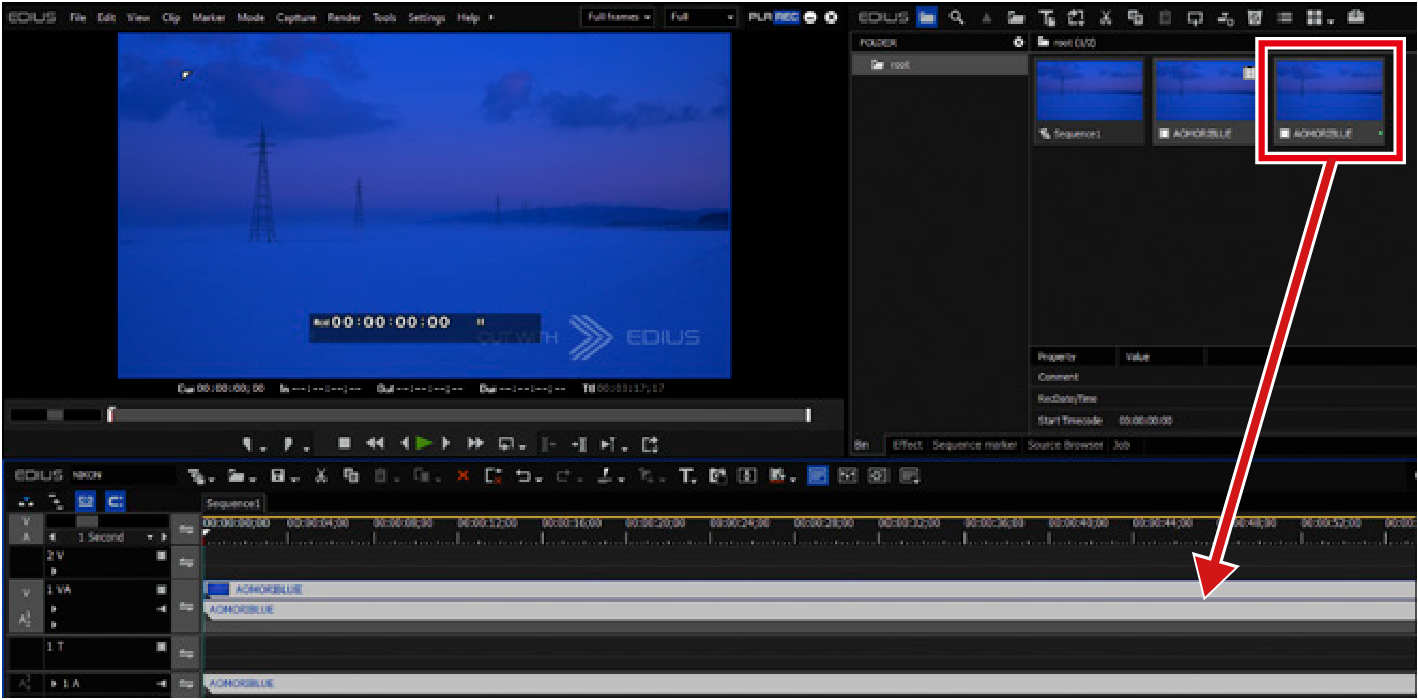
Right-click in the [Bin] panel at the top right of the screen where clips are managed, then click [Add File].
-
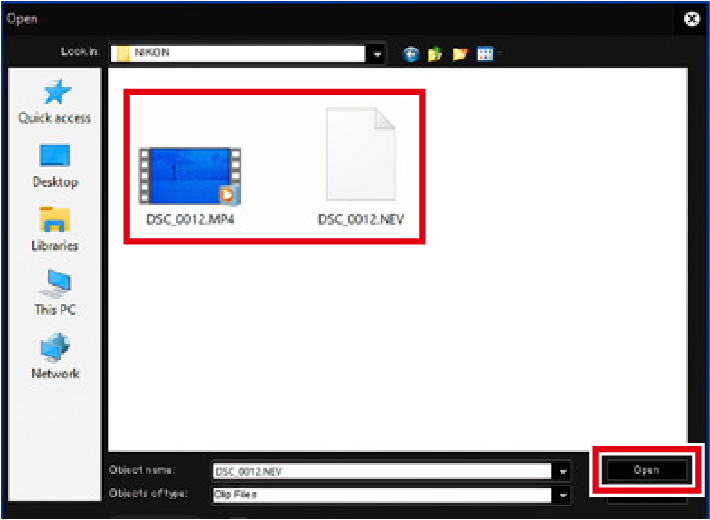
A proxy file is automatically generated in the same folder with an N-RAW file when recording RAW video. Select both the N-RAW file and its corresponding proxy, then click [Open].
When a proxy file is loaded, a temporary editing clip mark appears at the top right of its thumbnail.
-
Drag and drop the N-RAW file into the timeline.
-
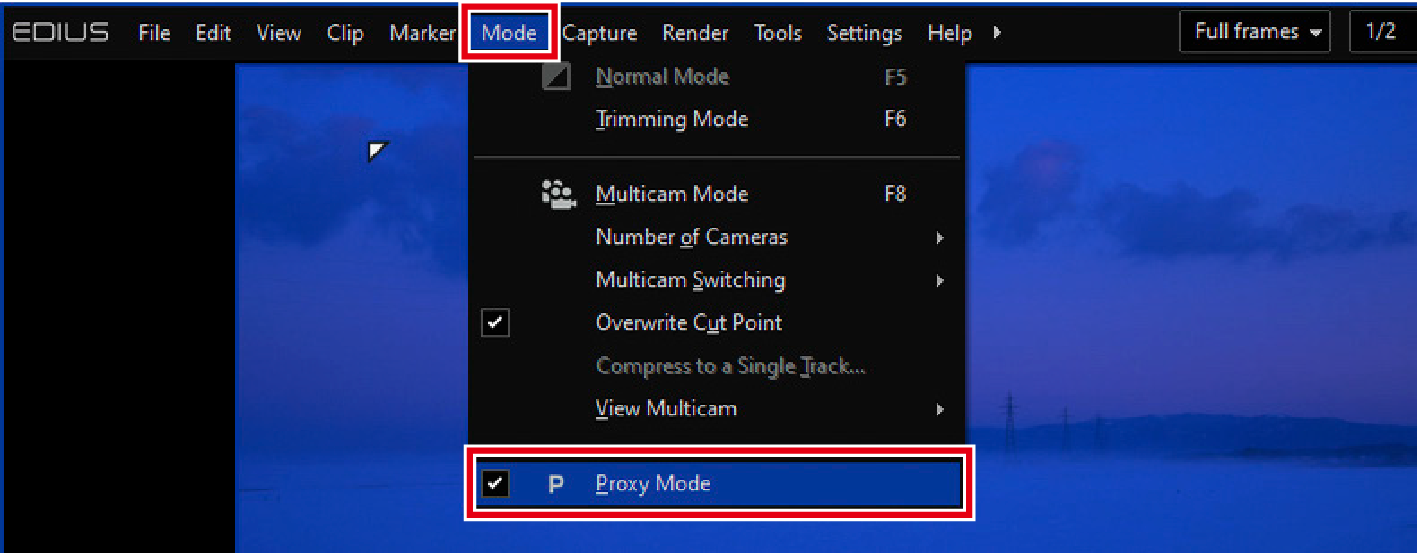
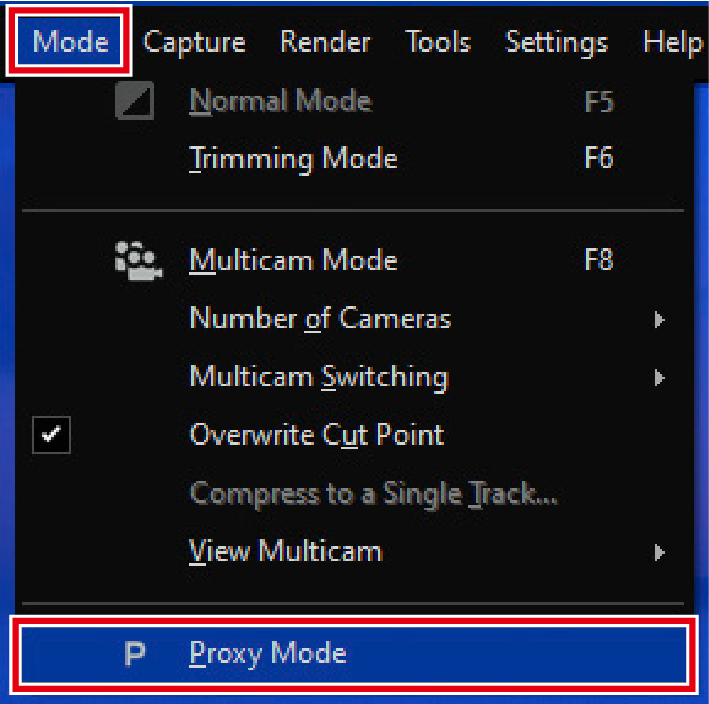
Click [Mode] > [Proxy Mode].
The grid pattern on timeline clips indicates that proxy files are being used instead of N-RAW files.
-
-
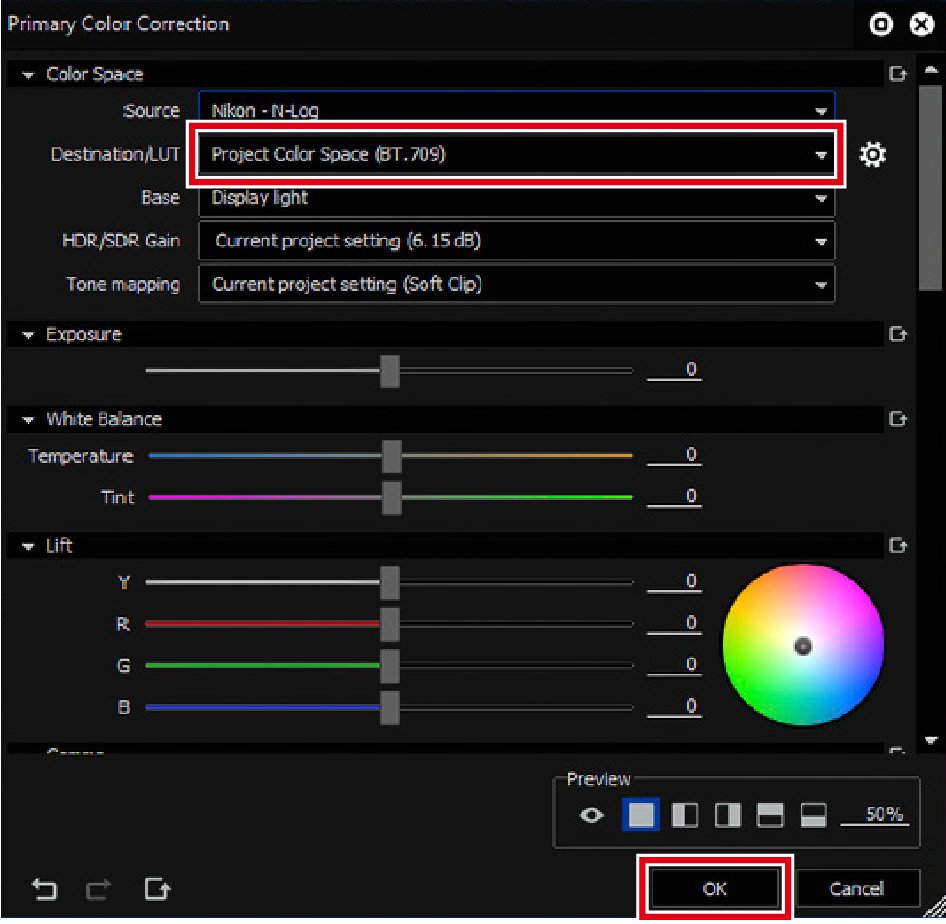
Use N-Log LUT to transform color space and gamma.
It is assumed that the video is being viewed in an SDR environment with BT.709 color space as specified in the project settings.
N-RAW files loaded into EDIUS X Pro are decoded as N-Log, with rec.2020 color space and N-Log gamma.
The N-Log LUT provided by Nikon must be registered in EDIUS X Pro.
-
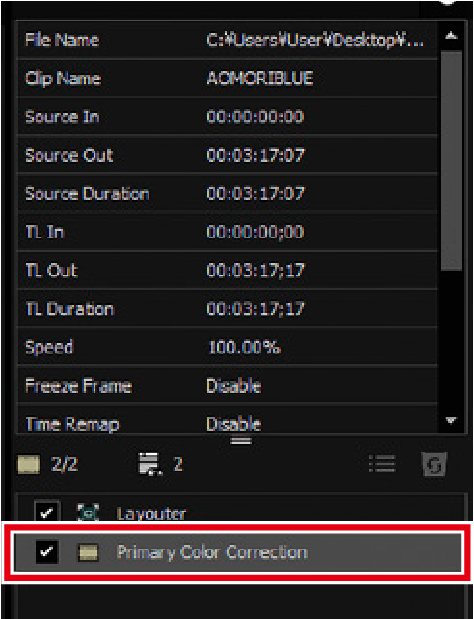
Click [Primary Color Correction] in the information palette to display the Primary Color Correction dialog box.
-
Select the N-Log LUT to apply from [Destination/LUT], then click [OK].
-
-
Export the video.
Pre-export video editing and color grading steps are omitted from this guide.
-
Click [Mode] > [Proxy Mode] to deselect.
-
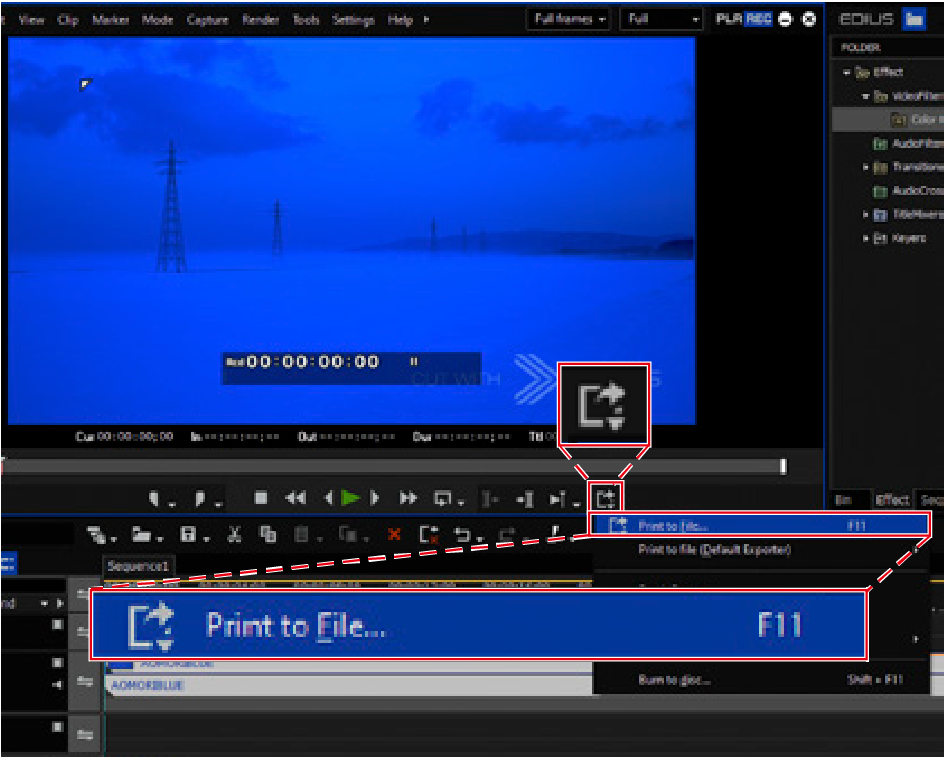
Click the [Export] icon under the preview window and select [Print to File].
-
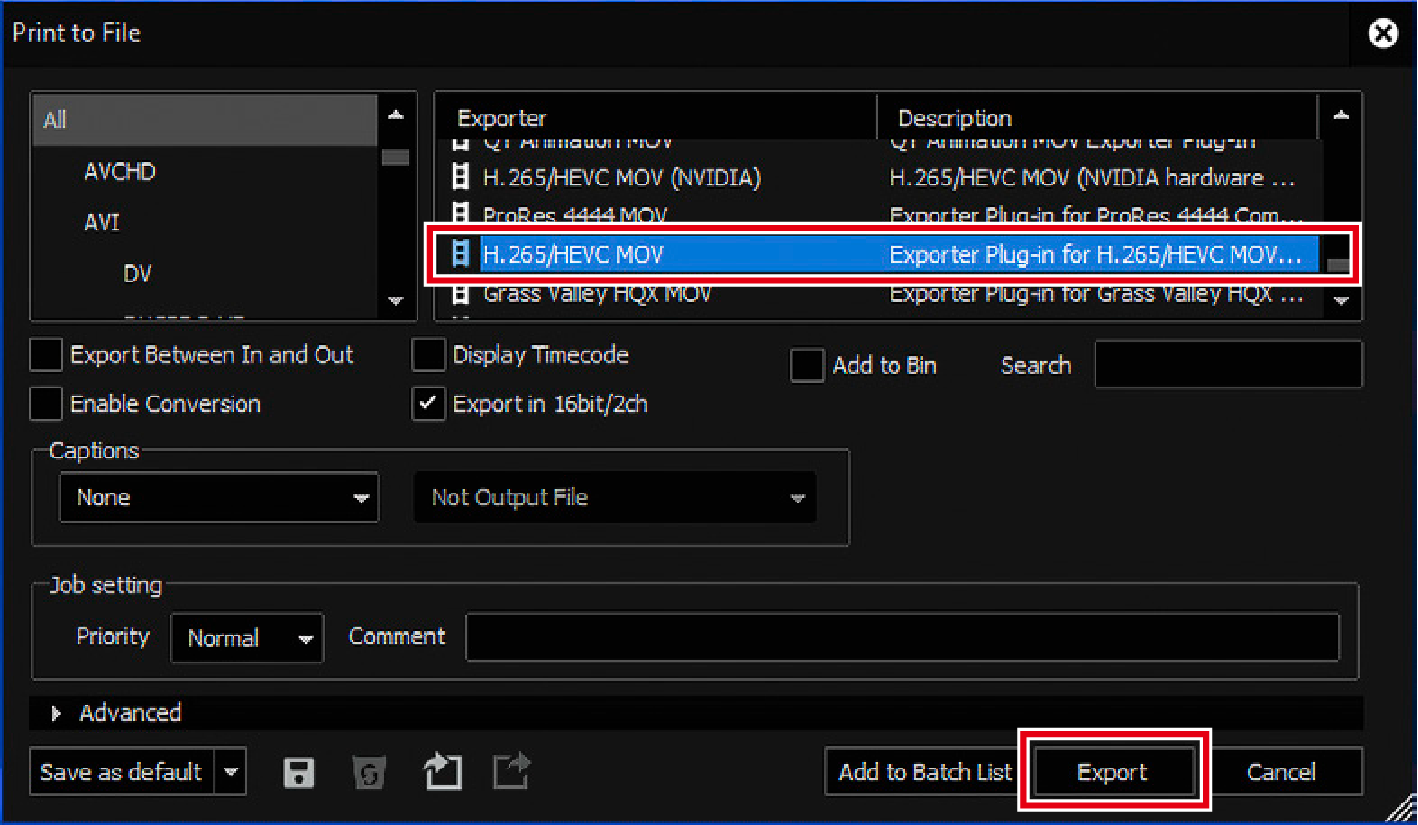
Select an exporter and click [Export].
-
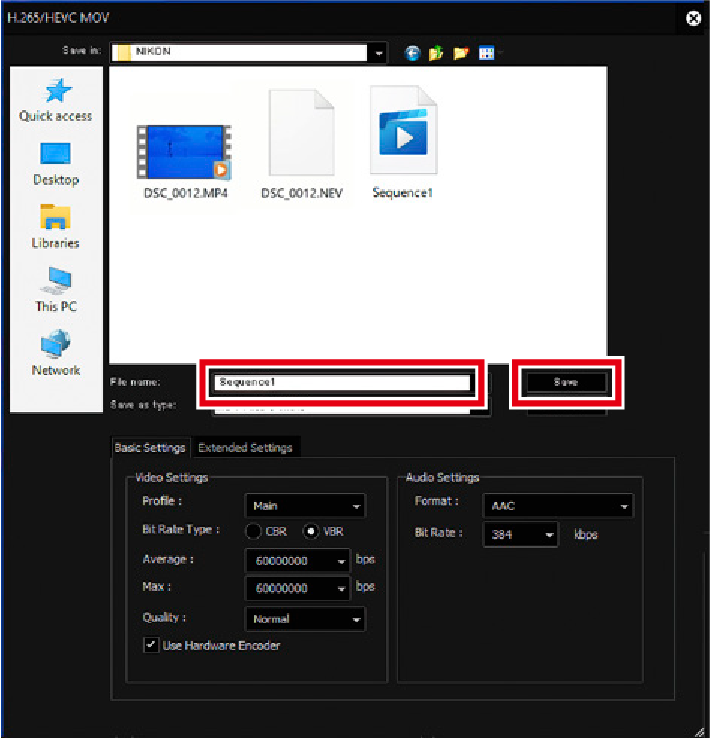
Name the file and click [Save].
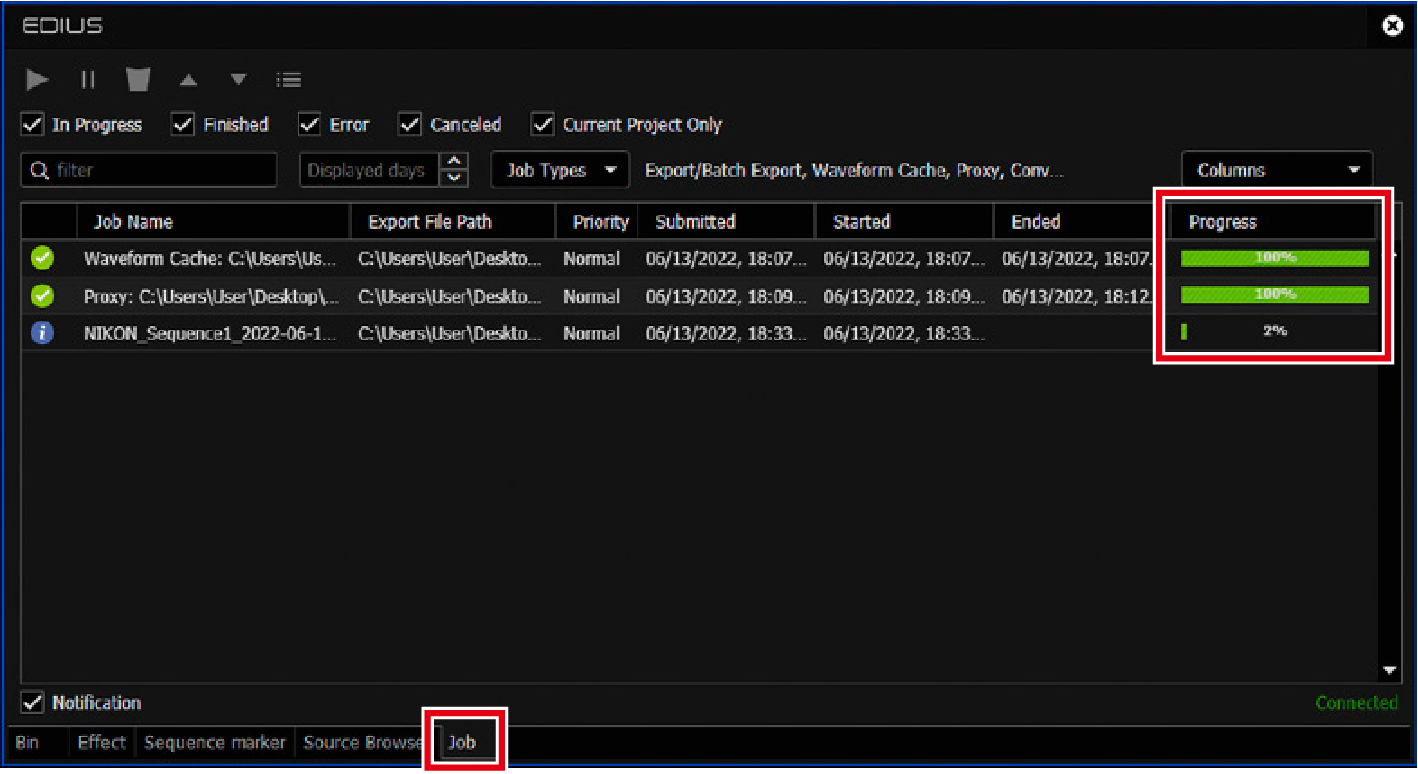
Export Progress
View export progress in the [Job] tab in the bin window.
-
Using the Color Space Transform Feature
-
Launch EDIUS X Pro and start a new project.
Click [Project] under [File] > [New] to create a new project.
-
Select a preset.
-
Click the desired preset in [Presets List].
-
Select the [Customize] check box and click [OK].
-
-
Configure project settings.
Set the items as follows and click [OK].
- [Video Preset]: [8K UHD 7680 x 4320 59.94p]
- [Video Bit Depth]: [10bit]
- [Color Space]: [BT.709]
- [HDR/SDR gain]: [6.15 dB]
- [Tone mapping]: [Soft Clip]
Modifying Project Settings
Click [Settings] > [Project Settings], then click [Current setting]. You can modify the settings in the [Project Settings] dialog box.
-
Load the footage.
Here we load proxy files in addition to original footage to use in the EDIUS X Pro proxy mode.
Editing RAW video can significantly increase CPU usage. We recommend using EDIUS X Pro proxy mode.
-
Right-click in the [Bin] panel at the top right of the screen where clips are managed, then click [Add File].
-
A proxy file is automatically generated in the same folder with an N-RAW file when recording RAW video. Select both the N-RAW file and its corresponding proxy, then click [Open].
When a proxy file is loaded, a temporary editing clip mark appears at the top right of its thumbnail.
-
Drag and drop the N-RAW file into the timeline.
-
Click [Mode] > [Proxy Mode].
The grid patterns on timeline clips indicate that proxy files are being used instead of N-RAW files.
-
-
Transform color space and gamma using effects.
Use the Primary Color Correction feature for transforms, which allows you to apply color grading to the clip recorded in Log format and adjust brightness and colors.
-
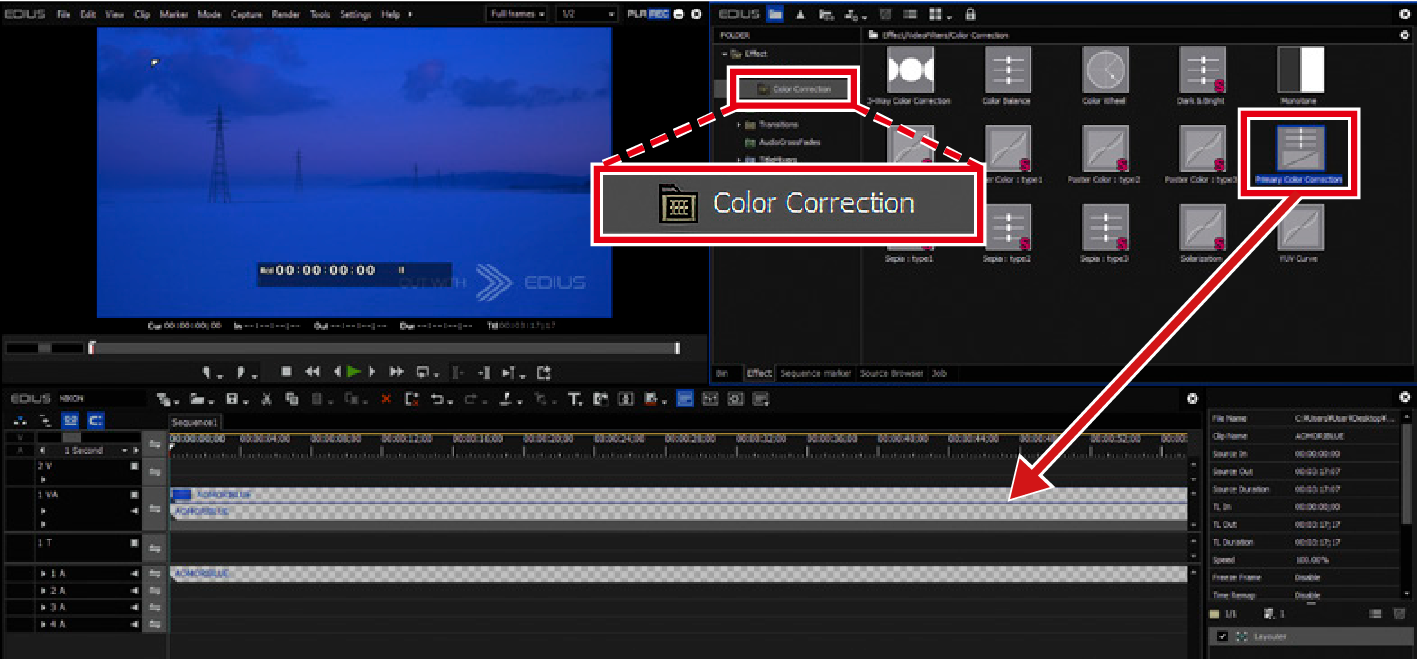
Switch the tab at the top right of the screen from [Bin] to [Effect].
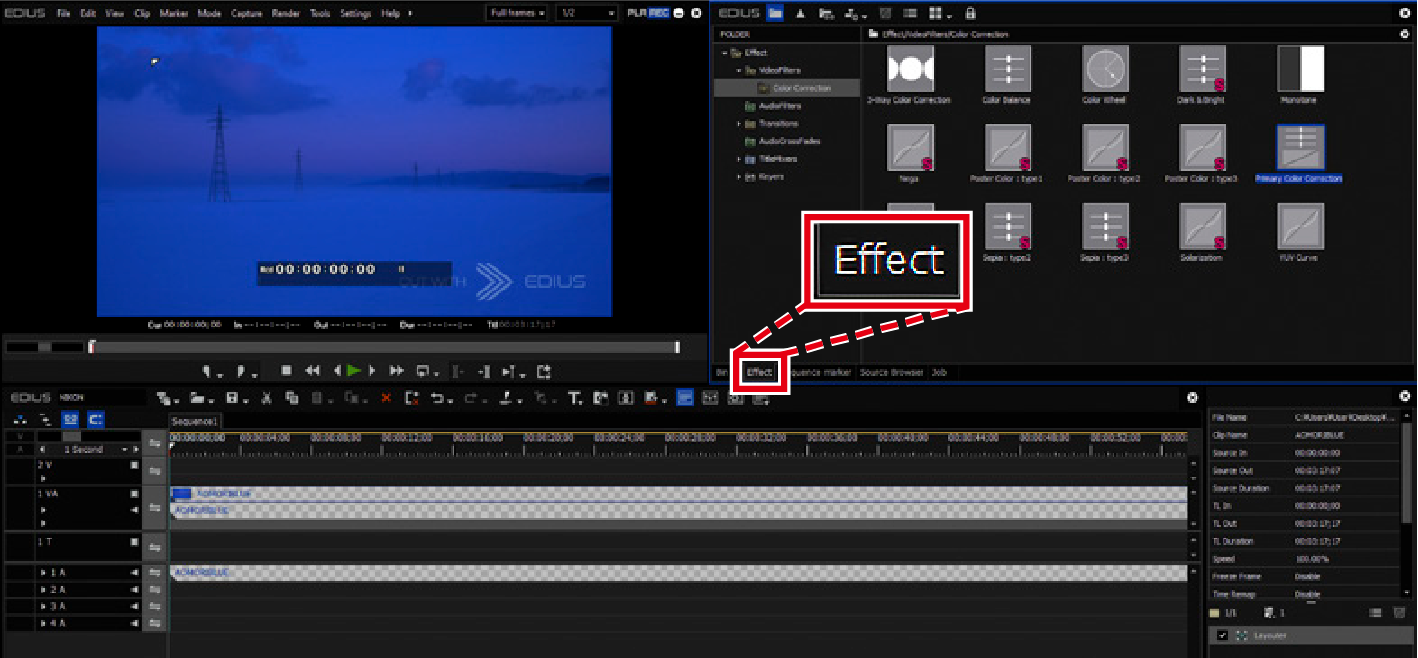
-
Select [VideoFilters] and drag and drop [Color Correction] > [Primary Color Correction] onto a clip in the timeline.
The preview window display changes.
-
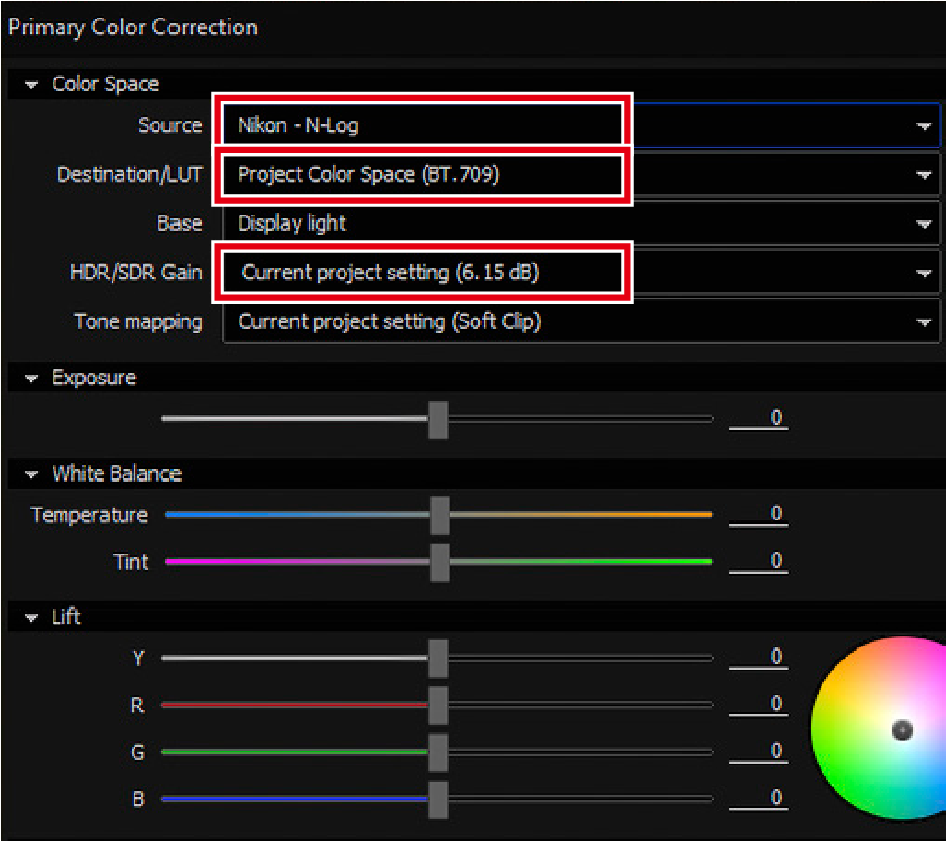
Click [Primary Color Correction] in the information palette to display the Primary Color Correction dialog box.
Confirm that [Color Space] is set as follows:
- [Source]: [N-Log]
- [Destination/LUT]: [Project Color Space (BT.709)]
- [HDR/SDR Gain]: [Current project setting]
-
-
Export the video.
Pre-export video editing and color grading steps are omitted from this guide.
-
Click [Mode] > [Proxy Mode] to deselect.
-
Click the [Export] icon under the preview window and select [Print to File].
-
Select an exporter and click [Export].
-
Name the file and click [Save].
Export Progress
View export progress in the [Job] tab in the bin window.
-