Edit with Premiere Pro
This section provides an example of how to edit N-Log videos.
- For optimal results, we recommend taking test shots and practicing editing before you start.
- The following information is current as of October 2025.
Edit N-Log Videos
Using the N-Log LUT
N‑RAW footage recorded in [N-Log] tone mode is opened as "RED Wide Gamut (RWG)/Log3G10" in Premiere Pro. Here we will show you how to transform color space using RWG/Log3g10 to Rec2020/N-Log LUT (hereafter Log conversion LUT) and technical LUTs.
| Step | Description | Color space* |
|---|---|---|
| 1 | Download the Log conversion LUT. | - |
| 2 | Load a LUT. | - |
| 3 | Launch Premiere Pro and start a new project. | - |
| 4 | Load the footage. | RWG/Log3G10 |
| 5 | Create a timeline. | RWG/Log3G10 |
| 6 | Create an adjustment layer. | RWG/Log3G10 |
| 7 | Add the adjustment layer to the timeline. | RWG/Log3G10 |
| 8 | Apply the Log conversion LUT. | Rec.2020/N-Log |
| 9 | Apply a technical LUT (Rec.709). | Rec.709/BT.1886 |
Shows the state of the color space in each step.
Download the Log conversion LUT.
The Log conversion LUT is available from the Nikon Download Center. It can be downloaded from the URL below:
https://downloadcenter.nikonimglib.com/en/products/662/RWG_Log3g10_to_Rec2020_N-Log_LUT.html
The downloaded file contains the following LUTs:
LOG3G10toNLOG_65.cube: The LUT recommended for use in this guide.
LOG3G10toNLOG_33.cube: This LUT may have lower color conversion accuracy when compared to "LOG3G10toNLOG_65.cube." Use this in environments that cannot use "LOG3G10toNLOG_65.cube."
Load a LUT.
Copy the Log conversion LUT and N-Log LUT to the following location. The folder path is:
Windows:
C:\Program Files\Adobe\Adobe Premiere Pro 2025\Lumetri\LUTs\Technical
macOS:
Applications/Adobe Premiere Pro 2025/Lumetri/LUTs/Technical/
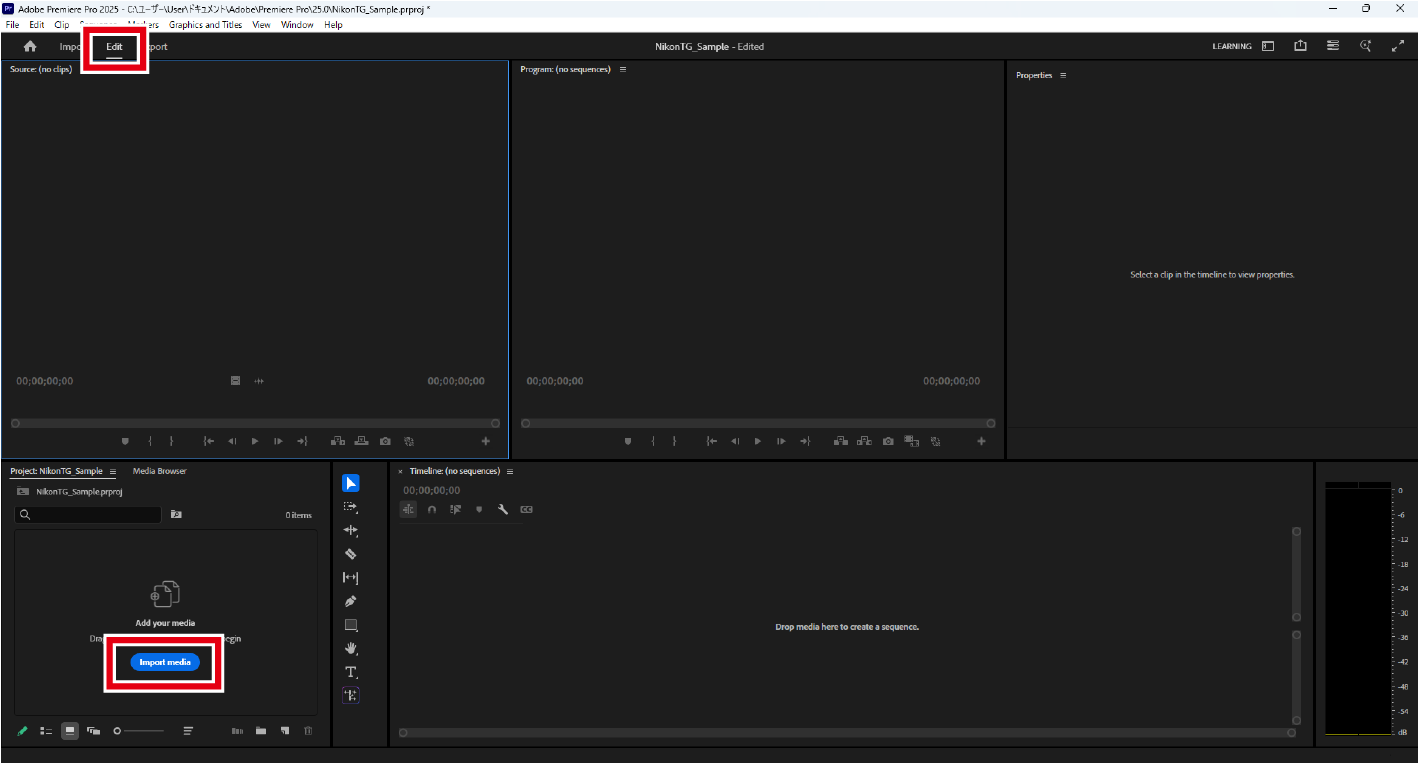
Launch Premiere Pro and start a new project.
Click [New Project], enter a project name, and click [Create].

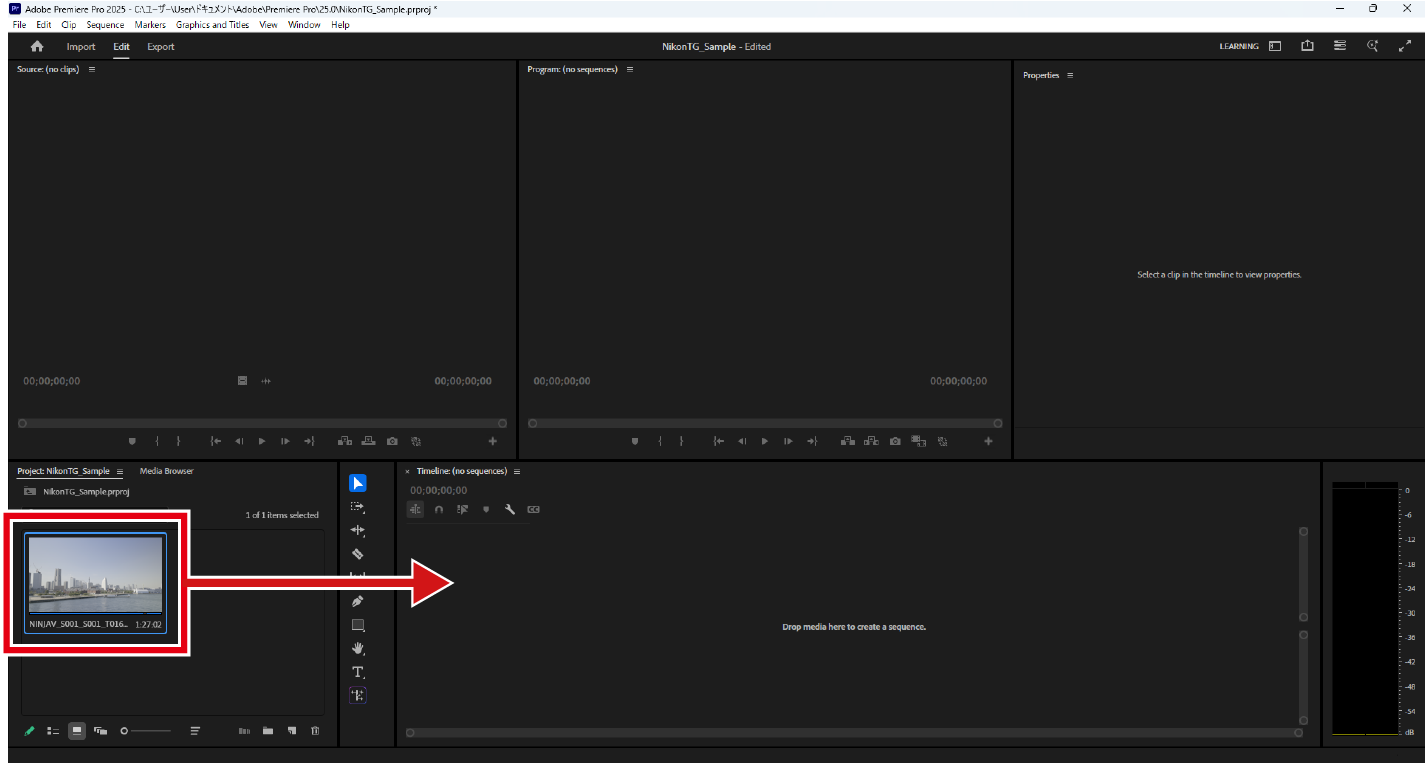
Load the footage.
Import your footage from the [Import media] in the [Project] panel at the bottom left of the screen displayed after clicking [Edit]. You can also drag and drop your footage into the application to load it.
Create a timeline.
Drag and drop the loaded footage into the [Timeline] panel.
Create an adjustment layer.
Click [New Item] > [Adjustment Layer].
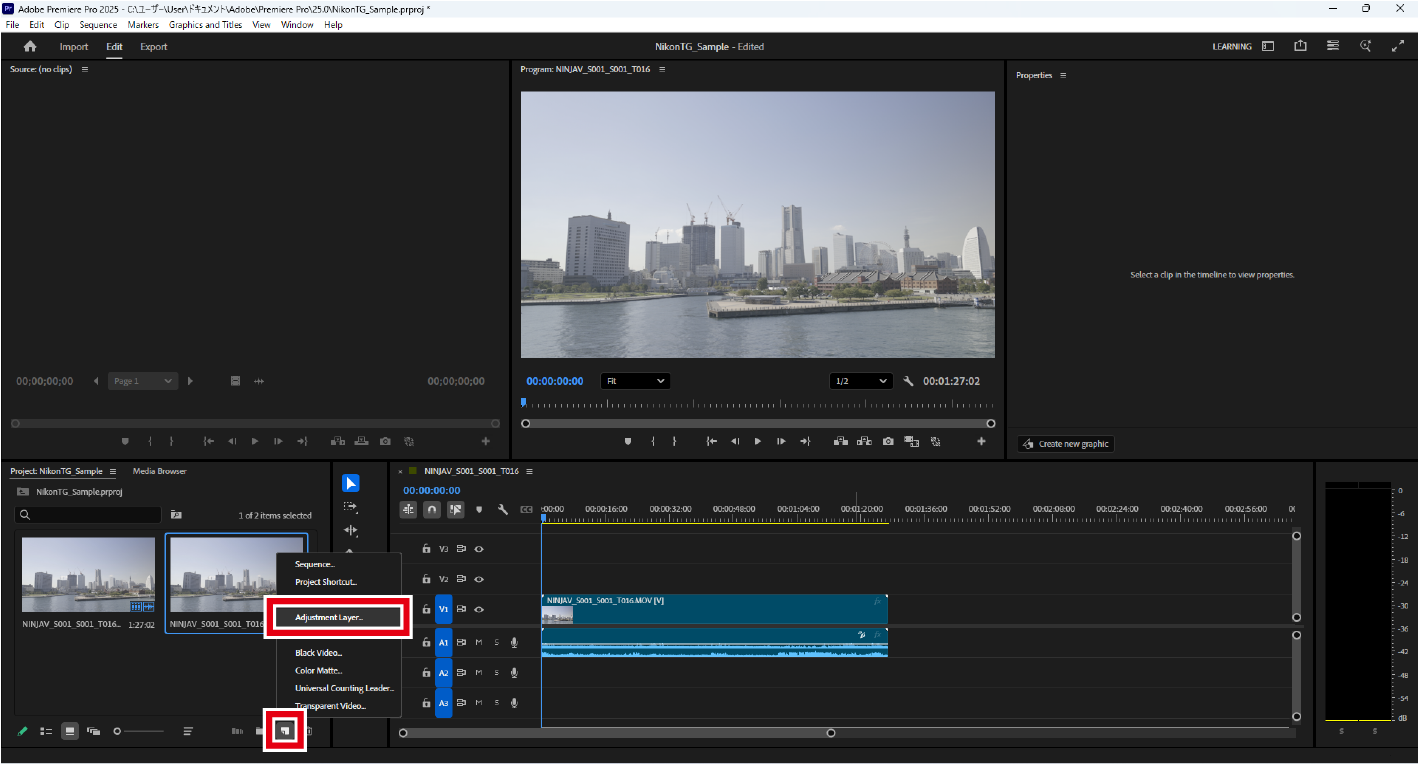
Configure the desired settings in the displayed dialog and click [OK].
An adjustment layer will be created in the [Project] panel.

Add the adjustment layer to the timeline.
Drag and drop the adjustment layer above the footage you are editing in the timeline.
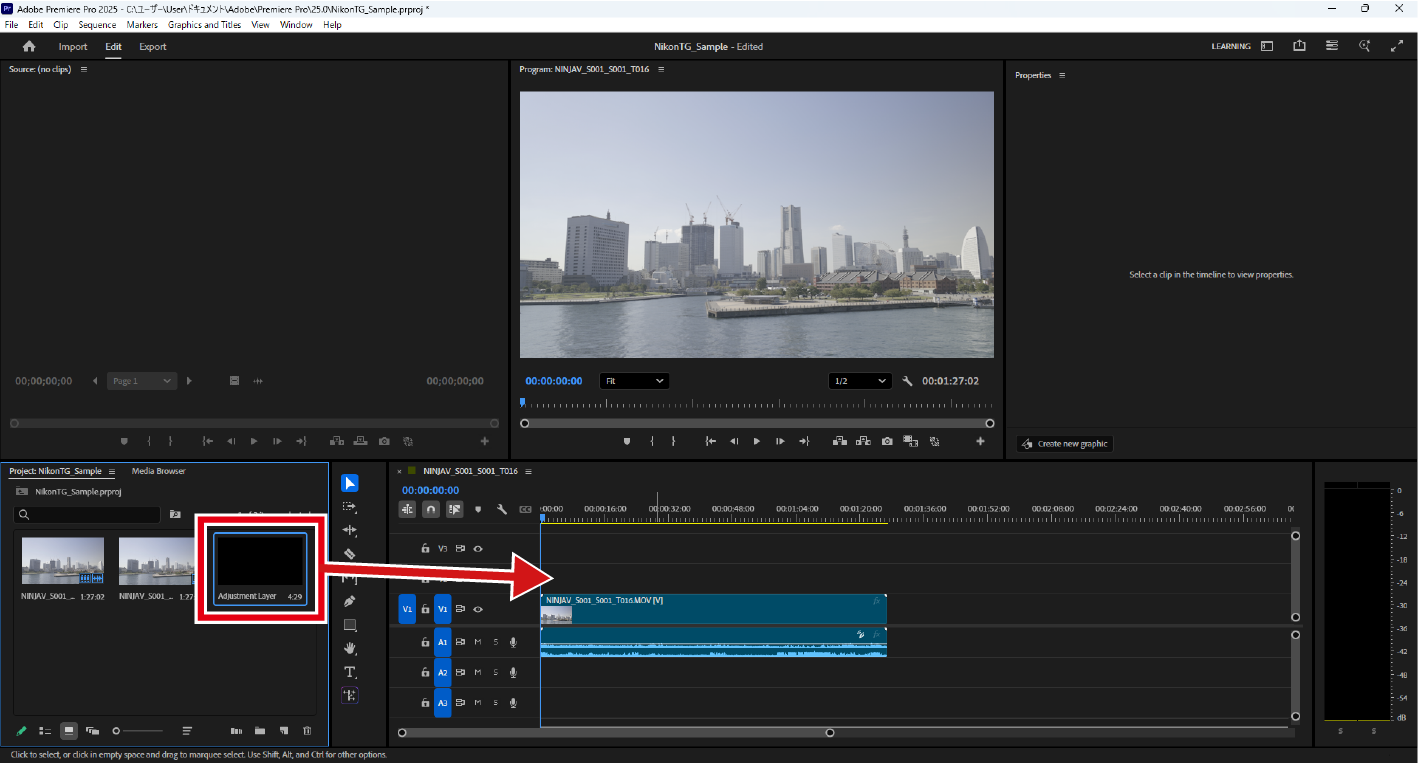
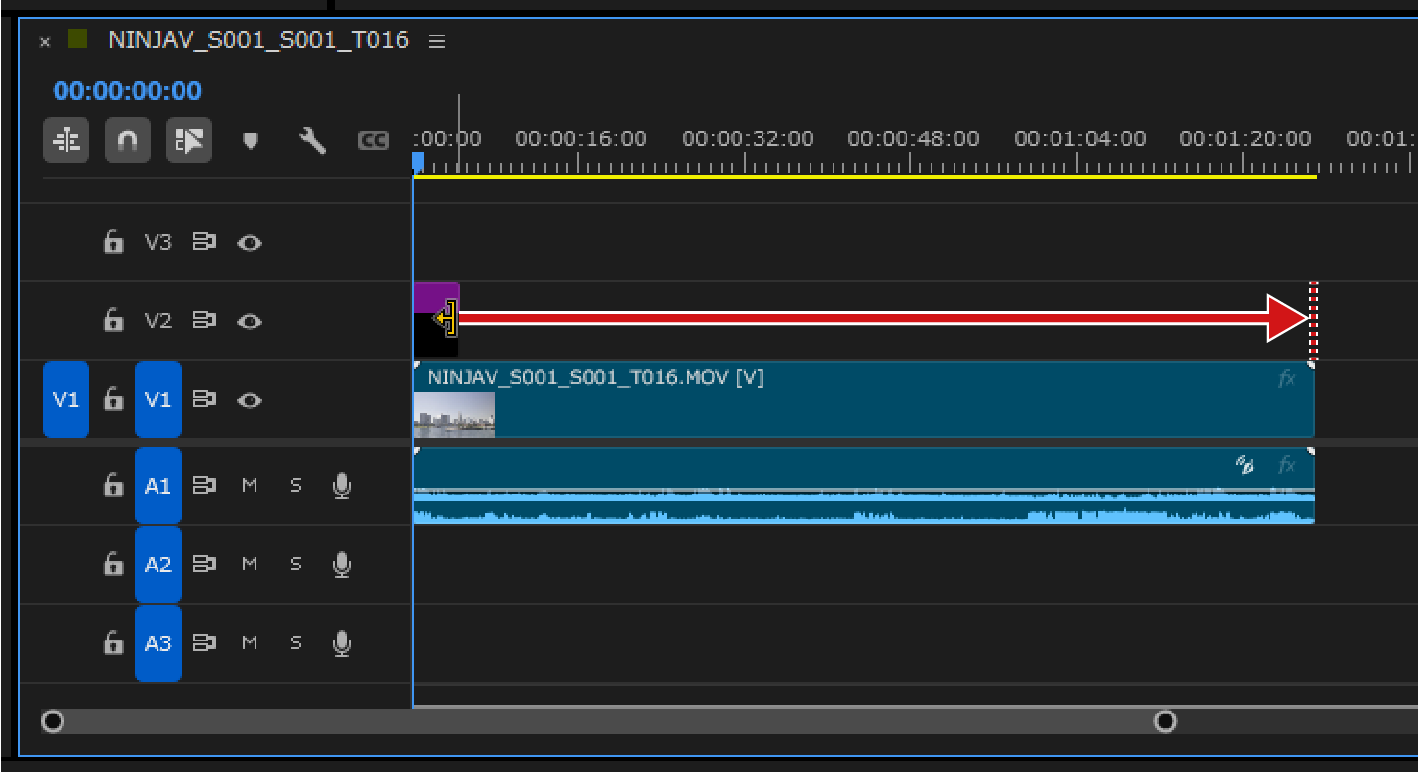
Click and hold the right edge of the adjustment layer, then stretch it until it matches the length of the footage.
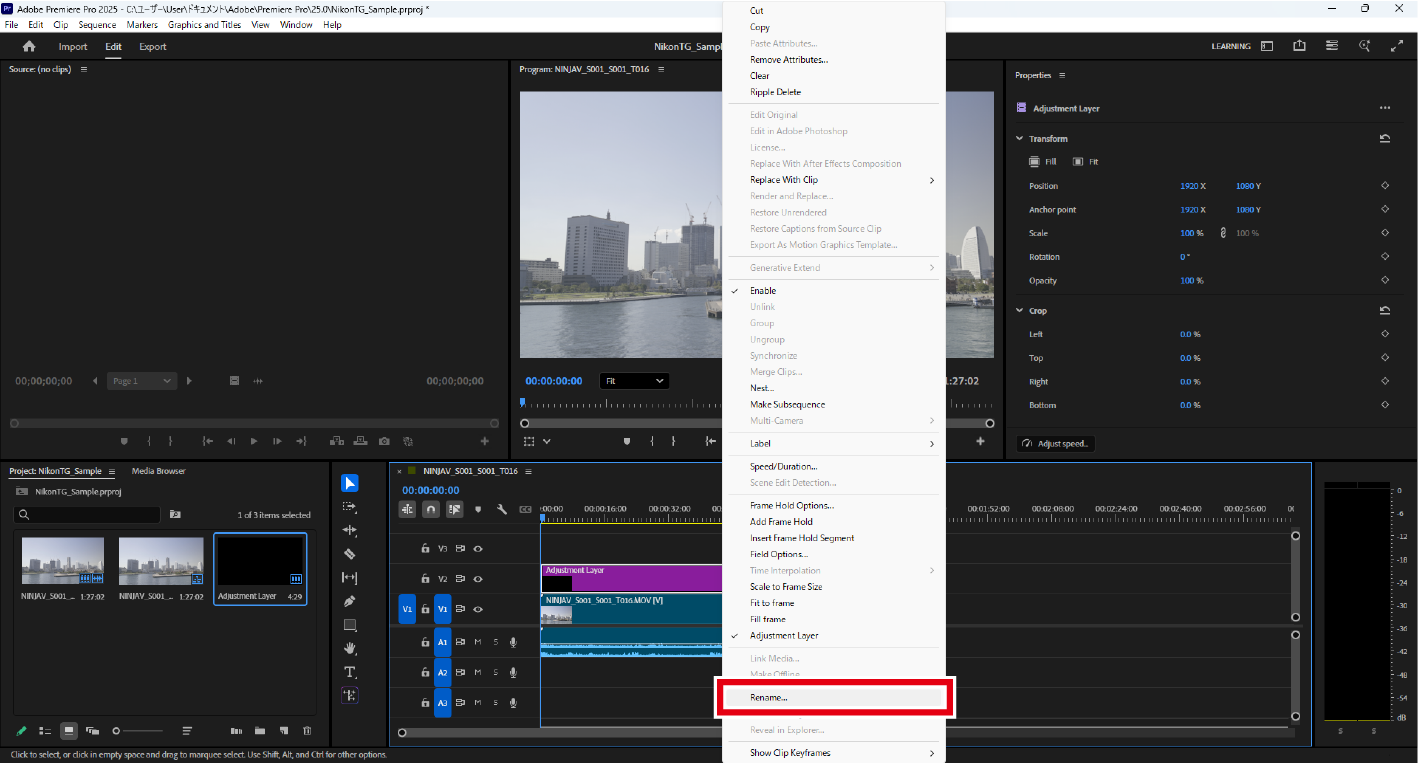
Right-click on the adjustment layer in the timeline and click [Rename].
Rename it to "Log3G10 to N-log."
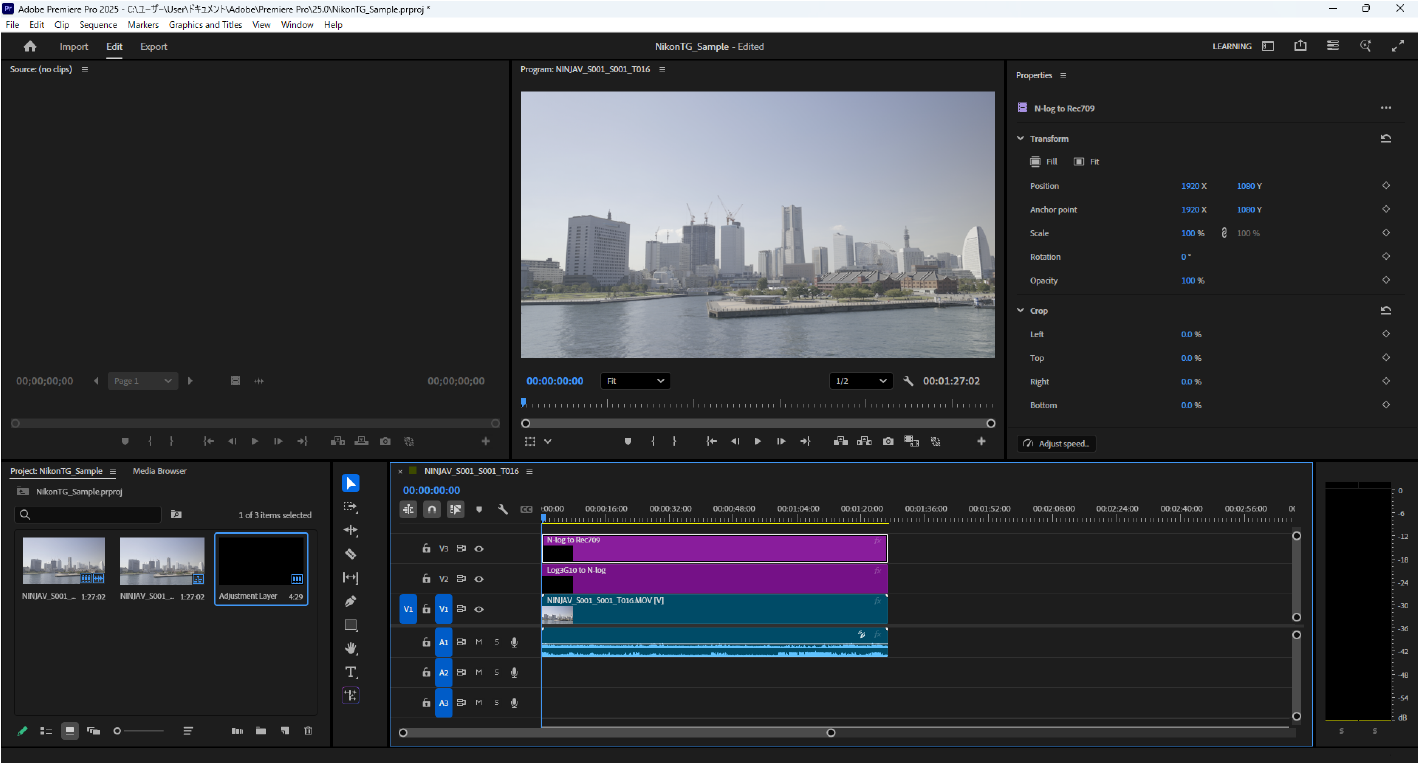
Repeat the above process to add a second adjustment layer to the timeline.
Drag and drop the second adjustment layer above the first adjustment layer. Rename it to "N-log to Rec709."
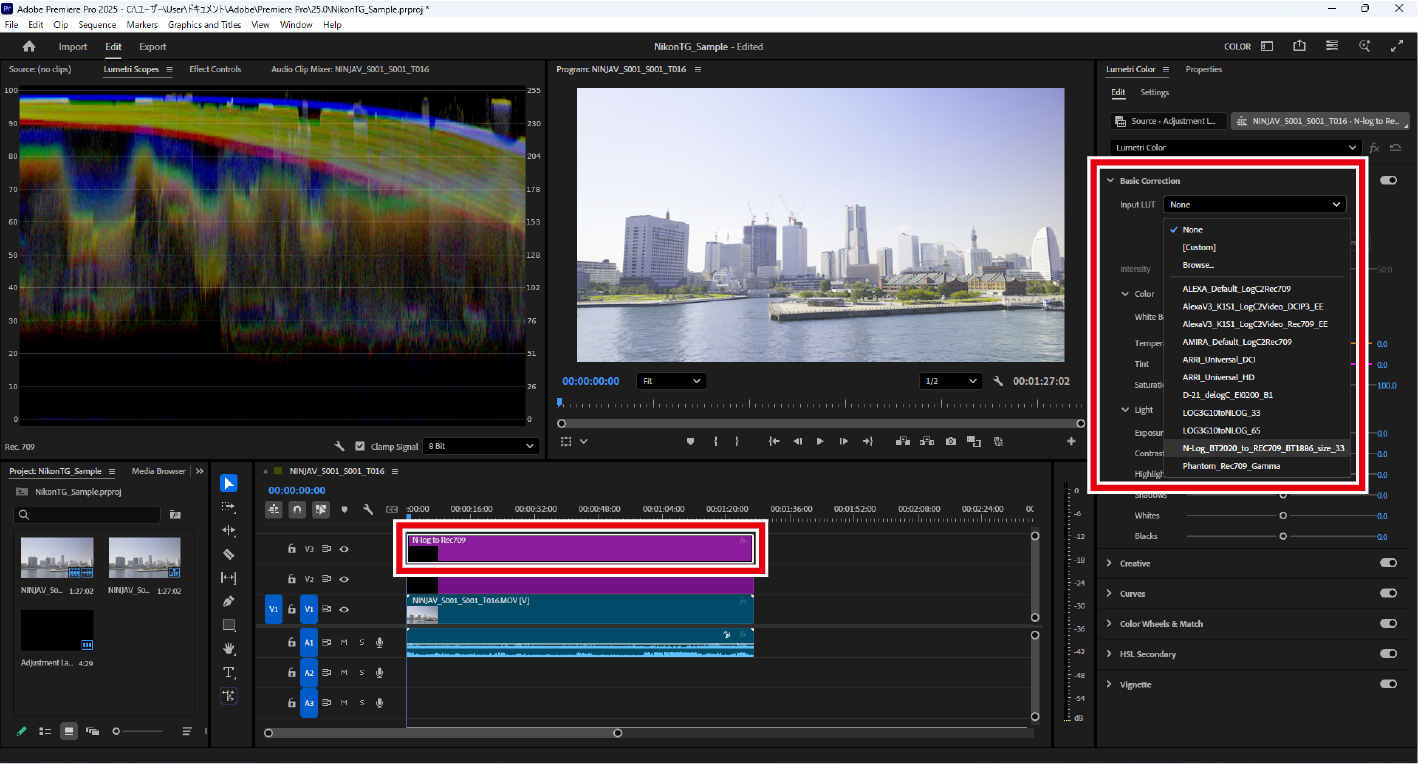
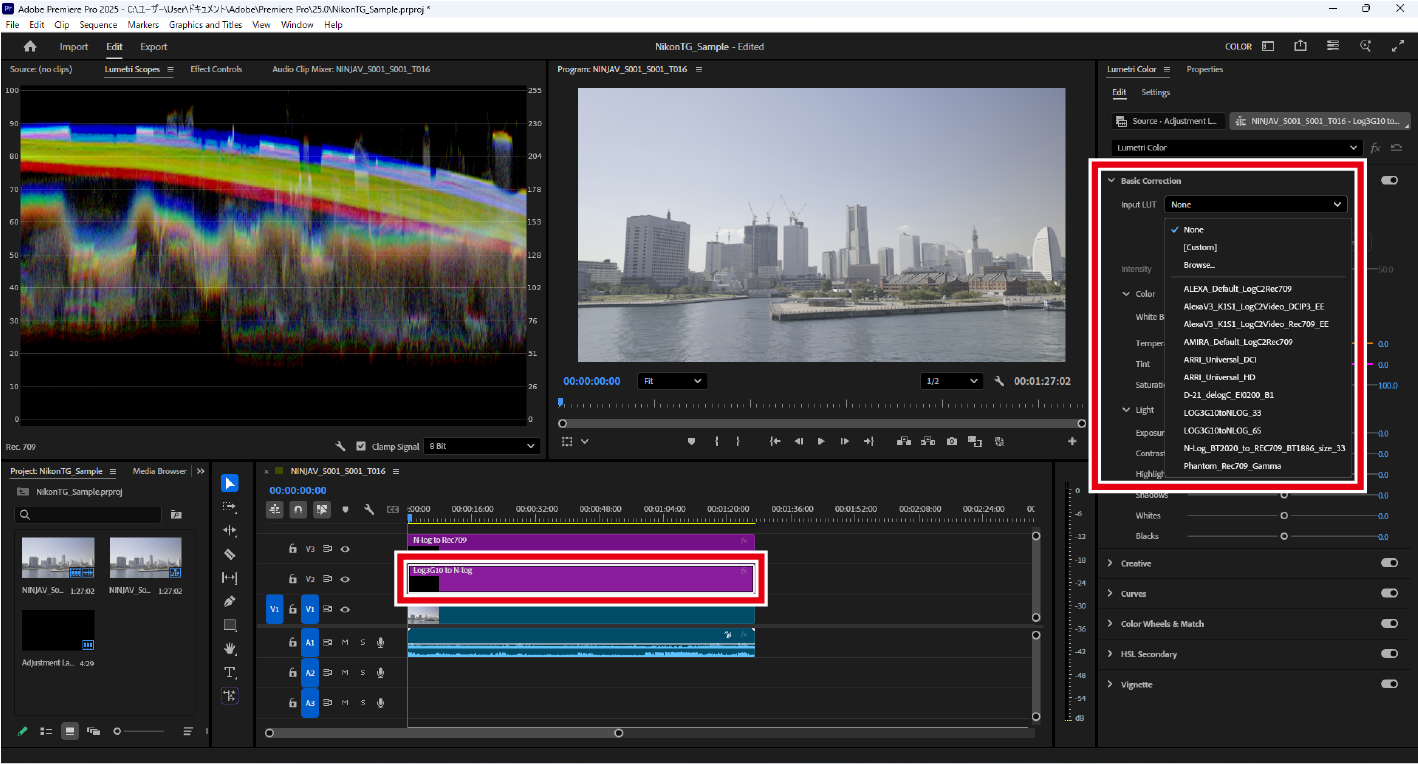
Apply the Log conversion LUT.
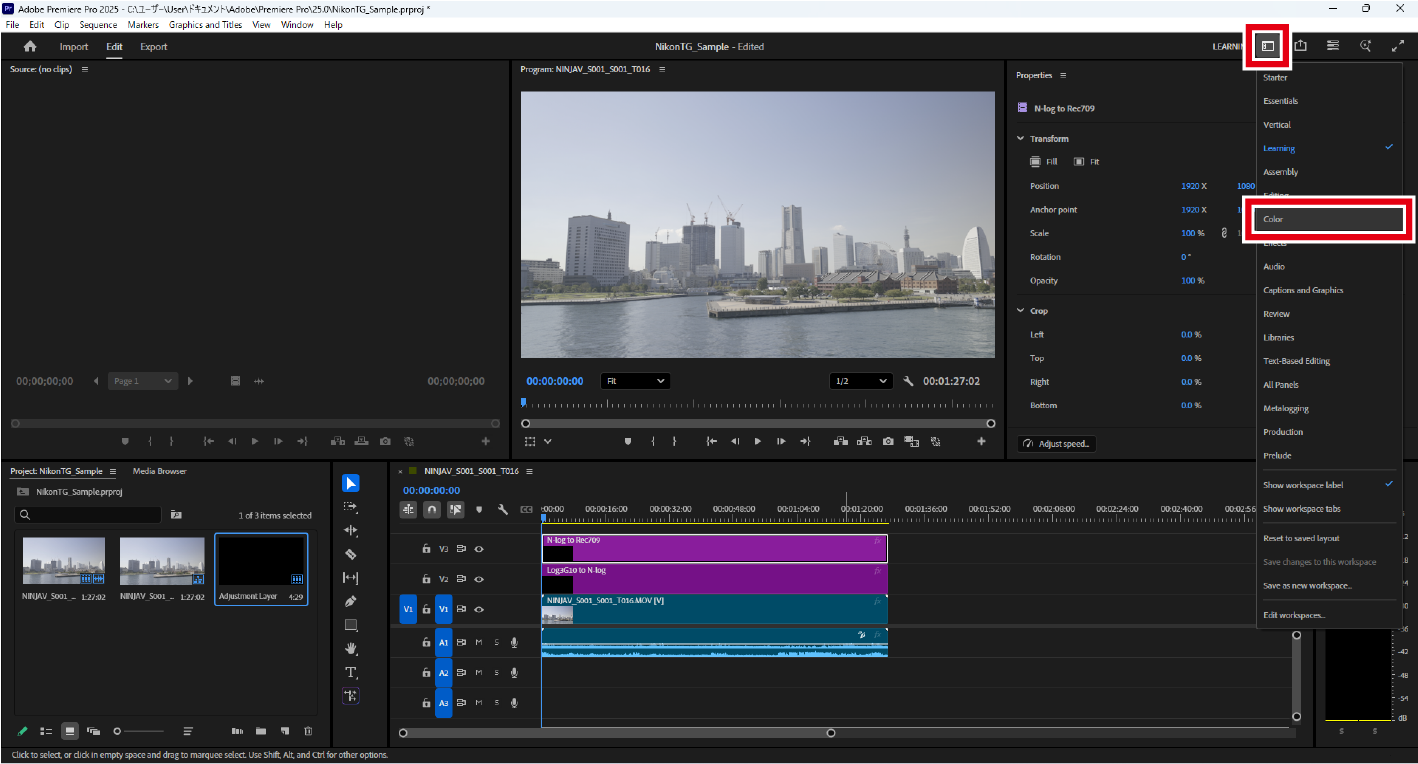
Click [Workspaces] > [Color].
The [Lumetri Color] panel appears.
Select the "Log3G10 to N-log” adjustment layer on the timeline and select Log conversion LUT from [Basic Correction] > [Input LUT] in the [Lumetri Color] panel.
This guide recommends using "LOG3G10toNLOG_65", but you can also use "LOG3G10toNLOG_33" depending on your computer.
Apply a technical LUT (Rec.709).
Select the "N-log to Rec709” adjustment layer on the timeline and select the technical LUT from [Basic Correction] > [Input LUT] in the [Lumetri Color] panel.