The Monitor
At default settings, the following indicators appear in the
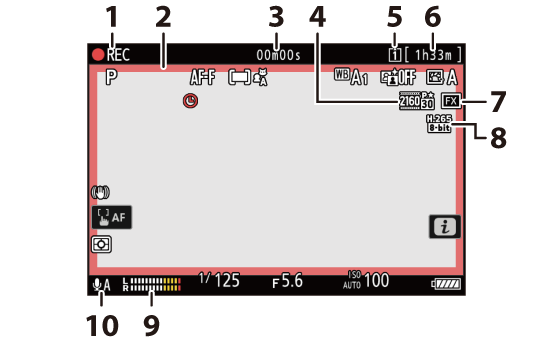
Photo Mode
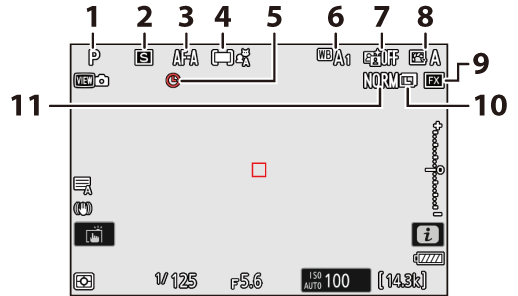
- Shooting mode (0 Choosing a Shooting Mode)
- Release mode (0 Release Mode)
- Focus mode (0 Focus Mode)
- AF-area mode (0 AF-Area Mode)
- g icon (0 The g Icon)
- White balance (0 White Balance)
- Active D-Lighting (0 Active D-Lighting)
- Picture Control (0 Picture Controls)
- Image area (0 Adjusting Image Area Settings)
- Image size (0 Choosing an Image Size)
- Image quality (0 Adjusting Image Quality)
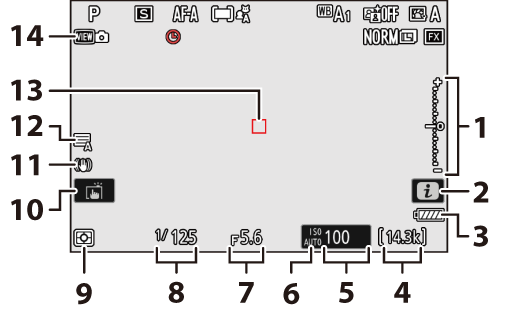
Exposure indicator
- Exposure (0 Exposure Indicators)
- Exposure compensation (0 Exposure Compensation)
- i icon (0 The i Button (i Menu), The i Button (Playback Mode))
- Battery indicator (0 Battery Level)
- Number of exposures remaining (0 Number of Exposures Remaining, Memory Card Capacity)
- ISO sensitivity (0 ISO Sensitivity)
ISO sensitivity indicator (0 ISO Sensitivity)
Auto ISO sensitivity indicator (0 Auto ISO Sensitivity Control)
- Aperture (0 A (Aperture-Priority Auto), M (Manual))
- Shutter speed (0 S (Shutter-Priority Auto), M (Manual))
- Metering (0 Metering)
- Touch shooting (0 The Touch Shutter)
- Vibration reduction indicator (0 Vibration reduction)
- Shutter type (0 d6: Shutter type)
- Focus point (0 Focus-Point Selection)
- View mode (photo live view; 0 d10: View mode (photo Lv))
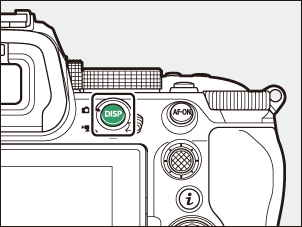
Using the Monitor with the Camera in “Tall” Orientation
In photo mode, the playback, i menu, and shooting displays rotate to match

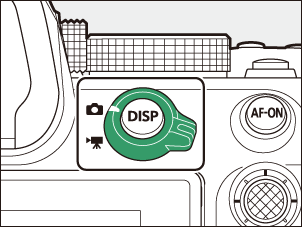
Press the
Video Mode

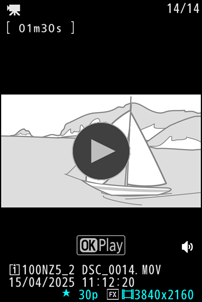
Recording indicator
“No video” indicator (0 The 0 Icon)
- Recording indicator (red border; 0 g19: Red REC Frame Indicator)
- Length of footage recorded
- Frame size and rate (0 Video Frame Size and Rate Options)
- Destination (0 Destination)
- Available recording time
- Image area (0 Video Image Area Options)
- Video file type (0 Video File Types)
- Sound level (0 Microphone sensitivity)
- Microphone sensitivity (0 Microphone sensitivity)
If the camera becomes hot, a high-temperature warning (K) may appear in the shooting display. Note that the camera body and battery may be hot while the high-temperature warning (K) is displayed.
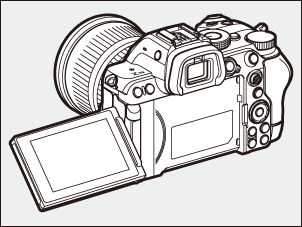
Angling the Monitor
The monitor can be angled and rotated.
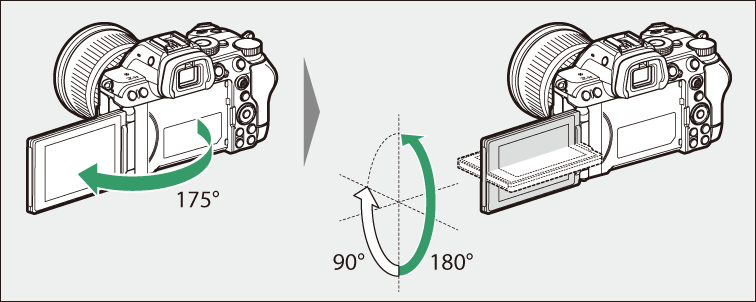
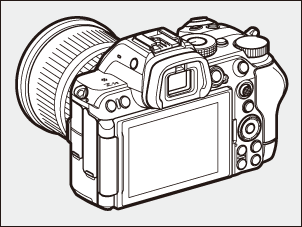
- Normal use:
The monitor is normally used in storage position with the screen facing outward.
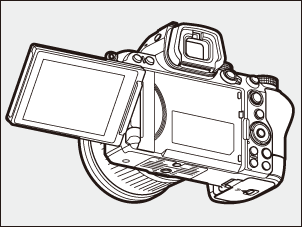
- Low-angle shots:
Tilt the monitor up to take shots with the camera held low.
- High-angle shots:
Tilt the monitor down to take shots with the camera held high.
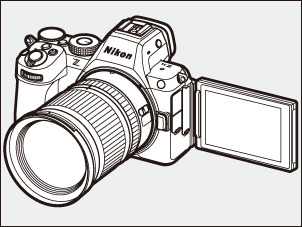
- Self-portraits:
Rotating the monitor to face the same direction as the lens enables self-portrait mode (0 Self-Portrait Mode).
- Rotate the monitor gently within the limits of its hinges. Using excessive force could damage the camera or monitor.
- We recommend returning the monitor to the storage position with the screen facing inward to keep it free of dust and scratches when not in use.
- Do not lift or carry the camera by the monitor. Failure to observe this precaution could result in damage to the camera.
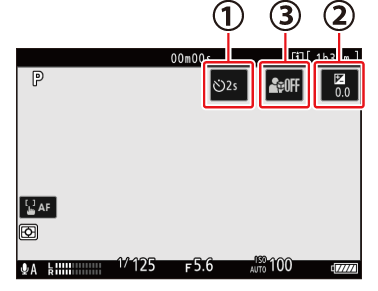
Self-Portrait Mode
Rotating the monitor to the self-portrait position triggers self-portrait mode.

- The monitor shows a mirror image of the view through the lens, but pictures recorded by the camera are not mirrored.
- In photo mode, tap the
self-timer icon (q) in the monitor to set the self-timer delay and select the number of shots to be taken when the timer expires. In video mode, set the self-timer delay for video recording. - You can also adjust exposure by tapping the exposure compensation icon (w).
- In video mode, enable the
product review mode (0 Product Review Mode) by tapping the product review mode icon (e). Use this mode to focus on nearby subjects when shooting product review videos. Tap the icon to cycle through options.
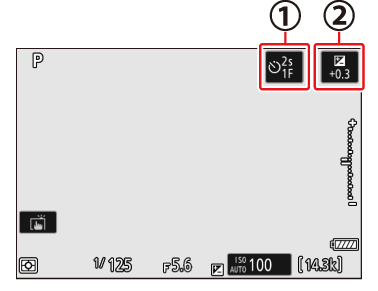
Photo mode
Video mode
- Press the shutter-release button halfway to focus. Press it the rest of the way down to take a photograph.
- You can also use the monitor for touch AF and take pictures via the touch shutter.
If the self-timer is enabled, press the shutter-release button all the way down or tap the monitor.
- The monitor will display a countdown timer and the shutter will release when it reaches zero.
- The camera will focus about a second before releasing the shutter (0 The Focus Position in Self-Timer).
- Pressing the video-record button will take a photograph in photo mode. In video mode, the camera starts recording video.
- Self-portrait mode ends when the monitor is moved to another position.
Note the following points when using the camera in self-portrait mode:
- Self-portrait mode disables all controls other than the power switch, the shutter-release and video-record buttons, the photo/video selector, and the mode dial.
- The standby timer will expire if no operations are performed for either one minute or the time selected for Custom Setting c3 [Power off delay] > [Standby timer], whichever is longer.
The following settings are fixed at the values below.
- [Release mode]: [Self-timer]
- [Focus mode] in the video recording menu: [Full-time AF]
- [Touch controls] > [Enable/disable touch controls]: [Enable]
- The viewfinder cannot be used.
The following features are disabled:
- [Long exposure NR]
- [Auto bracketing]
- [HDR overlay]
- [Exposure delay mode]
- You cannot change the dimensions of the focus areas when [Product review mode] is set to [On (customize focus area)] in self-portrait mode.
- Rotating the monitor to the self-portrait position will not trigger self-portrait mode when [OFF] is selected for [Self-portrait mode] in the setup menu (0 Self-portrait mode).