The Monitor
At default settings, the following indicators appear in the
Photo Mode
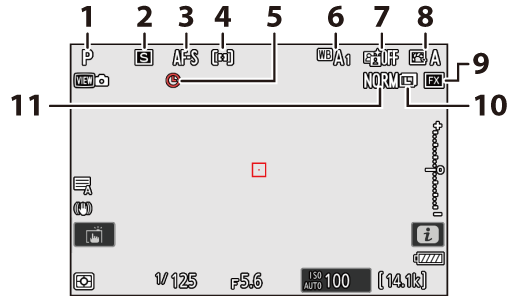
- Shooting mode (0 Choosing a Shooting Mode)
- Release mode (0 Release Mode)
- Focus mode (0 Focus Mode)
- AF-area mode (0 AF-Area Mode)
- g icon (0 The g Icon)
- White balance (0 White Balance)
- Active D-Lighting (0 Active D-Lighting)
- Picture Control (0 Picture Controls)
- Image area (0 Adjusting Image Area Settings)
- Image size (0 Choosing an Image Size)
- Image quality (0 Adjusting Image Quality)
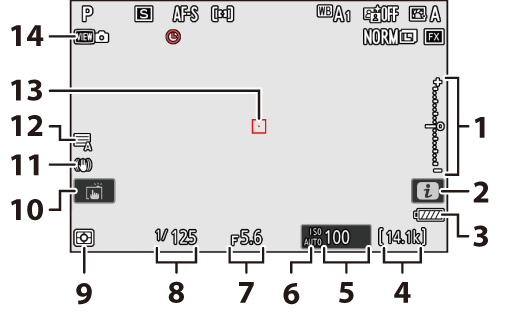
Exposure indicator
- Exposure (0 Exposure Indicators)
- Exposure compensation (0 Exposure Compensation)
- i icon (0 The i Button (i Menu), The i Button (Playback Mode))
- Battery indicator (0 Battery Level)
- Number of exposures remaining (0 Number of Exposures Remaining, Memory Card Capacity)
- ISO sensitivity (0 ISO Sensitivity)
ISO sensitivity indicator (0 ISO Sensitivity)
Auto ISO sensitivity indicator (0 Auto ISO Sensitivity Control)
- Aperture (0 A (Aperture-Priority Auto), M (Manual))
- Shutter speed (0 S (Shutter-Priority Auto), M (Manual))
- Metering (0 Metering)
- Touch shooting (0 The Touch Shutter)
- Vibration reduction indicator (0 Vibration Reduction)
- Shutter type (0 d6: Shutter Type)
- Focus point (0 Focus-Point Selection)
- View mode (photo live view; 0 d10: View Mode (Photo Lv))
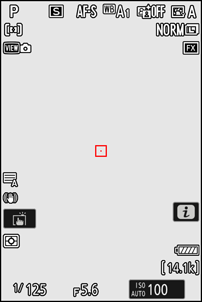
Using the Monitor with the Camera in “Tall” Orientation
In photo mode, the playback, i menu, and shooting displays rotate to match
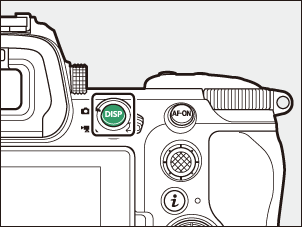
Press the
Video Mode

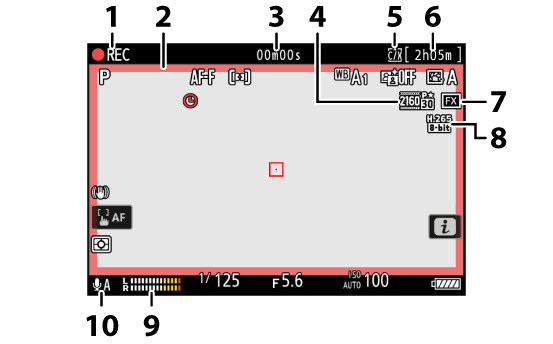
Recording indicator
“No video” indicator (0 The 0 Icon)
- Recording indicator (red border; 0 g18: Red REC Frame Indicator)
- Length of footage recorded
- Frame size and rate (0 Video Frame Size and Rate Options)
- Destination (0 Destination)
- Available recording time
- Image area (0 Video Image Area Options)
- Video file type (0 Video File Types)
- Sound level (0 Audio Input Sensitivity)
- Audio input sensitivity (0 Audio Input Sensitivity)
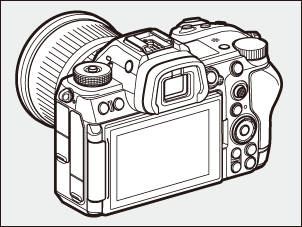
Angling the Monitor
The monitor can be angled and rotated.
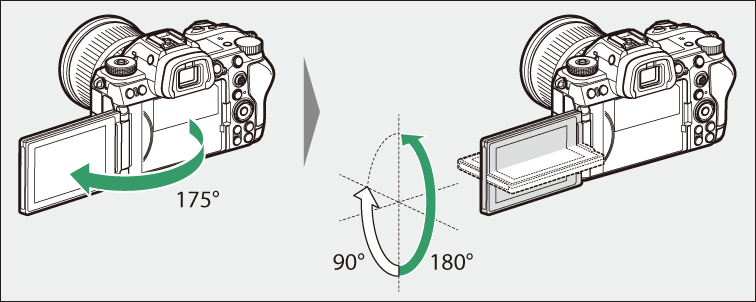
- Normal use:
The monitor is normally used in storage position with the screen facing outward.
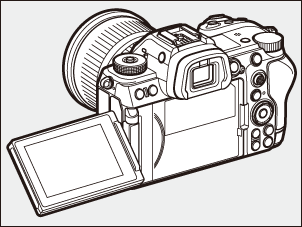
- Low-angle shots:
Tilt the monitor up to take shots with the camera held low.
- High-angle shots:
Tilt the monitor down to take shots with the camera held high.
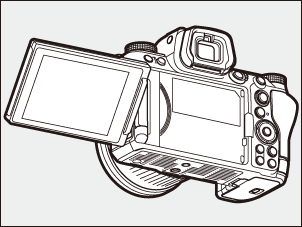
- Rotate the monitor gently within the limits of its hinges. Using excessive force could damage the camera or monitor.
- We recommend returning the monitor to the storage position with the screen facing inward to keep it free of dust and scratches when not in use.
- Do not lift or carry the camera by the monitor. Failure to observe this precaution could result in damage to the camera.