Pixel Shift Shooting
G button U C photo shooting menu
The camera automatically shoots a series of NEF (RAW) photos, changing the position of the image sensor with each one. The photos can be merged using Nikon’s NX Studio software to create a single high-resolution image.
| Option | Description |
|---|---|
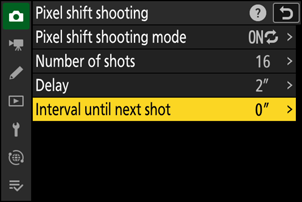
| [Pixel shift shooting mode] |
|
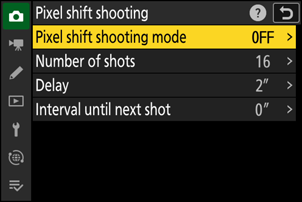
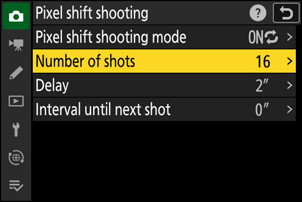
| [Number of shots] | Choose the number of photos taken each time the shutter-release button is pressed. A long series will require more time to record but will produce better-quality results when merged into a single image. |
| [Delay] | Choose the delay between the shutter-release button being pressed all the way down and the start of pixel shift photography. |
| [Interval until next shot] | Choose the interval between shots, in seconds.
|
| [Options] | Combine pixel shift shooting with other options.
|
| [Starting storage folder] | Highlight options and press J or 2 to select (M) or deselect (U).
|
Taking Photos Using Pixel Shift
- Pixel shift is intended for pictures of landscapes, buildings, and other static subjects shot with the camera on a tripod. The desired results may consequently not be achieved with moving subjects or shots taken without a tripod.
- To improve the quality of merged pixel shift images, we recommend using [Pixel mapping] in the setup menu before shooting.
- Take a test shot at current settings.
We recommend using one of the following power sources to prevent loss of power while shooting is in progress:
- A fully-charged battery
- An optional EH-8P AC adapter connected using the supplied USB cable (featuring Type-C connectors at both ends)
- An optional EP‑5B power connector with an EH‑5d, EH‑5c, or EH‑5b AC adapter
- A third-party portable charger
Be sure to download and install the latest version from the Nikon Download Center. Earlier versions may not support pixel shift merge.
Keep the camera steady, for example by using a tripod.
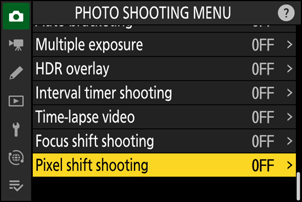
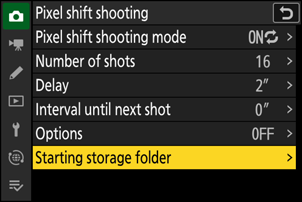
Highlight [Pixel shift shooting] in the photo shooting menu and press 2.
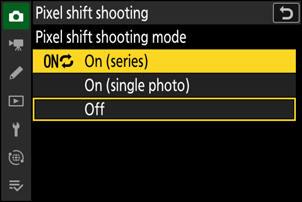
Select a [Pixel shift shooting mode].
- Highlight [Pixel shift shooting mode] and press 2.
Highlight [On (series)] or [On (single photo)] using 1 or 3 and press J.
- Image quality will be fixed at [RAW].
- The electronic shutter will be used regardless of the option selected for Custom Setting d6 [Shutter type].
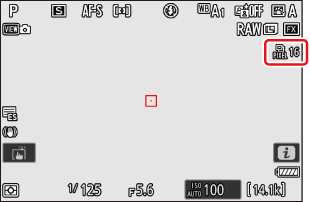
A Z icon will appear in the shooting display and the control panel.
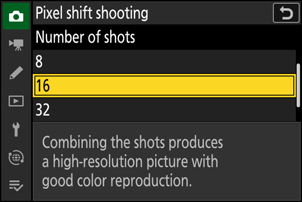
Choose the [Number of shots].
- Highlight [Number of shots] and press 2.
Choose the number of shots using 1 or 3 and press J.
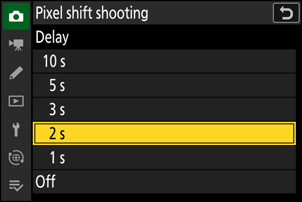
Choose a value for [Delay].
- Highlight [Delay] and press 2. Choose the delay between the shutter-release button being pressed all the way down and the start of pixel shift photography.
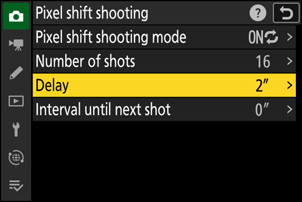
Choose a delay (in seconds) using 1 or 3 and press J.
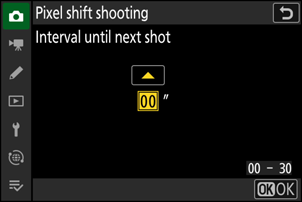
Choose a value for [Interval until next shot].
- Highlight [Interval until next shot] and press 2. Choose the interval between shots, in seconds.
- Choose an interval (in seconds) using 1 or 3 and press J.
- To ensure correct exposure when using a flash, choose an interval long enough for the flash to charge. A setting of [00] is recommended when shooting without a flash.
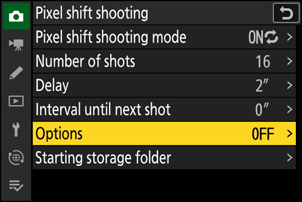
Select [Options].
- Highlight [Options] and press 2.
- To perform pixel shift without additional operations, proceed to Step 8.
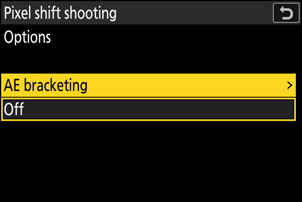
- Highlight [AE bracketing] and press J to select values for [Number of shots] and [Increment] for exposure bracketing for each pixel shift shooting sequence.
Select the [Starting storage folder].
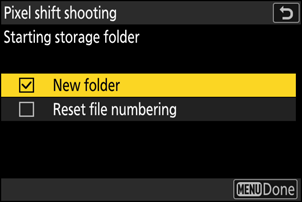
- Highlight [Starting storage folder] and press 2. You can select whether to automatically create a new folder for each new sequence.
- Highlight options and press J or 2 to select (M) or deselect (U).
Frame the photograph, focus, and shoot.
Press the shutter-release button all the way down; the camera will display the number of shots selected for [Number of shots] in the control panel and begin taking NEF (RAW) photos after the time selected for [Delay].
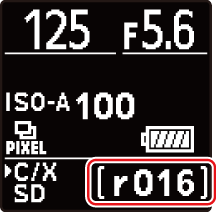
- Shooting may continue for some time depending on the value selected for [Number of shots].
- If [On (series)] is selected for [Pixel shift shooting mode], you can continue to take photographs using pixel shift until [Off] is selected.
- If [On (single photo)] is selected for [Pixel shift shooting mode], pixel shift will end automatically after a single series.
Merge the NEF (RAW) photos using NX Studio.
- See NX Studio’s online help for detailed instructions.
- The desired results may not be achieved if the subject moved or lighting changed during shooting.
Ending Pixel Shift
To end pixel-shift photography before all the photos in the current series have been taken, either press the shutter-release button halfway or press the J button between shots.
- In continuous release modes, only one photograph will be taken each time the shutter-release button is pressed all the way down.
- Changing camera settings while pixel shift is in progress may cause shooting to end.
- Shutter speeds of “Bulb” and “Time” are not available.
- The focus mode for autofocus is fixed at AF-S. If the option currently selected for AF-area mode is available only with AF-C, the AF-area mode will switch to single-point AF.
- Custom Setting d7 [Extended shutter speeds (M)] is fixed at [OFF].
Pixel shift cannot be combined with some camera features, including:
- video recording,
- the self-timer,
- high-speed frame capture +,
- long exposure noise reduction,
- photo flicker reduction,
- vibration reduction,
- bracketing,
- multiple exposures,
- HDR overlay,
- interval-timer photography,
- time-lapse video recording,
- focus shift,
- auto capture,
- exposure delay mode, and
- energy saving (photo mode).