Connecting to HDMI Devices
The camera can be connected to TVs, recorders, and other devices featuring HDMI connectors. Use the optional HDMI cable (HDMI Cables) or a third-party type C HDMI cable. These items must be purchased separately. Always turn the camera off before connecting or disconnecting an HDMI cable.
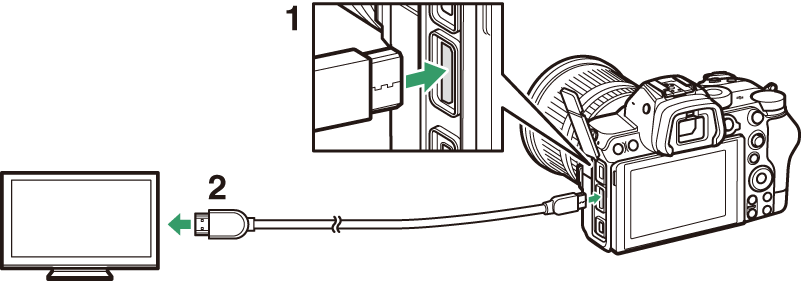
| 1 |
HDMI connector for connection to camera |
|---|
| 2 |
HDMI connector for connection to external device * |
|---|
-
Choose a cable with a connector that matches the connector on the HDMI device.
TVs
-
After tuning the TV to the HDMI input channel, turn the camera on and press the K button to view pictures on the television screen.
-
Audio playback volume can be adjusted using the controls on the TV. Camera controls cannot be used.
-
If the camera is paired with a smart device running the SnapBridge app, the device can be used to control playback remotely while the camera is connected to a TV. See the SnapBridge app online help for details.
Recorders
The camera can record video directly to connected HDMI recorders. Use the [] item in the setup menu to adjust settings for HDMI output. Some recorders will start
and stop recording in response to camera controls.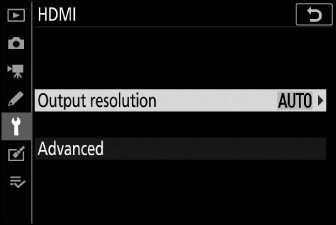
Output Resolution
Choose the format for images output to the HDMI device. If [] is selected, the camera will automatically choose the appropriate format.
Advanced
Adjust settings for connection to the HDMI device.
|
Option |
Description |
|---|---|
|
[] |
The RGB video signal input range varies with the HDMI device. [], which matches the output range to the HDMI device, is recommended in most situations. If the camera is unable to determine the correct RGB video signal output range for the HDMI device, you can choose from the following options:
|
|
[] |
Choosing [] allows camera controls to be used to start and stop recording when the camera is connected via HDMI to a third-party recorder that supports the Atomos Open Protocol.
|
HDMI output is not available when the camera is in movie mode and connected to a computer running Camera Control Pro 2.
Movies recorded at a frame size of 3840 × 2160 display at a frame size of 1920 × 1080 during zoom.