Connecting to Smart Devices
- The SnapBridge App
- What SnapBridge Can Do for You
- Wireless Connections
- Connecting via Wi-Fi (Wi-Fi Mode)
- Connecting via Bluetooth
The SnapBridge App
Use the SnapBridge app for wireless connections between the camera and your smartphone
or tablet (“smart device”).![]()
-
SnapBridge apps can be downloaded from the Apple App Store® or on Google Play™.


-
Visit the Nikon website for the latest SnapBridge news.
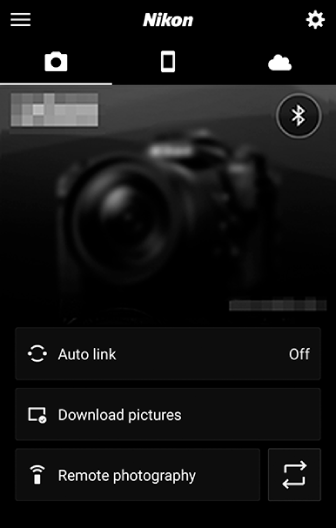
What SnapBridge Can Do for You
The tasks that can be performed using the SnapBridge app are outlined below. For details, see the SnapBridge app online help:
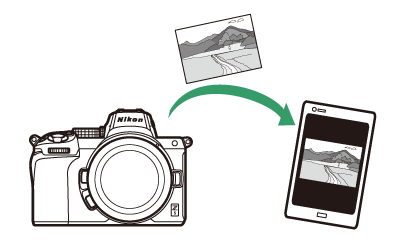
Downloading Pictures from the Camera
Download existing pictures to your smart device. Pictures can be uploaded as they are taken.
Remote Photography
Control the camera and take pictures from the smart device.
Wireless Connections
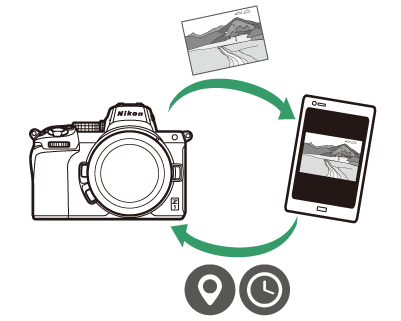
Use the SnapBridge app for wireless connections between the camera and your smart device. You can connect via either Wi-Fi (Connecting via Wi-Fi (Wi-Fi Mode)) or Bluetooth (Connecting via Bluetooth). Connecting using the SnapBridge app allows you to set the camera clock and update location data using information provided by the smart device. Connecting using Bluetooth allows pictures to be uploaded automatically as they are taken.
|
Wi-Fi |
Bluetooth |
Connecting via Wi-Fi (Wi-Fi Mode)
-
Enable Wi-Fi on the smart device. For details, see the documentation provided with the device.
-
Ensure that the batteries in the camera and smart device are fully charged to prevent the devices turning off unexpectedly.
-
Check that there is space available on the camera memory card.
-
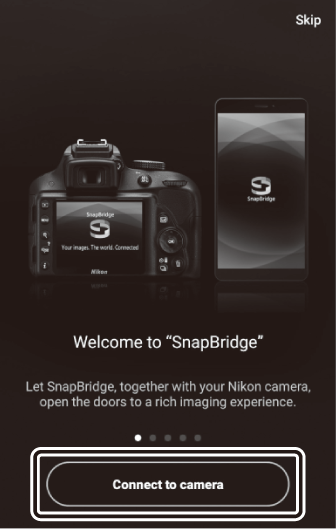
Smart device: Launch the SnapBridge app.
-
If this is the first time you have launched the app, tap [] and proceed to Step 2.
-
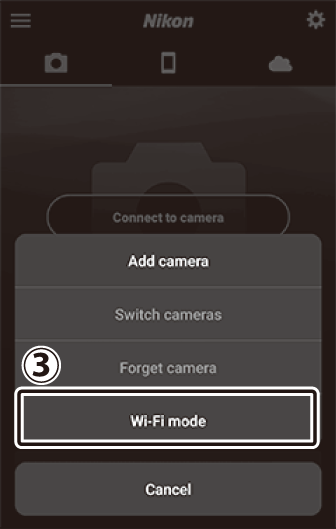
If you have launched the app before, open the
 tab and select
  > [] before proceeding to Step 3.
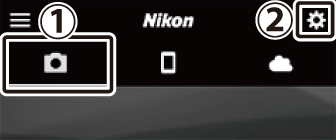
-
-
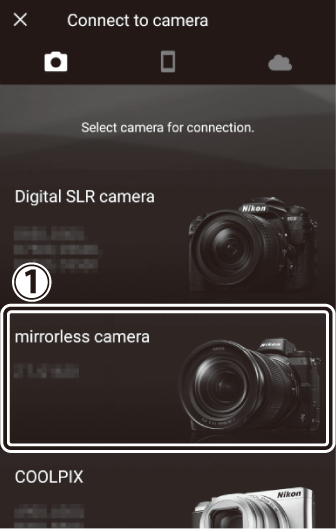
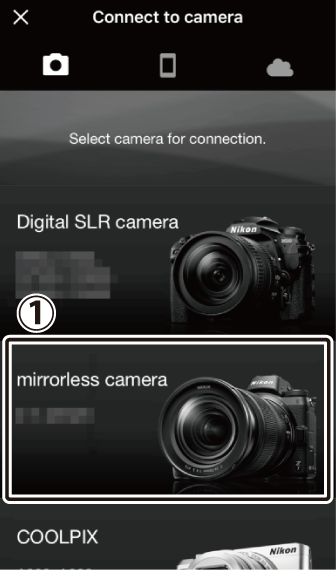
Smart device: When prompted to choose the camera type, tap [] and then tap [].
-
Camera/smart device: Turn the camera on when prompted.
Do not tap [] until you have completed the next step.
-
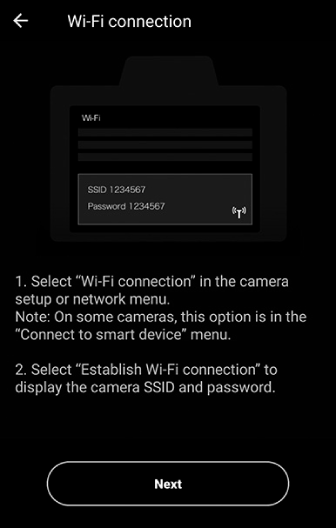
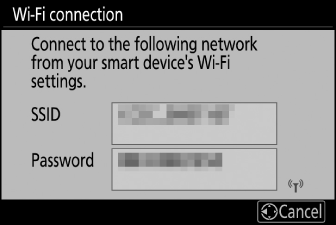
Camera: Select [] > [] in the setup menu, then highlight [] and press J.
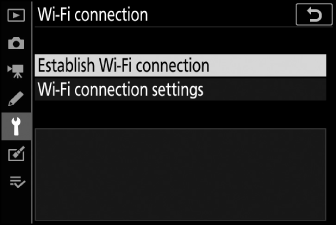
The camera SSID and password will be displayed.
 Enabling Wi-Fi
You can also enable Wi-Fi by selecting [] > [] in the i menu for shooting mode.

-
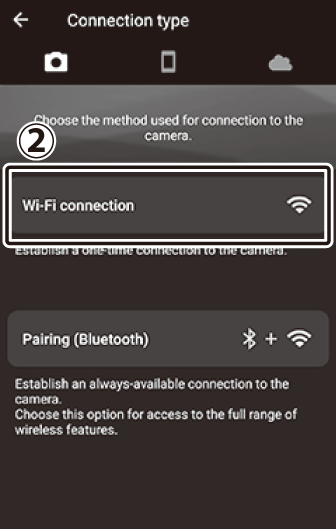
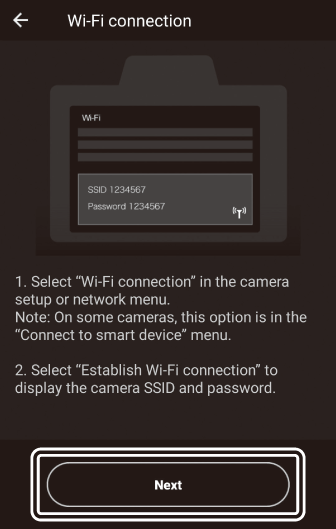
Smart device: Return to the smart device and tap [].
-
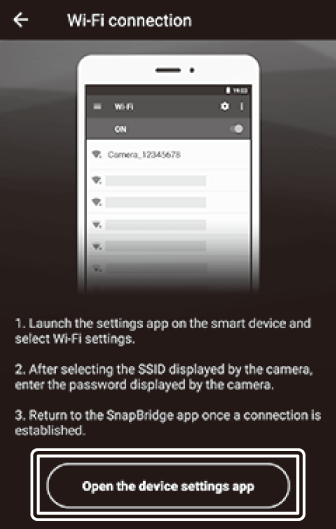
Smart device: After reading the instructions displayed by the smart device, tap [].
-
Android devices: Wi-Fi settings will be displayed.
-
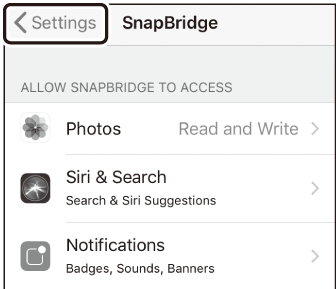
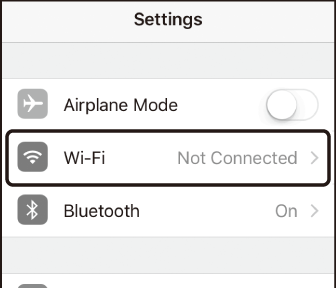
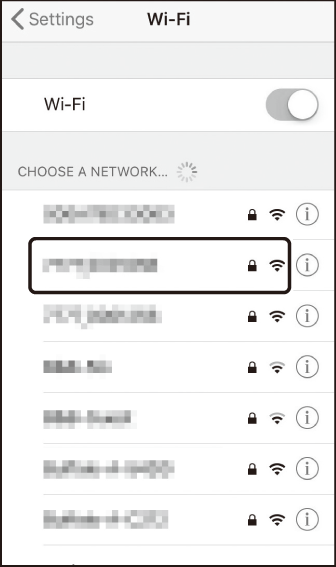
iOS devices: The “Settings” app will launch. Tap [] to open [], then scroll up and tap [], which you’ll find near the top of the settings list.

-
-
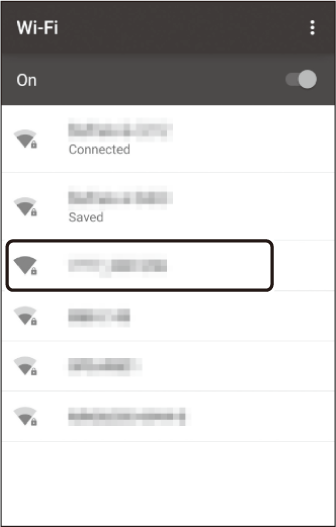
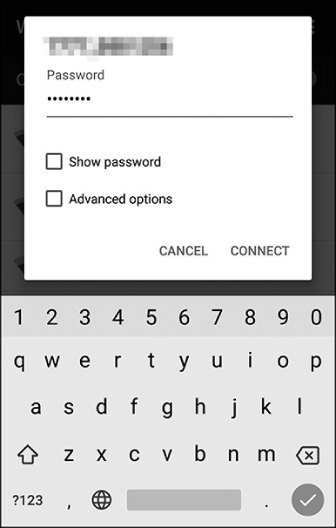
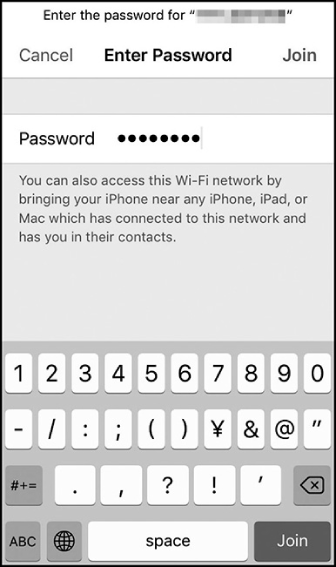
Smart device: Enter the SSID and password displayed by the camera in Step 4.
-
The prompt displayed by the device varies with model and operating system.
-
Android device:
-
iOS device:
-
-
You will not be required to enter the password when next you connect to the camera.
-
-
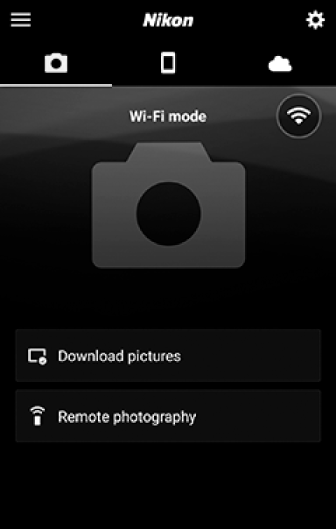
Smart device: Return to the SnapBridge app.
-
Once a Wi-Fi connection is established, Wi-Fi mode options will be displayed.
-
See online help for information on using the SnapBridge app.
Terminating Wi-Fi ModeTo end the Wi-Fi connection, tap
 . When the icon changes to
  , tap and select [].
-
Connecting via Bluetooth
Before connecting via Bluetooth for the first time, you will need to pair the camera and smart device as described below. The procedure for iOS differs slightly from that for Android devices.
-
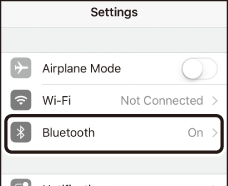
Enable Bluetooth on the smart device. For details, see the documentation provided with the device.
-
Ensure that the batteries in the camera and smart device are fully charged to prevent the devices turning off unexpectedly.
-
Check that there is space available on the camera memory card.
Connecting to an Android Device for the First Time: Pairing
For information on connecting to iOS devices, see “Connecting to an iOS Device for the First Time: Pairing” (Connecting to an iOS Device for the First Time: Pairing).
-
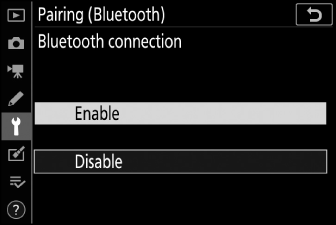
Camera: Select [] > [] in the setup menu, then highlight [] and press J.
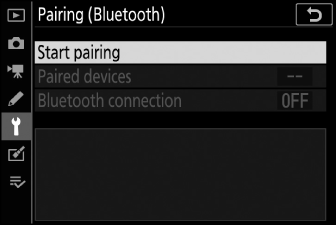
The camera name will be displayed in the monitor.
-
Android device: Launch the SnapBridge app.
-
If this is the first time you have launched the app, tap [].
-
If you have launched the app before, open the
tab and tap [].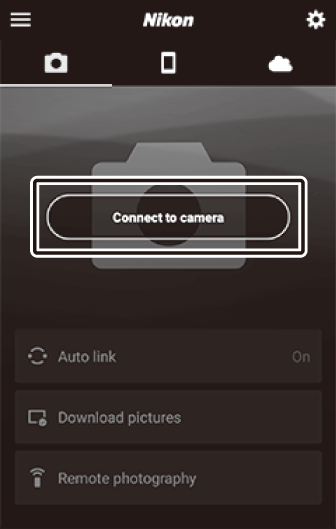
-
-
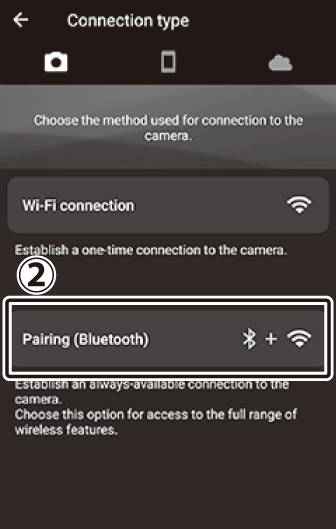
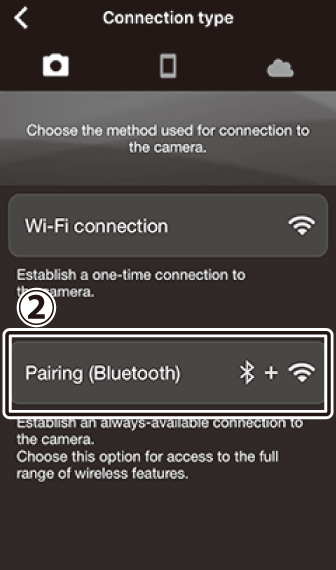
Android device: Tap [] and then tap [].
-
This step can be omitted once the devices have been paired.
-
You must grant access to location data when using Bluetooth. If prompted to provide access to location data, follow the on-screen instructions.
-
-
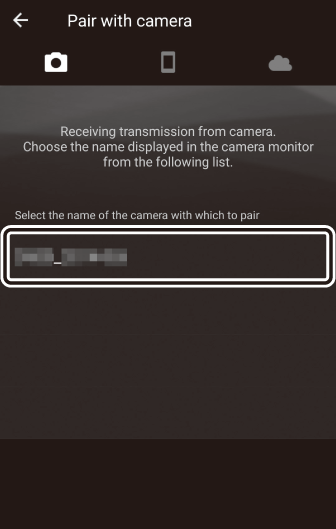
Android device: Tap the camera name.
-
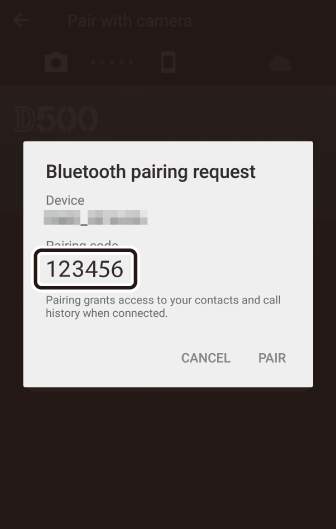
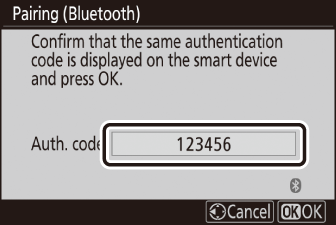
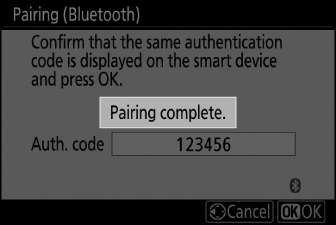
Camera/Android device: Confirm that the camera and Android device display the same authentication code.
The authentication code is shown circled in the illustrations.
-
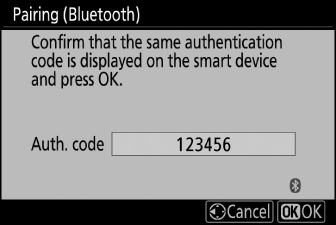
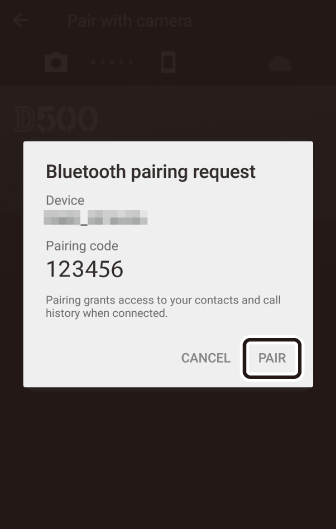
Camera/Android device: Initiate pairing.
-
Camera: Press J.
-
Android device: Tap the button indicated in the illustration. The button in the illustration is labeled [], but the label may differ depending on the type of device and version of Android you are using.
 Pairing Error
If you wait too long between pressing the button on the camera and tapping the button on the Android device, the device will display an error message and pairing will fail. Tap [] and return to Step 2.
-
-
Camera/Android device: Follow the on-screen instructions to complete pairing.
-
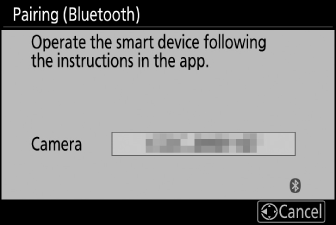
Camera: Press J. The camera will display the message shown in the illustration when pairing is complete.
-
Android device: Pairing is complete. Tap [] to exit to the
tab.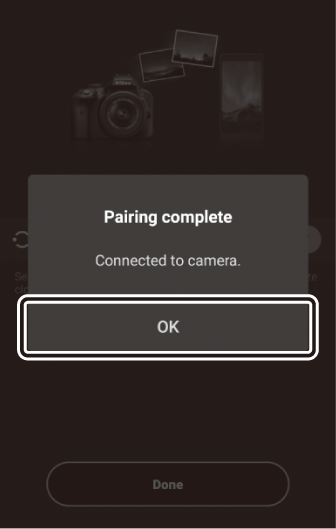

Pairing for the First Time-
The first time you pair the Android device with a camera after installing the SnapBridge app, you will be prompted to select auto link (auto upload and auto clock and location synchronization) options.
-
This prompt will not be displayed a second time. Auto link settings can however be accessed at any time using [] in the
tab.
Disabling BluetoothTo disable Bluetooth, select [] for [] > [] > [] in the camera setup menu.
-
Connecting to an iOS Device for the First Time: Pairing
For information on connecting to Android devices, see “Connecting to an Android Device for the First Time: Pairing” (Connecting to an Android Device for the First Time: Pairing).
-
Camera: Select [] > [] in the setup menu, then highlight [] and press J.
The camera name will be displayed in the monitor.
-
iOS device: Launch the SnapBridge app.
-
If this is the first time you have launched the app, tap [].
-
If you have launched the app before, open the
tab and tap [].
-
-
iOS device: Tap [] and then tap [].
-
This step can be omitted once the devices have been paired.
-
You must grant access to location data when using Bluetooth. If prompted to provide access to location data, follow the on-screen instructions.
-
-
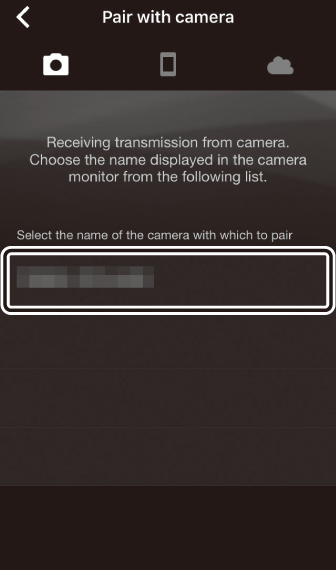
iOS device: Tap the camera name.
-
iOS device: Read the pairing instructions.
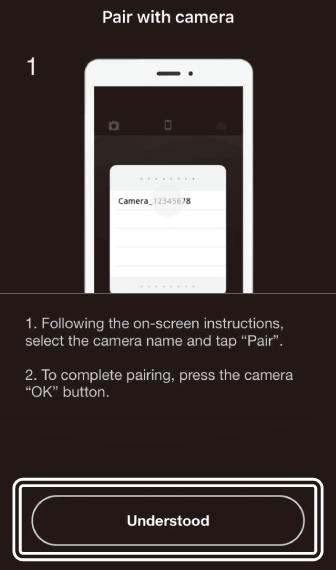
Pairing instructions will be displayed. Read the instructions carefully and tap [].
-
iOS device: Tap the camera name again.
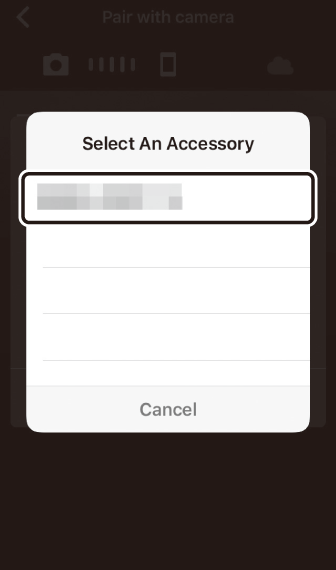
The iOS device prompt you to select an accessory. Tap the camera name again.
-
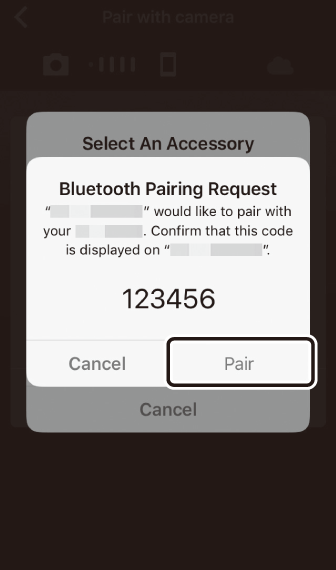
Camera/iOS device: Initiate pairing.
-
Camera: Press J.
-
iOS device: Tap the button indicated in the illustration. The button in the illustration is labeled [], but the label may differ depending on the version of iOS you are using.
 Pairing Error
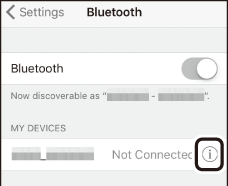
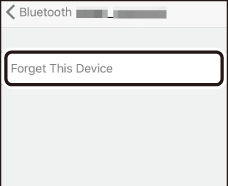
If you wait too long between pressing the button on the camera and tapping the button on the iOS device, the device will display an error message and pairing will fail. Dismiss the SnapBridge app and check that it is not running in the background, then open the iOS “Settings” app and request iOS to “forget” the camera before returning to Step 1. “Forget” the camera using the iOS “Settings” app.
-
-
Camera/iOS device: Follow the on-screen instructions to complete pairing.
-
Camera: Press J. The camera will display the message shown in the illustration when pairing is complete.
-
iOS device: Pairing is complete. Tap [] to exit to the
tab.
Pairing for the First Time-
The first time you pair the iOS device with a camera after installing the SnapBridge app, you will be prompted to select auto link (auto upload and auto clock and location synchronization) options.
-
This prompt will not be displayed a second time. Auto link settings can however be accessed at any time using [] in the
tab.
Disabling BluetoothTo disable Bluetooth, select [] for [] > [] > [] in the camera setup menu.
-
Connecting to a Paired Device
Connecting to a smart device that has already been paired with the camera is quick and easy.
-
Camera: In the setup menu, select [] > [] > [], then highlight [] and press J.
-
Smart device: Launch the SnapBridge app.
A Bluetooth connection will be established automatically.