Choose a Language and Set the Clock
The language option in the setup menu is automatically highlighted the first time menus are displayed. Choose a language and set the camera clock.
-
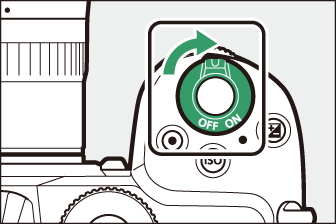
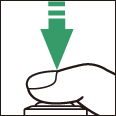
Turn the camera on.
-
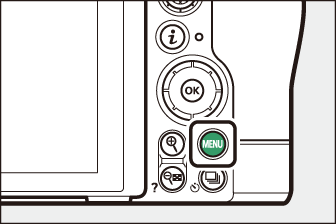
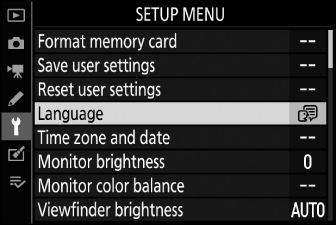
Highlight [] in the setup menu and press 2.
-
The [] item is automatically highlighted in the setup menu the first time the G button is pressed after purchase.
-
For information on using the menus, see “Using the Menus” (Using the Menus).
-
-
Select a language.
Press 1 or 3 to highlight the desired language and press J (the languages available vary with the country or region in which the camera was originally purchased).
-
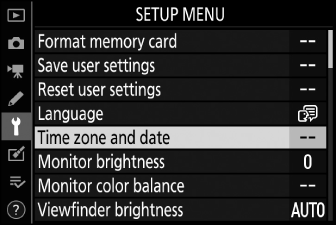
Highlight [] and press 2.
-
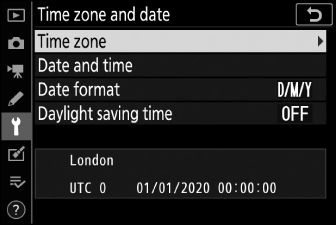
Choose a time zone.
-
Select [] in the [] display.
-
Highlight a time zone in the [] display and press J.
-
The display shows a time zone map listing the selected cities in the chosen zone and the difference between the time in the chosen zone and UTC.
-
-
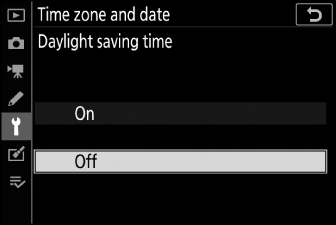
Turn daylight saving time on or off.
-
Select [] in the [] display.
-
Highlight [] (daylight saving time on) or [] (daylight saving time off) and press J.
-
Selecting [] advances the clock one hour; to undo the effect, select [].
-
-
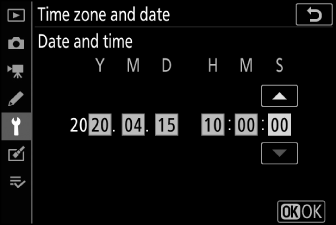
Set the clock.
-
Select [] in the [] display.
-
Press J after using the multi selector to set the clock to the date and time in the selected time zone (note that the camera uses a 24-hour clock).
-
-
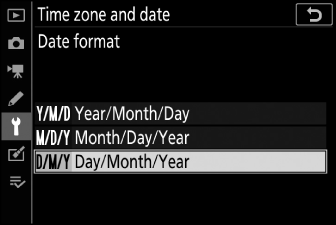
Choose a date format.
-
Select [] in the [] display.
-
Highlight the desired date (year, month, and day) display order and press J.
-
-
Exit the menus.
Lightly press the shutter-release button halfway to exit to shooting mode.
A flashing t icon in the shooting display indicates that the camera clock has been reset. The date and time recorded with new photographs will not be correct; use the [] > [] option in the setup menu to set the clock to the correct time and date. The camera clock is powered by an independent clock battery. The clock battery charges when the main battery is inserted in the camera. It takes about 2 days to charge. Once charged, it will power the clock for about a month.
Use the SnapBridge app to synchronize the camera clock with the clock on a smartphone or tablet (smart device). See SnapBridge online help for details.