Camera Controls
- Viewfinder
- The M (Monitor Mode) Button
- The Mode Dial
- The Command Dials
- The S Button
- The E (Exposure Compensation) Button
- Touch Controls
- The DISP Button
- The X and W (Q) Buttons
- The Sub-Selector
- The AF‑ON Button
- The G Button
- The i Button (the i Menu)
- The Fn1 and Fn2 Buttons
Viewfinder
-
Placing your eye to the viewfinder activates the eye sensor, switching the display from the monitor to the viewfinder. Note that the eye sensor will also respond to other objects, such as your fingers.

-
The viewfinder can be used for menus and playback if desired.
-
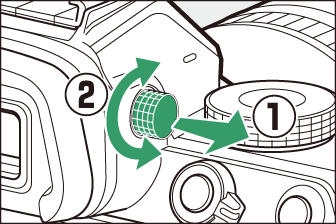
The viewfinder can be focused by lifting and rotating the diopter adjustment control.
-
Be careful not to put your fingers or fingernails in your eye.
-
After adjusting diopter, push the diopter adjustment control back into its original position.
When using the viewfinder for extended periods, you can select [] for Custom Setting d7 [] to ensure that viewfinder brightness and hue are adjusted for ease of viewing.
The M (Monitor Mode) Button
Press the M button to cycle between viewfinder and monitor displays.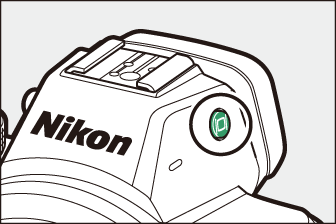
Press the M button to cycle through the displays as follows.
|
[]: The camera automatically switches between the viewfinder and monitor displays based
on information from the eye sensor. |
|
|
|
[]: The monitor remains blank. The viewfinder is used for shooting, menus, and playback. |
|
|
|
[]: The monitor is used for shooting, menus, and playback. The viewfinder display will
remain blank even if you put your eye to the viewfinder. |
|
|
|
[]: The camera functions in a manner similar to existing digital SLR cameras.
|

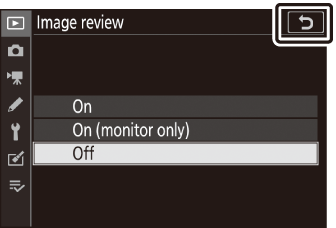
You can limit the choice of monitor modes available using the [] item in the setup menu.
The Mode Dial
Rotate the mode dial to choose a shooting mode.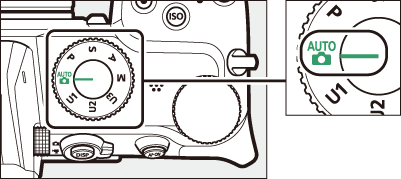
|
Mode |
Description |
|
|---|---|---|
|
b |
Auto |
A simple, “point-and-shoot” mode that leaves the camera in charge of settings (Taking Photographs (b Mode), Shooting Movies (b Mode)). |
|
P |
Programmed auto |
The camera sets shutter speed and aperture for optimal exposure. |
|
S |
Shutter-priority auto |
You choose the shutter speed; the camera selects the aperture for best results. |
|
A |
Aperture-priority auto |
You choose the aperture; the camera selects the shutter speed for best results. |
|
M |
Manual |
You control both shutter speed and aperture. |
|
U1 |
User settings modes |
Assign frequently-used settings to these positions for quick recall. |
The Command Dials
Rotate the command dials to choose settings for shutter speed, aperture, or the functions
assigned to other camera controls.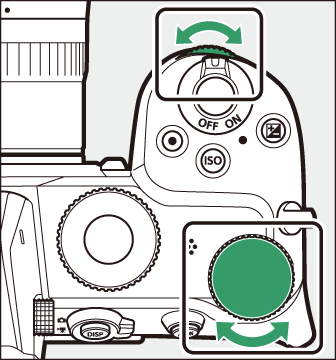
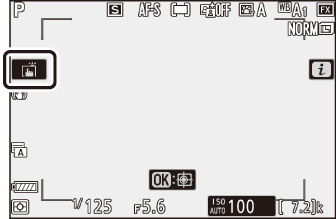
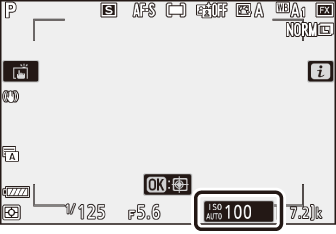
The S Button
Adjust the camera’s sensitivity to light (ISO sensitivity) in accord with lighting
conditions.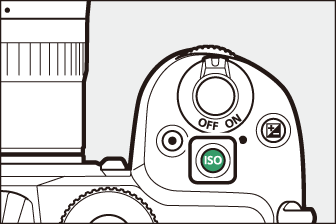
Photo Mode
ISO sensitivity can be adjusted by holding the S button and rotating the main command dial.
-
In modes P, S, A, and M, you can hold the S button and rotate the sub-command dial to choose from “ISO AUTO” (auto ISO sensitivity control enabled) or “ISO” (auto ISO sensitivity control disabled).
-
In b mode, “ISO AUTO” (auto ISO sensitivity control enabled) is selected by default. Hold the S button and rotate the main command dial to cycle between “ISO AUTO” and “ISO” (auto ISO sensitivity control disabled).
Movie Mode
ISO sensitivity can be adjusted by holding the S button and rotating the main command dial. ISO sensitivity for movie recording can be adjusted in mode M only.
-
The value selected for [] > [] applies when [] is selected for [] > [].
-
You can choose between “ISO AUTO” (auto ISO sensitivity control enabled) and “ISO” (auto ISO sensitivity control disabled) by holding the S button and rotating the sub-command dial.
The E (Exposure Compensation) Button
Alter exposure from the value suggested by the camera. Exposure compensation can be used to make pictures brighter or darker.
|
−1 EV |
No exposure compensation |
+1 EV |

-
Exposure compensation can be adjusted by holding the E button and rotating either command dial.

-
Higher values make the subject brighter, lower values darker.
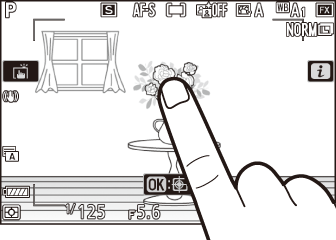
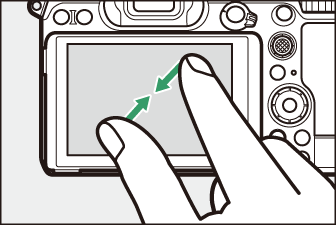
Touch Controls
The touch-sensitive monitor offers a variety of controls that can be operated by touching
the display with your fingers. During viewfinder photography, touch controls are disabled
and cannot be used for focus or the like.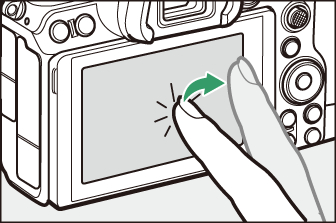
Focusing and Releasing the Shutter
-
Touch the monitor to focus on the selected point (touch AF).
-
In photo mode, the shutter will be released when you lift your finger from the display (touch shutter).
-
Touch shutter/AF settings can be adjusted by tapping the W icon (The Touch Shutter).
Adjusting Settings
-
Tap highlighted settings in the display.
-
You can then choose the desired option by tapping icons or sliders.
-
Tap Z or press J to select the chosen option and return to the previous display.
Playback
-
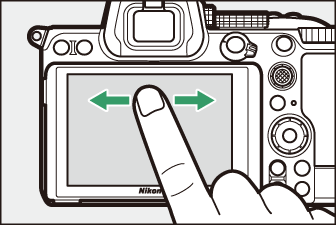
Flick left or right to view other pictures during full-frame playback.
-
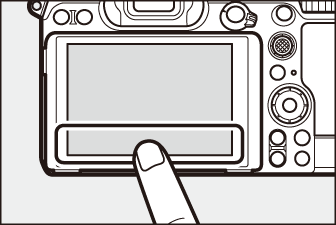
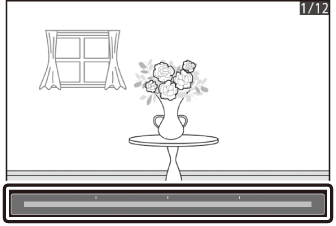
In full-frame playback, touching the bottom of the display brings up a frame-advance bar. Slide your finger left or right over the bar to scroll rapidly to other pictures.
-
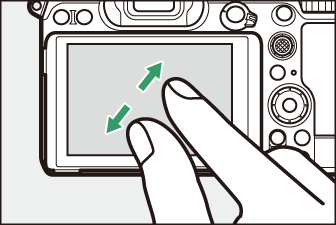
To zoom in on a picture displayed during full-frame playback, use a stretch gesture or give the display two quick taps. You can adjust the zoom ratio using stretch gestures to zoom in and pinch gestures to zoom out.
-
Use slide gestures to view other parts of the image during zoom.
-
Giving the display two quick taps while zoom is in effect cancels zoom.
-
To “zoom out” to a thumbnail view, use a pinch gesture during full-frame playback. Use pinch and stretch to choose the number of images displayed from 4, 9, and 72 frames.
-
Using a pinch gesture when 72 frames are displayed selects calendar playback. Use a stretch gesture to return to the 72-frame display.
Viewing Movies
-
Movies are indicated by a 1 icon; to start playback, tap the on-screen guide.
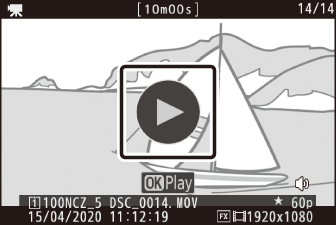
-
Tap the display to pause. Tap again to resume.
-
Tap Z to exit to full-frame playback.
The i Menu
-
Tap the i icon to display the i menu during shooting (The i Button (the i Menu), The i Menu).
-
Tap items to view and change options.
Text Entry
-
When a keyboard is displayed, you can enter text by tapping the keys.
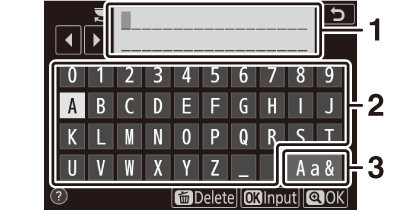
1 Text display area
2 Keyboard area
3 Keyboard selection
-
To position the cursor, tap e or f or tap directly in the text display area.
-
To cycle through the upper- and lower-case and symbol keyboards, tap the keyboard selection button.
Navigating the Menus
-
Slide up or down to scroll.
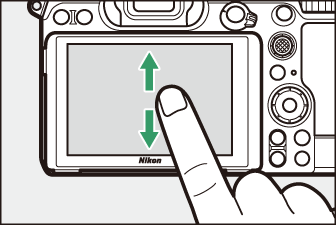
-
Tap a menu icon to choose a menu.
-
Tap menu items to display options. You can then choose the desired option by tapping icons or sliders.
-
To exit without changing settings, tap Z.
-
The touch screen responds to static electricity. It may not respond when touched with fingernails or gloved hands.
-
Do not touch the screen with sharp objects.
-
Do not use excessive force.
-
The screen may not respond when covered with third-party protective films.
-
The screen may not respond when touched simultaneously in multiple locations.
Touch controls can be enabled or disabled using the [] item in the setup menu.
The DISP Button
Use the DISP button to cycle through the following displays:
Photo Mode
| 1 |
Indicators on |
|---|---|
| 2 |
Simplified display |
| 3 |
Histogram 1, 2 |
| 4 |
Virtual horizon |
|---|---|
| 5 |
Information display (Photo Mode) |
| 6 |
Flash info (Flash Info for On-Camera Units, Flash Info for Remote Units)3 |
-
Displayed when [] is selected for Custom Setting d7 [].
-
Not displayed if [] is selected for [] during multiple exposure photography.
-
Displayed when an optional SB‑5000, SB‑500, SB‑400, or SB‑300 flash unit is mounted on the accessory shoe or a WR‑R10 wireless remote controller commands a flash unit via radio flash control.
The DISP button can also be used to choose the information displayed in the viewfinder. Note, however, that the information display and flash info do not appear in the viewfinder.
Movie Mode
| 1 |
Indicators on |
|---|---|
| 2 |
Simplified display |
| 3 |
Histogram |
|---|---|
| 4 |
Virtual horizon |
The X and W (Q) Buttons
Zoom the display in the monitor in or out during shooting or playback.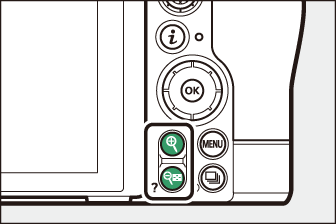
Shooting
Press X to zoom in on the view through the lens during shooting. Press X to increase the zoom ratio, W (Q) to zoom out.
Playback
Press X to zoom in on pictures during full-frame playback. Press X to increase the zoom ratio, W (Q) to zoom out. Pressing W (Q) when the picture is displayed full frame “zooms out” to the thumbnail list. Pressing W (Q) when 72 frames are displayed selects calendar playback.
The Sub-Selector
Press the sub-selector up, down, left, or right to select the focus point. Press and
hold the center of the selector to lock focus and exposure (The Sub-Selector).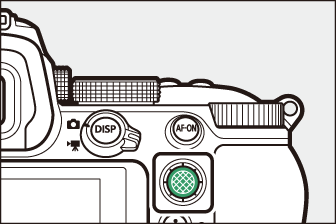
The AF‑ON Button
The AF‑ON button can be used for focus in autofocus mode.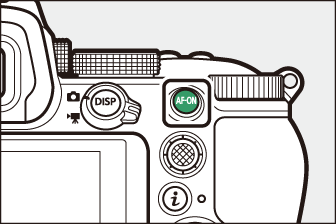
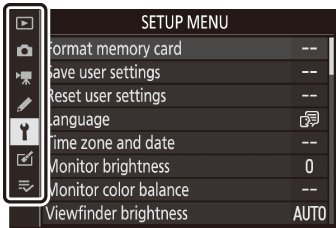
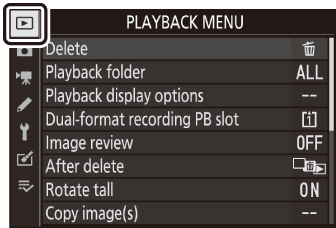
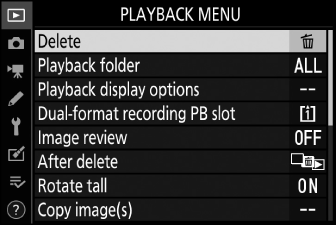
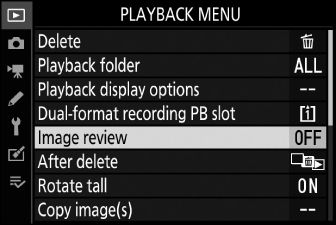
The G Button
Press the G button to view the menus.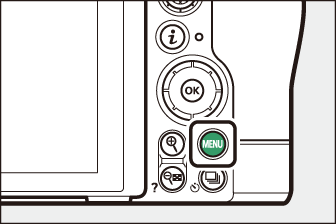
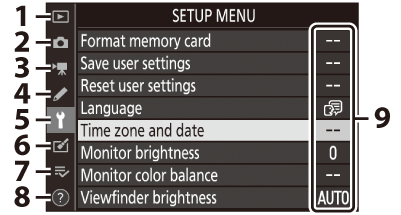
| 1 | |
|---|---|
| 2 | |
| 3 | |
| 4 | |
| 5 |
| 6 | |
|---|---|
| 7 |
O []/ |
| 8 |
The d Help icon (The d (Help) Icon) |
| 9 |
Current settings |
-
You can choose the menu displayed. The default is [].
Using the Menus
You can navigate the menus using the multi selector and J button.

| 1 |
Move cursor up |
|---|---|
| 2 |
Select highlighted item |
| 3 |
Display sub-menu, select highlighted item, or move cursor right |
| 4 |
Move cursor down |
|---|---|
| 5 |
Cancel and return to previous menu, or move cursor left |
-
Highlight the icon for the current menu.
Press 4 to place the cursor in the menu-selection area.

-
Select a menu.
Press 1 or 3 to select the desired menu.

-
Position the cursor in the selected menu.
Press 2 to position the cursor in the selected menu.

-
Highlight a menu item.
Press 1 or 3 to highlight a menu item.
-
Display options.
Press 2 to display options for the selected menu item.
-
Highlight an option.
Press 1 or 3 to highlight an option.
-
Select the highlighted option.

-
Press J to select the highlighted option.
-
To exit without making a selection, press the G button.
-
To exit the menus and return to shooting mode, press the shutter-release button halfway.
-
Some items and menu options may be unavailable depending on the mode and camera status. Unavailable items are displayed in gray.
-
Where available, a description of the currently-selected item can be viewed by pressing the W (Q) button.
-
Press 1 or 3 to scroll.
-
Press W (Q) again to return to the menus.
You can also navigate the menus using touch controls (Touch Controls).
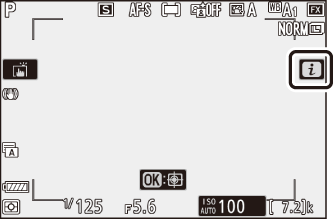
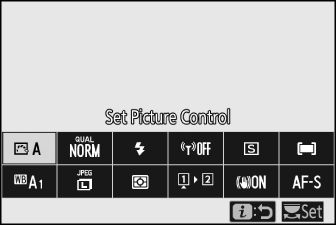
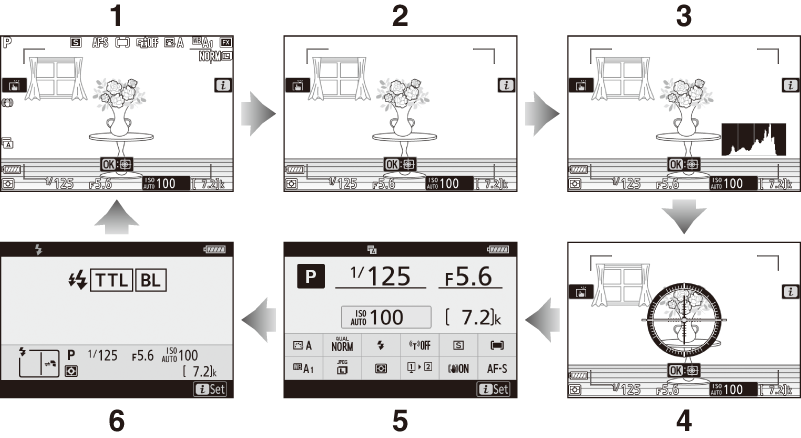
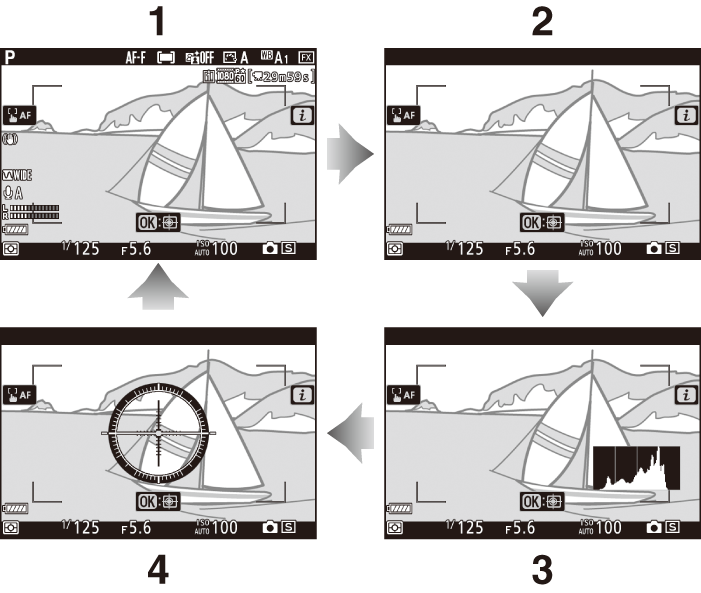
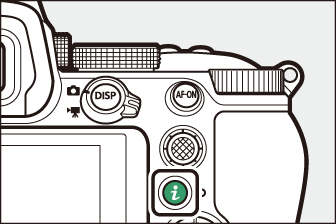
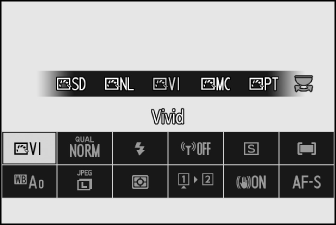
The i Button (the i Menu)
For quick access to frequently-used settings, press the i button or tap the i icon to view the i menu.
|
|
|
-
Different menus are displayed during photo mode and movie mode.
-
Options can be viewed by tapping items in the display or by highlighting items and pressing J; selections can then be made using the multi selector.
-
Items for which the camera displays an on-screen guide can be adjusted by highlighting them in the i menu and rotating a command dial. In some cases, adjustments can be made using both the main and sub-command dials.
Pressing the i button during playback displays a context-sensitive i menu of frequently-used playback options.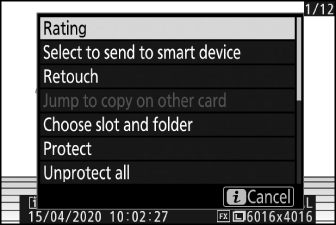
Customizing the i Menu
The items displayed in the photo-mode i menu can be chosen using Custom Setting f1 or g1 [].
-
Highlight Custom Setting f1 or g1 [] and press J.

See “The G Button” (The G Button) for information on using the menus.
-
Highlight the position you want to change and press J.

A list of the items available for the selected position will be displayed.
-
Highlight the desired item and press J.
-
The item will be assigned to the selected position and the options shown in Step 2 will be displayed.
-
Repeat Steps 2 and 3 as desired.
-
-
Press the G button.
Changes will be saved and the Custom Settings menu will be displayed.
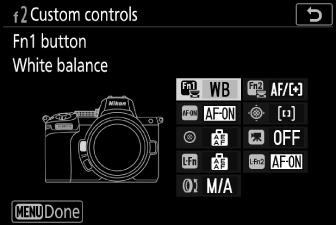
The Fn1 and Fn2 Buttons
Use the Fn1 or Fn2 button for quick access to selected settings.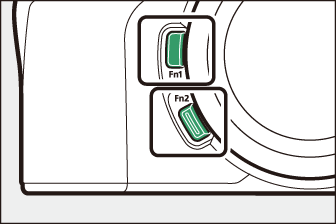
-
By default, the Fn1 button is assigned white balance (White Balance) and the Fn2 button focus- and AF-area–mode selection (Focus).
-
The assigned setting can be adjusted by holding the Fn1 or Fn2 button and rotating the command dials. In some cases, adjustments can be made using both the main and sub-command dials.
Choosing Roles for the Fn1 and Fn2 Buttons
The roles played by the Fn1 and Fn2 buttons can be selected using Custom Setting f2 or g2 [] > [] and [].
-
Highlight Custom Setting f2 or g2 [] and press J.
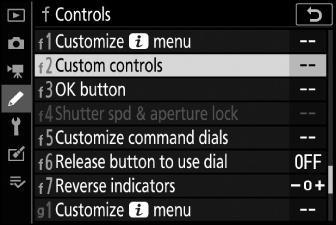
See “The G Button” (The G Button) for information on using the menus.
-
Highlight the option for the desired button and press J.
A list of the items available for the selected button will be displayed.
-
Highlight the desired item and press J.
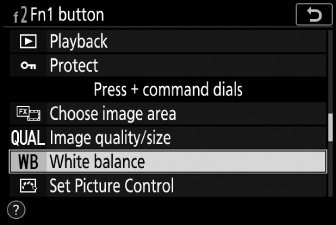
-
The item will be assigned to the selected button and the options shown in Step 2 will be displayed.
-
Repeat Steps 2 and 3 to assign a role to the remaining button.
-
-
Press the G button.
Changes will be saved and the Custom Settings menu will be displayed.