Still Images

| 1 |
Set Picture Control (Set Picture Control) |
|---|---|
| 2 |
White balance (White Balance) |
| 3 |
Image quality (Image Quality) |
| 4 |
Image size (Image Size) |
| 5 |
Flash mode (Flash Mode) |
| 6 |
Metering (Metering) |
| 7 |
Wi-Fi connection (Wi-Fi Connection) |
|---|---|
| 8 |
View memory card info (View Memory Card Info) |
| 9 |
Release mode (Release Mode) |
| 10 |
Vibration reduction (Vibration Reduction) |
| 11 |
AF-area mode (AF-Area Mode) |
| 12 |
Focus mode (Focus Mode) |
- Set Picture Control
- White Balance
- Image Quality
- Image Size
- Flash Mode
- Metering
- Wi-Fi Connection
- View Memory Card Info
- Release Mode
- Vibration Reduction
- AF-Area Mode
- Focus Mode
Set Picture Control
Choose image processing (“Picture Control”) options for new photos according to the scene or your creative intent.
|
Option |
Description |
|
|---|---|---|
|
n |
[] |
|
|
Q |
[] |
Standard processing for balanced results. Recommended for most situations. |
|
R |
[] |
Minimal processing for natural results. Choose for photographs that will later be processed or retouched. |
|
S |
[] |
Pictures are enhanced for a vivid, photoprint effect. Choose for photographs that emphasize primary colors. |
|
T |
[] |
Take monochrome photographs. |
|
o |
[] |
Smooth complexions for natural-looking portraits. |
|
p |
[] |
Shoot vibrant landscapes and cityscapes. |
|
q |
[] |
Details are preserved over a wide tone range, from highlights to shadows. Choose for photographs that will later be extensively processed or retouched. |
|
k01–k20 |
[] (Creative Picture Control) |
|
-
To view Picture Control settings, highlight a Picture Control and press 3. Any changes to fine-tuning options can be previewed in the display (Modifying Picture Controls).
-
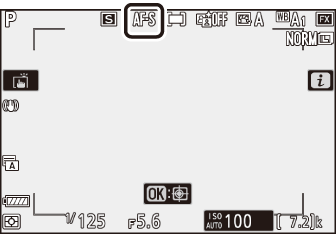
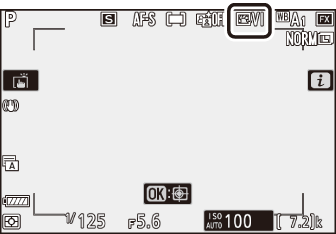
The option currently selected is shown in the display during shooting.
Modifying Picture Controls
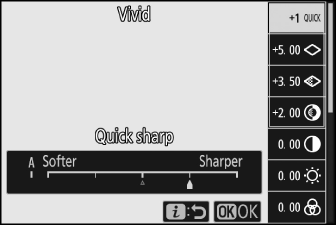
Highlighting [] in the i menu and pressing J displays a Picture Control list. Highlight a Picture Control and press 3 to preview the effect in the display.
-
Press 1 or 3 to highlight settings. Press 4 or 2 to choose a value in increments of 1, or rotate the sub-command dial to choose a value in increments of 0.25.
-
The options available vary with the Picture Control selected.
-
To abandon any changes and start over from default settings, press the O button.
-
Press J to save changes and return to the i menu.
-
Picture Controls that have been modified from default settings are indicated by an asterisk (“U”).

The j indicator under the value display in the Picture Control setting menu indicates the
previous value for the setting.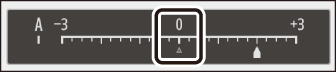
-
Selecting the (auto) option available for some settings lets the camera adjust the setting automatically.
-
Results vary with exposure and the position of the subject in the frame.
Settings can be adjusted in the range [] to [].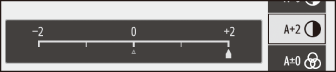
Picture Control Settings
|
Option |
Description |
|
|---|---|---|
|
[] |
Mute or heighten the effect of Creative Picture Controls. |
|
|
[] |
Quickly adjust levels for balanced [], [], and []. These parameters can also be adjusted individually. |
|
|
[] |
Control the sharpness of details and outlines. |
|
|
[] |
Adjust the sharpness of patterns and lines in the range between [] and []. |
|
|
[] |
Adjust overall sharpness and the sharpness of thicker outlines without affecting brightness or dynamic range. |
|
|
[] |
Adjust contrast. |
|
|
[] |
Raise or lower brightness without loss of detail in highlights or shadows. |
|
|
[] |
Control the vividness of colors. |
|
|
[] |
Adjust hue. |
|
|
[] |
Simulate the effect of color filters on monochrome pictures. |
|
|
[] |
Choose the tint used in monochrome pictures. Pressing 3 when an option other than [] (black-and-white) is selected displays saturation options. |
|
|
[] (Creative Picture Control) |
Choose the shade of color used for Creative Picture Controls. |
|
Choose from the following []:
|
Option |
Description |
|---|---|
|
[] (yellow) * |
These options enhance contrast and can be used to tone down the brightness of the sky in landscape photographs. Orange [] produces more contrast than yellow [], red [] more contrast than orange. |
|
[] (orange) * |
|
|
[] (red) * |
|
|
[] (green) * |
Green softens skin tones. Use for portraits and the like. |
-
The term in parentheses is the name of the corresponding third-party color filter for black-and-white photography.
White Balance
Adjust white balance. For more information, see “Basic Settings” under “White Balance” (White Balance).
|
Option |
|
|---|---|
|
4 [] |
|
|
i [] |
|
|
j [] |
|
|
k [] |
|
|
D [] |
|
|
H [] |
|
|
G [] |
|
|
M [] |
|
|
J [] |
|
|
I [] |
|
|
[] |
|
|
[] |
|
|
[] |
|
|
[] |
|
|
[] |
|
|
[] |
|
|
[] |
|
|
5 [] |
|
|
K [] |
|
|
L [] |
|
-
Pressing 3 when 4 [] or I [] is highlighted displays sub-options for the highlighted item.
-
The option currently selected is shown in the display during shooting.
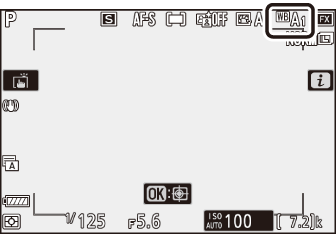
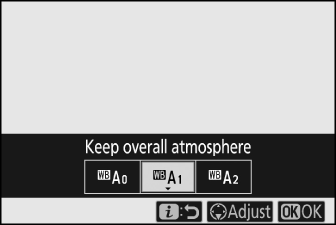
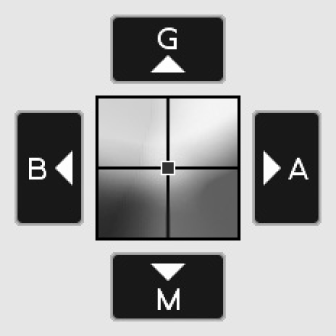
Fine-Tuning White Balance
Pressing J when [] is highlighted in the i menu displays a list of white balance options. If an option other than K [] is highlighted, fine-tuning options can be displayed by pressing 3. Any changes to fine-tuning options can be previewed in the display.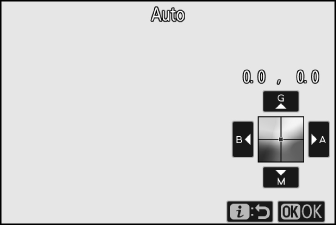
|
G |
Increase green |
|---|---|
|
B |
Increase blue |
|
A |
Increase amber |
|
M |
Increase magenta |
-
Tap the arrows in the display or use the multi selector to fine-tune white balance.
-
Press J to save changes and return to the i menu.
-
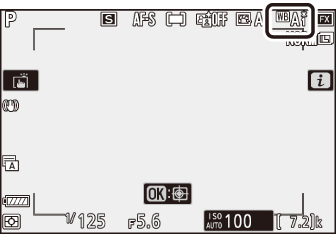
If white balance has been fine-tuned, an asterisk (“U”) will be displayed in the white balance icon.
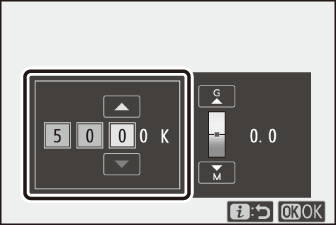
Choosing a Color Temperature
Pressing J when [] is highlighted in the i menu displays a list of white balance options. When K [] is highlighted, color temperature options can be viewed by pressing 3.
|
Value for Amber–Blue axis |
Value for Green–Magenta axis |
-
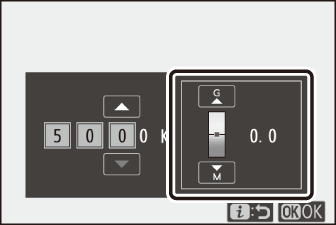
Press 4 or 2 to highlight digits on the A–B (amber–blue) axis. You can also highlight the G–M (green–magenta) axis.
-
Press 1 or 3 to edit the selected item.
-
Press J to save changes and return to the i menu.
-
If a value other than 0 is selected for the green (G)–magenta (M) axis, an asterisk (“U”) will appear in the white balance icon.
-
Do not use color-temperature selection with fluorescent light sources; instead, use the I [] option.
-
When using color-temperature selection with other light sources, take a test shot to determine if the selected value is appropriate.
Preset Manual
White balance settings such as 4 [], J [], and K [] may fail to produce the desired results under mixed lighting or lighting with a strong color cast. Should this occur, white balance can be set to a value measured under the light source used in the final photograph. The camera can store up to six values for preset manual white balance.
-
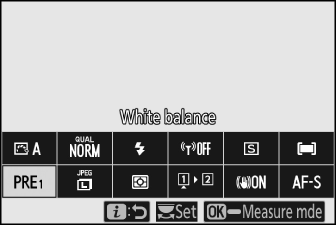
Select [] in the i menu, then highlight L [] and press 3.
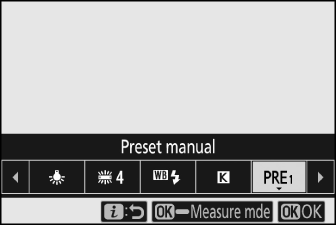
-
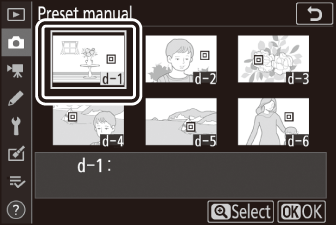
Select a preset.
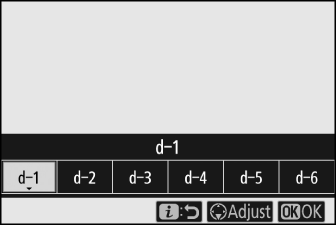
-
Select from presets [] through [].
-
Press J to save changes and return to the i menus.
-
-
Highlight [] in the i menu and hold the J button to initiate direct measurement mode.
-
A L indicator will flash in the shooting display.

-
The white balance target (r) appears in the center of the frame.
-
-
Position the white balance target (r) over a white or gray object and measure a value for preset manual white balance.
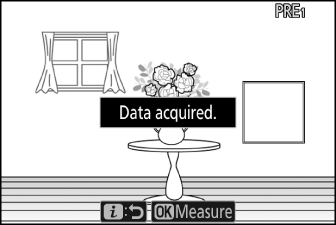
-
Position the target (r) using the multi selector.
-
To measure white balance, press the shutter-release button all the way down or press J.
-
You can also position the target and measure white balance by tapping the display.
-
Target selection will not be available if an optional flash unit is attached. Frame the shot so that the white or gray reference object is in the center of the display.
-
If the camera is unable to measure white balance, a message will be displayed and the camera will return to direct measurement mode. Try measuring white balance again, for example with the target (r) positioned over a different area of the subject.

-
-
Press the i button to exit direct measurement mode.
The preset manual white balance menu can be accessed by selecting [] > L [] in the photo shooting menu. The preset manual white balance menu offers options for copying values for preset manual white balance from an existing photograph or adding comments to or protecting white balance presets.
White balance presets indicated by g icons are protected and cannot be changed.
-
At shipment, presets d-1 through d-6 are set to 5200 K, equivalent to the H [] white balance option.
-
White balance presets can be viewed by selecting [] > L [] in the photo shooting menu. To recall a stored value, highlight a preset using the multi selector and press J.
Direct measurement mode will end if no operations are performed in the time selected for Custom Setting c3 [] > [].
Preset manual white balance cannot be measured during multiple exposures.
Image Quality
Choose a file format for photographs.
|
Option |
Description |
|---|---|
|
[] |
|
|
[] |
|
|
[] |
|
|
[] |
|
|
[] |
|
|
[] |
|
|
[] |
Record photos in NEF (RAW) format. |
|
[] |
Record photos in JPEG format. ”Fine” produces higher quality pictures than ”normal” and ”normal” higher quality pictures than “basic”.
|
|
[] |
|
|
[] |
|
|
[] |
|
|
[] |
|
|
[] |
The option currently selected is shown in the display during shooting.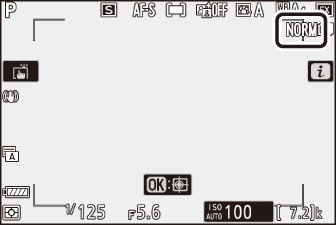
-
NEF (RAW) files have the extension “*.nef”.
-
The process of converting NEF (RAW) pictures to other highly-portable formats such as JPEG is referred to as “NEF (RAW) processing”. During this process, Picture Controls and settings such as exposure compensation and white balance can be freely adjusted.
-
The RAW data themselves are unaffected by NEF (RAW) processing and their quality will remain intact even if the pictures are processed multiple times at different settings.
-
NEF (RAW) processing can be performed in-camera using the [] item in the retouch menu or on a computer using Nikon’s NX Studio software. NX Studio is available free-of-charge from the Nikon Download Center.
-
The camera displays only the JPEG copies of photos recorded at image quality settings of “NEF (RAW) + JPEG”. If only one memory card was inserted in the camera when the photos were recorded, the NEF (RAW) copies can only be viewed using a computer.
-
In the case of photos recorded with only one memory card inserted, deleting the JPEG copies on the camera also deletes the NEF (RAW) images.
-
If [] is selected for [], the NEF (RAW) copies will be recorded to the card in Slot 1 and the JPEG copies to the card in Slot 2 (Role Played by Card in Slot 2).
Image Size
Choose the size at which photographs are recorded. The option currently selected is
shown in the display during shooting.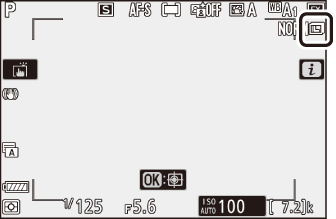
Image Size Versus Number of Pixels
The physical dimensions of the photos in pixels vary with the option selected for [] in the photo shooting menu.
|
Image area |
Image size |
||
|---|---|---|---|
|
Large |
Medium |
Small |
|
|
[] |
6016 × 4016 |
4512 × 3008 |
3008 × 2008 |
|
[] |
3936 × 2624 |
2944 × 1968 |
1968 × 1312 |
|
[] |
4016 × 4016 |
3008 × 3008 |
2000 × 2000 |
|
[] |
6016 × 3384 |
4512 × 2536 |
3008 × 1688 |
Flash Mode
Choose a flash mode for optional flash units. The options available vary with the shooting mode.
|
Option |
Available in |
|
|---|---|---|
|
I |
[] |
b, P, S, A, M |
|
J |
[] |
b, P, S, A, M |
|
L |
[] |
P, A |
|
K |
[] |
P, A |
|
M |
[] |
P, S, A, M |
|
s |
[] |
b, P, S, A, M |
The option currently selected is shown in the display during shooting.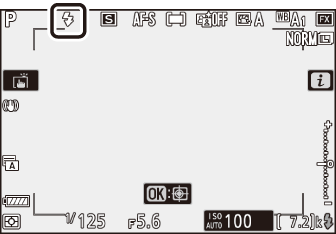
Metering
Metering determines how the camera sets exposure.
|
Option |
Description |
|
|---|---|---|
|
L |
[] |
The camera meters a wide area of the frame and sets exposure according to tone distribution, color, composition, and distance for results close to those seen by the naked eye. |
|
M |
[] |
|
|
N |
[] |
|
|
t |
[] |
The camera assigns the greatest weight to highlights. Use this option to reduce loss of detail in highlights, for example when photographing spotlit performers on stage. |
The option currently selected is shown in the display during shooting.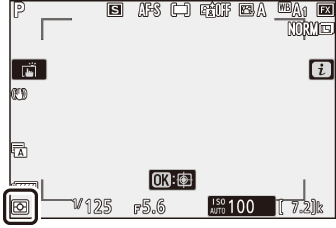
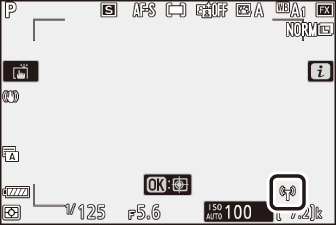
Wi-Fi Connection
Enable or disable Wi-Fi.
-
Enable Wi-Fi to establish wireless connections to computers or between the camera and smartphones or tablets (smart devices) running the SnapBridge app (Connecting via Wi-Fi (Wi-Fi Mode)).
-
The camera displays a Wi-Fi icon when Wi-Fi is enabled.
-
To turn Wi-Fi off, highlight [] in the i menu and press J; if Wi-Fi is currently enabled, a [] prompt will be displayed. Press J to end the connection.
View Memory Card Info
View the slot currently selected as the destination for new pictures and the role played by the card in Slot 2 when two memory cards are inserted. This option can be used to view but not to change the option selected.
-
The role played by the card in Slot 2 can be selected using [] in the photo shooting menu.
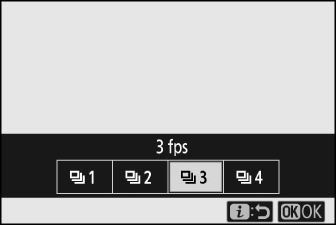
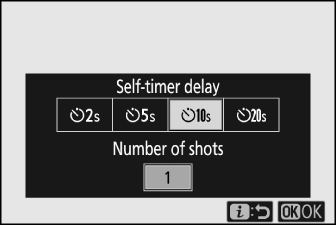
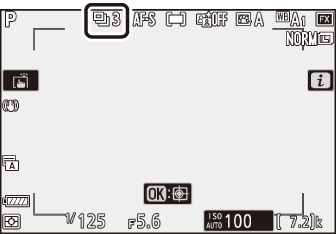
Release Mode
Choose the operation performed when the shutter is released. For more information, see “The c/E (Release Mode/Self-Timer) Button” (The c/E (Release Mode/Self-Timer) Button).
|
Option |
|
|---|---|
|
U |
[] |
|
V |
[] |
|
W |
[] |
|
E |
[] |
-
Pressing 3 when [] is highlighted displays frame advance rate options.
-
Pressing 3 when [] is highlighted displays options for the shutter-release delay and the number of shots taken when the timer expires.
-
The option currently selected is shown in the display during shooting.
Vibration Reduction
Choose whether to enable vibration reduction. The options available vary with the lens.
|
Option |
Description |
|
|---|---|---|
|
C |
[] |
Choose for enhanced vibration reduction when photographing static subjects. |
|
[] |
||
|
D |
[] |
Choose when photographing athletes and other subjects that are moving rapidly and unpredictably. |
|
E |
[] |
Vibration reduction is disabled. |
Options other than [] are shown by an icon in the display during shooting.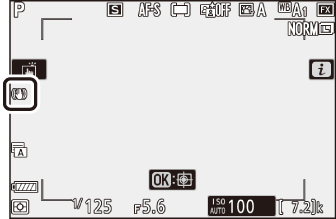
-
[] may be unavailable with some lenses.
-
We recommend that you wait for the image in the display to stabilize before shooting.
-
Depending on the lens, when vibration reduction is active, the image in the viewfinder may jiggle after the shutter is released, but this does not indicate a malfunction.
-
[] or [] is recommended for panning shots. In [], [], and [] modes, vibration reduction applies only to motion that is not part of the pan. If the camera is panned horizontally, for example, vibration reduction will be applied only to vertical shake.
-
To prevent unintended results, select [] when the camera is mounted on a tripod. Note that settings for VR lenses may differ; consult the lens manual for more information. Note, however, that [], [], or [] is recommended if the tripod head is unsecured or the camera is mounted on a monopod.
AF-Area Mode
AF-area mode controls how the camera selects the focus-point for autofocus. For more information, see “Focus” under “AF-Area Mode” in “Basic Settings” (AF-Area Mode).
|
Option |
|
|---|---|
|
3 |
[] |
|
d |
[] |
|
e |
[] |
|
f |
[] |
|
g |
[] |
|
h |
[] |
The option currently selected is shown in the display during shooting.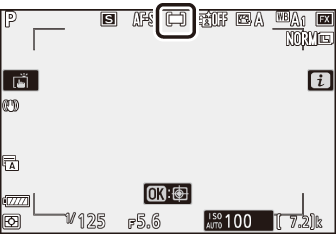
Focus Mode
Focus mode controls how the camera focuses. For more information, see “Focus” under “Focus Mode” in “Basic Settings” (Focus Mode).
|
Option |
|
|---|---|
|
AF-S |
[] |
|
AF-C |
[] |
|
MF |
[] |
The option currently selected is shown in the display during shooting.