Shooting Movies (b Mode)
b (auto) mode can also be used for simple, “point-and-shoot” movie recording.
-
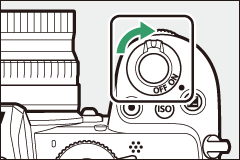
Turn the camera on.
The monitor will light.
-
Select movie mode.
Rotate the photo/movie selector to 1. Note that the built-in flash and optional flash units cannot be used when the camera is in movie mode.

-
Select b mode.
Rotate the mode dial to b.
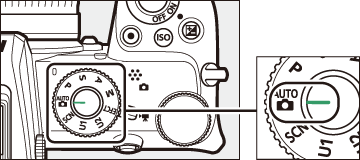
Mode dial
-
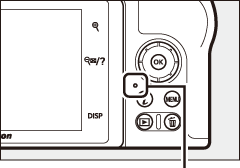
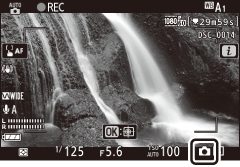
Start recording.
Press the movie-record button to start recording. While recording is in progress, the camera will display a recording indicator and the time remaining. The camera can be refocused at any time during recording by tapping your subject in the display. Sound is recorded via the built-in microphone; do not cover the microphone during recording.

Movie-record button
Recording indicator
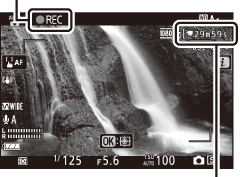
Time remaining
-
End recording.
Press the movie-record button again to end recording. The memory card access lamp will light while the camera finishes saving the movie to the memory card. Do not eject the memory card or remove the battery until the lamp has gone out and recording is complete.

Memory card access lamp
The 0 Icon
A 0 icon indicates that movies cannot be recorded.
In movie mode, photos can be taken without interrupting recording by pressing the shutter-release button all the way down. The release mode (single-frame or continuous) can be selected before shooting begins using the Release mode (save frame) option in the movie shooting menu (note that regardless of the option chosen, only one photo can be taken with each press while movie recording is in progress). A C icon will flash in the display when a photo is taken.
Taking Photos in Movie Mode
Note that photo-mode settings do not apply to photos taken in movie mode and that photos can be taken even when the subject is not in focus. Photos are recorded in fine-quality JPEG format at the dimensions currently selected for movie frame size. When Continuous is selected for Release mode (save frame) in the movie shooting menu, the frame advance rate while recording is paused varies with the option selected for Frame size/frame rate. Up to 40 photographs can be taken with each movie.
During Shooting
Flicker, banding, or distortion may be visible in the display and in photos and movies shot under fluorescent, mercury vapor, or sodium lamps or with subjects that are in motion, particularly if the camera is panned horizontally or an object moves horizontally at high speed through the frame. Jagged edges, color fringing, moiré, and bright spots may also appear. Bright regions or bands may appear in some areas of the frame with flashing signs and other intermittent light sources or if the subject is briefly illuminated by a strobe or other bright, momentary light source, while noise (randomly-spaced bright pixels, fog, or lines) and unexpected colors may appear if you zoom in on the view through the lens. Flicker may occur when power aperture is used during movie recording.
Avoid pointing the camera at the sun or other strong light sources. Failure to observe this precaution could result in damage to the camera’s internal circuitry.
Recording Movies
Recording ends automatically when the maximum length is reached or if the lens is removed, another mode is selected, or the photo/movie selector is rotated to C. Note that the built-in microphone may record sounds made by the camera or lens during optical vibration reduction, autofocus, or changes to aperture.