The Mode Dial
Rotate the mode dial to choose from the following modes:
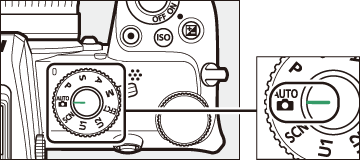
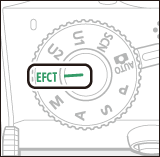
Mode dial
- b Auto: A “point-and-shoot” mode in which the camera sets exposure and hue (0 Taking Photographs (b Mode), Shooting Movies (b Mode)).
- P Programmed auto: The camera sets shutter speed and aperture for optimal exposure. Recommended for snapshots and in other situations in which there is little time to adjust camera settings.
- S Shutter-priority auto: You choose the shutter speed; the camera selects the aperture for best results. Use to freeze or blur motion.
- A Aperture-priority auto: You choose the aperture; the camera selects the shutter speed for best results. Use to blur backgrounds or bring both foreground and background into focus.
- M Manual: You control both shutter speed and aperture. Set shutter speed to “bulb” or “time” for long time-exposures.
- EFCT Special effects: Take pictures with added special effects.
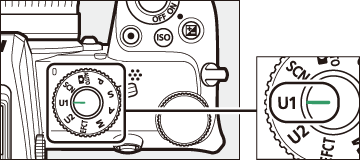
- U1/U2 User settings modes: Assign frequently-used settings to these positions for quick recall.
- SCN Scene: Use for subjects of a selected type.
- P: Programmed Auto
- S: Shutter-Priority Auto
- A: Aperture-Priority Auto
- M: Manual
- User Settings: U1 and U2 Modes
- h (Scene Modes)
- q (Special Effect Modes)
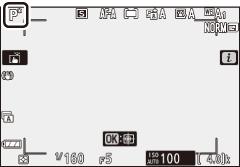
P: Programmed Auto
In this mode, the camera automatically adjusts shutter speed and aperture according to a built-in program to ensure optimal exposure in most situations. Different combinations of shutter speed and aperture that produce the same exposure can be selected by rotating the main command dial (“flexible program”). While flexible program is in effect, a flexible program indicator (U) is displayed. To restore default shutter speed and aperture settings, rotate the main command dial until the indicator is no longer displayed, choose another mode, or turn the camera off.
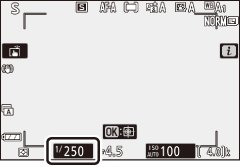
S: Shutter-Priority Auto
In shutter-priority auto, you choose the shutter speed while the camera automatically selects the aperture that will produce the optimal exposure. To choose a shutter speed, rotate the main command dial. Shutter speed can be set to values between 30 s and 1/4000 s.
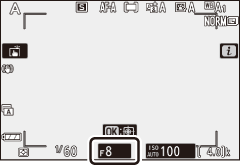
A: Aperture-Priority Auto
In aperture-priority auto, you choose the aperture while the camera automatically selects the shutter speed that will produce the optimal exposure. To choose an aperture between the minimum and maximum values for the lens, rotate the sub-command dial.
Movie Mode Exposure Settings
The following exposure settings can be adjusted in movie mode:
| Aperture | Shutter speed | ISO sensitivity | |
|---|---|---|---|
| P, S 1 | ー | ー | ー 2 |
| A | ー | ー 2 | |
| M | 3 |
Exposure for mode S is equivalent to mode P.
The upper limit for ISO sensitivity can be selected using the ISO sensitivity settings > Maximum sensitivity option in the movie shooting menu.
If On is selected for ISO sensitivity settings > Auto ISO control (mode M) in the movie shooting menu, the upper limit for ISO sensitivity can be selected using the Maximum sensitivity option.
M: Manual
In manual exposure mode, you control both shutter speed and aperture. Rotate the main command dial to choose a shutter speed, and the sub-command dial to set aperture. Shutter speed can be set to values between 30 s and 1/4000 s, or the shutter can be held open indefinitely for a long time-exposure (0 Long Time-Exposures). Aperture can be set to values between the minimum and maximum values for the lens. Use the exposure indicators to check exposure.
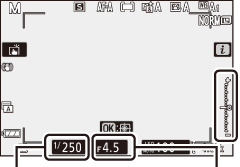
Shutter speed
Aperture
Exposure Indicators
The exposure indicators show whether the photograph would be under- or over-exposed at current settings. Depending on the option chosen for Custom Setting b1 (EV steps for exposure cntrl), the amount of under- or overexposure is shown in increments of 1/3 or 1/2 EV. If the limits of the exposure metering system are exceeded, the displays will flash.
| Custom Setting b1 set to “1/3 step” | |||
|---|---|---|---|
| Optimal exposure | Underexposed by 1/3 EV |
Overexposed by over 3 EV |
|
| Monitor |  |
 |
 |
| Viewfinder |  |
 |
 |
Auto ISO Sensitivity Control (Mode M)
If auto ISO sensitivity control (0 Auto ISO Sensitivity Control) is enabled, ISO sensitivity will automatically be adjusted for optimal exposure at the selected shutter speed and aperture.
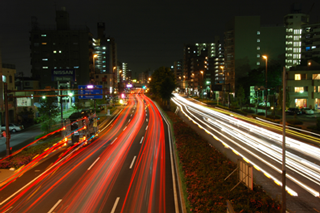
Long Time-Exposures
Select the following shutter speeds for long time-exposures of moving lights, the stars, night scenery, or fireworks.
- Shutter speed: Bulb (35-second exposure)
- Aperture: f/25
- Bulb: The shutter remains open while the shutter-release button is held down (note that this option functions in the same way as “time” when the camera is used with an optional ML-L7 remote control).
- Time: The exposure starts when the shutter-release button is pressed and ends when the button is pressed a second time.
To prevent blur, mount the camera on a tripod. Nikon also recommends using a fully-charged battery to prevent loss of power while the shutter is open. Note that noise (bright spots, randomly-spaced bright pixels, or fog) may be present in long exposures. Bright spots and fog can be reduced by choosing On for Long exposure NR in the photo shooting menu.
-
Ready the camera.
Mount the camera on a tripod or place it on a stable, level surface.
-
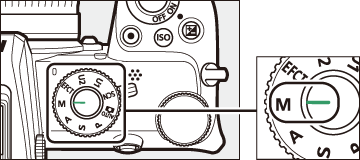
Select mode M.
Rotate the mode dial to M.
-
Choose a shutter speed.
Rotate the main command dial to choose a shutter speed of Bulb or Time.

Bulb
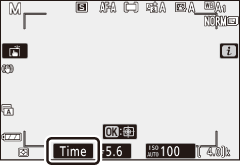
Time
-
Open the shutter.
Bulb: After focusing, press the shutter-release button all the way down. Keep the shutter-release button pressed until the exposure is complete.
Time: After focusing, press the shutter-release button all the way down.
-
Close the shutter.
Bulb: Take your finger off the shutter-release button.
Time: Press the shutter-release button all the way down.
User Settings: U1 and U2 Modes
Assign frequently-used settings to the U1 and U2 positions on the mode dial.
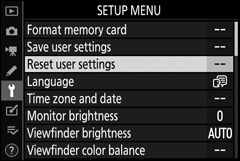
Saving User Settings
Follow the steps below to save settings:
-
Adjust settings.
Make the desired adjustments to camera settings, including:
- photo shooting menu options,
- movie shooting menu options,
- Custom Settings, and
- shooting mode, shutter speed (modes S and M), aperture (modes A and M), flexible program (mode P), exposure compensation, and auto bracketing.
-
Select Save user settings.
Highlight Save user settings in the setup menu and press 2.

-
Select a position.
Highlight Save to U1 or Save to U2 and press 2.
-
Save user settings.
Highlight Save settings and press J to assign the settings selected in Step 1 to the mode dial position selected in Step 3.
Recalling User Settings
Rotating the mode dial to U1 or U2 recalls the settings last saved to that position.
Resetting User Settings
To reset settings for U1 or U2 to default values:
-
Select Reset user settings.
Highlight Reset user settings in the setup menu and press 2.
-
Select a position.
Highlight Reset U1 or Reset U2 and press 2.
-
Reset user settings.
Highlight Reset and press J to restore default settings for the selected position. The camera will function in mode P.
User Settings
The following cannot be saved to U1 or U2.
Photo shooting menu:
- Storage folder
- Choose image area
- Manage Picture Control
- Multiple exposure
- Interval timer shooting
- Time-lapse movie
Movie shooting menu:
- Manage Picture Control
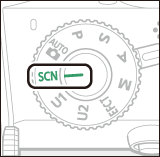
h (Scene Modes)
The camera offers a choice of “scene” modes. Choosing a scene mode automatically optimizes settings to suit the selected scene, making creative photography as simple as selecting a mode, framing a picture, and shooting as described in “Taking Photographs (b Mode)” (0 Taking Photographs (b Mode)).
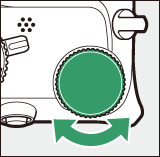
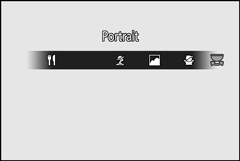
The following scenes can be selected by rotating the mode dial to h and rotating the main command dial until the desired scene appears in the monitor.
Mode dial
Main command dial
Monitor
| k | Portrait |
| l | Landscape |
| p | Child |
| m | Sports |
| n | Close up |
| o | Night Portrait |
| r | Night Landscape |
| s | Party/Indoor |
| t | Beach/Snow |
| d | Sunset |
| e | Dusk/Dawn |
| f | Pet Portrait |
| g | Candlelight |
| j | Blossom |
| z | Autumn Colors |
| 0 | Food |
k Portrait
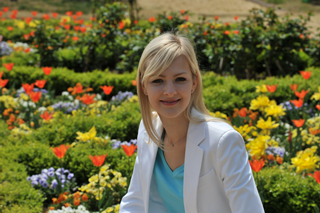
Use for portraits with soft, natural-looking skin tones. If the subject is far from the background or a telephoto lens is used, background details will be softened to lend the composition a sense of depth.
l Landscape
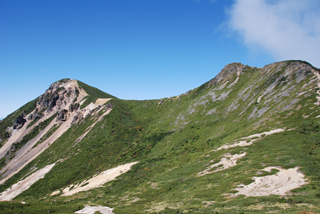
Use for vivid landscape shots in daylight.
Note
The built-in flash and AF-assist illuminator turn off.
p Child
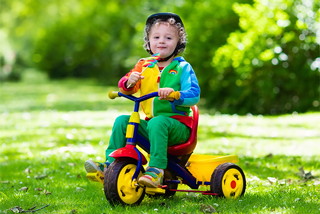
Use for snapshots of children. Clothing and background details are vividly rendered, while skin tones remain soft and natural.
m Sports
Fast shutter speeds freeze motion for dynamic sports shots in which the main subject stands out clearly.
Note
The built-in flash and AF-assist illuminator turn off.
n Close up

Use for close-up shots of flowers, insects, and other small objects.
o Night Portrait
Use for a natural balance between the main subject and the background in portraits taken under low light.
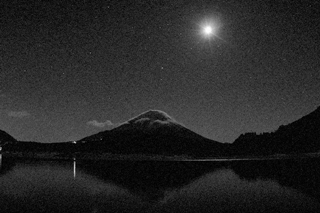
r Night Landscape
Reduce noise and unnatural colors when photographing night landscapes, including street lighting and neon signs.
Note
The built-in flash and AF-assist illuminator turn off.
s Party/Indoor

Capture the effects of indoor background lighting. Use for parties and other indoor scenes.
t Beach/Snow
Capture the brightness of sunlit expanses of water, snow, or sand.
Note
The built-in flash and AF-assist illuminator turn off.
d Sunset
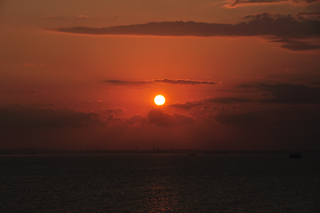
Preserves the deep hues seen in sunsets and sunrises.
Note
The built-in flash and AF-assist illuminator turn off.
e Dusk/Dawn
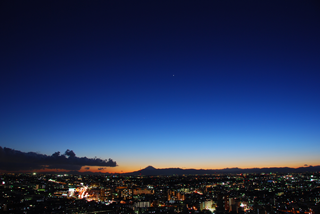
Preserves the colors seen in the weak natural light before dawn or after sunset.
Note
The built-in flash and AF-assist illuminator turn off.
f Pet Portrait
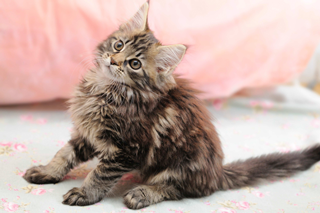
Use for portraits of active pets.
Note
The AF-assist illuminator turns off.
g Candlelight
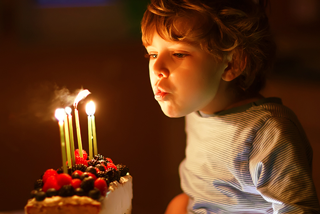
For photographs taken by candlelight.
Note
The built-in flash turns off.
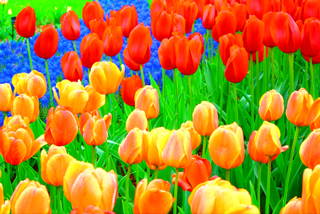
j Blossom
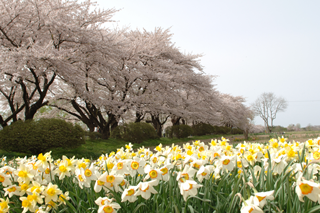
Use for fields of flowers, orchards in bloom, and other landscapes featuring expanses of blossoms.
Note
The built-in flash turns off.
z Autumn Colors
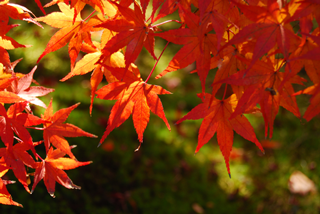
Captures the brilliant reds and yellows in autumn leaves.
Note
The built-in flash turns off.
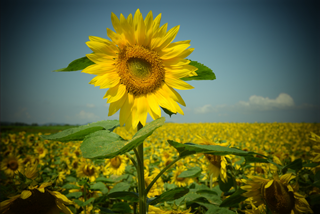
0 Food

Use for vivid photographs of food.
Note
If raised, the built-in flash will fire with every shot.
Preventing Blur
Use a tripod to prevent blur caused by camera shake at slow shutter speeds.
Scene Modes
Some settings—for example, Picture Controls, white balance, or Custom Settings—cannot be changed depending on the mode selected.
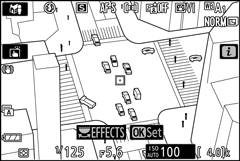
q (Special Effect Modes)
Special effects can be used when taking photographs and shooting movies.
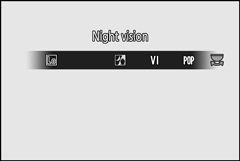
The following effects can be selected by rotating the mode dial to q and rotating the main command dial until the desired option appears in the monitor.
Mode dial
Main command dial
Monitor
| 4 | Night Vision |
| V | Super Vivid |
| T | Pop |
| U | Photo Illustration |
| 5 | Toy Camera Effect |
| 6 | Miniature Effect |
| 7 | Selective Color |
| 1 | Silhouette |
| 2 | High Key |
| 3 | Low Key |
Movie frame sizes of 1920 × 1080 120p, 1920 × 1080 100p, and 1920 × 1080 slow-motion are not available in q mode.
4 Night Vision
Use under conditions of darkness to record monochrome images at high ISO sensitivities.
Note
Manual focus can be used if the camera is unable to focus. The built-in flash turns off; optional flash units will not fire.
V Super Vivid
Overall saturation and contrast are increased for a more vibrant image.
T Pop

Overall saturation is increased for a more lively image.
U Photo Illustration
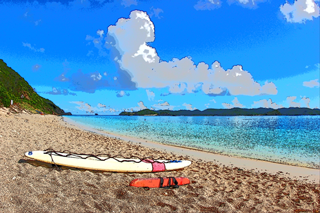
Sharpen outlines and simplify coloring for a poster effect. Press J to adjust settings (0 Adjusting U (Photo Illustration) Settings).
Notes
- Movies shot in this mode play back like a slide show made up of a series of stills.
- Autofocus is not available during movie recording.
5 Toy Camera Effect
Create photos and movies with saturation and peripheral illumination similar to pictures shot with a toy camera. Press J to adjust settings (0 Adjusting 5 (Toy Camera Effect) Settings).
6 Miniature Effect
Create photos that appear to be pictures of dioramas. Works best when shooting from a high vantage point. Press J to adjust settings (0 Adjusting 6 (Miniature Effect) Settings).
Notes
- The built-in flash does not fire.
- The AF-assist illuminator does not light.
- Miniature effect movies play back at high speed.
- Sound is not recorded with movies.
7 Selective Color
All colors other than the selected colors are recorded in black and white. Press J to adjust settings (0 Adjusting 7 (Selective Color) Settings).
Note
The built-in flash and optional flash units are disabled.
1 Silhouette
Silhouette subjects against bright backgrounds.
Note
The built-in flash turns off.
2 High Key

Use with bright scenes to create bright images that seem filled with light.
Note
The built-in flash turns off.
3 Low Key
Use with dark scenes to create dark, low-key images with prominent highlights.
Note
The built-in flash turns off.
Preventing Blur
Use a tripod to prevent blur caused by camera shake at slow shutter speeds.
Special Effect Modes
- NEF (RAW) image quality options cannot be selected in 4, V, T, U, 5, 6, and 7 modes.
- Some settings—for example, AF-area mode, Picture Controls, or white balance—cannot be changed depending on the mode selected.
- In U and 6 modes, the shooting display refresh rate will drop.
Adjusting U (Photo Illustration) Settings
To adjust line thickness, select U in special effects mode and then press J.
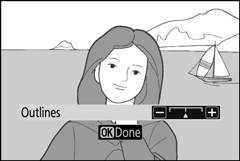
- Press 4 to thin outlines or 2 to make them thicker.
- Press J to save changes; the selected effect will be applied during shooting.
Adjusting 5 (Toy Camera Effect) Settings
To adjust settings, select 5 in special effects mode and then press J.
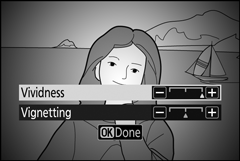
- Press 1 or 3 to highlight the desired setting.
- Vividness: Press 2 for more saturation, 4 for less.
- Vignetting: Press 2 for more vignetting, 4 for less.
- Press J to save changes; the selected effect will be applied during shooting.
Adjusting 6 (Miniature Effect) Settings
To adjust settings, select 6 in special effects mode and then press J.
-
Position the focus point.
- Use the multi selector to position the focus point in the area that you want to be in focus.
- To check focus, press the shutter-release button halfway.
-
Choose the orientation and size of the area that will be in focus.
- Press J to view miniature effect options.
- Press 4 or 2 to choose the orientation of the area that will be in focus.
- Press 1 or 3 to choose the width of the area that will be in focus.
-
Save changes.
Press J to save changes; the selected effect will be applied during shooting.
Movies
Miniature effect movies play back at high speed. For example, approximately 15 minutes of footage shot with 1920 × 1080/30p selected for Frame size/frame rate in the movie shooting menu (0 Frame Size/Frame Rate) will play back in about a minute.
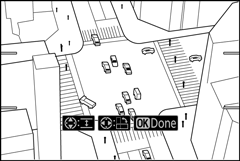
Adjusting 7 (Selective Color) Settings
To adjust settings, select 7 in special effects mode and then press J.
-
Select colors.
Selected color
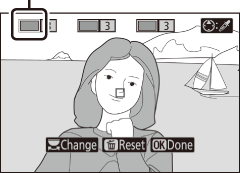
- Press J to view selective color options.
- Frame an object of the desired color in the white square at the center of the display.
- To zoom in on the center of the display for more precise color selection, tap the X button. Tap the W button to zoom out.
- Press 1 to choose the color of the object in the white square as one that will be recorded in color when photographs are taken; the selected color will appear in the first of the numbered color boxes.
- All colors other than those selected in the color boxes will appear in black and white.
-
Choose the color range.
Color range
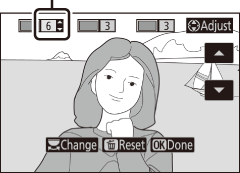
Press 1 or 3 to increase or decrease the range of similar hues that will be included in photographs; choose from values between 1 and 7. The higher the value, the wider the range of colors that will be included; the lower the value, the lower the range of colors that will be included.
-
Select additional colors.
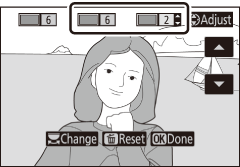
- To select additional colors, rotate the main command dial to highlight another of the numbered color boxes and repeat Steps 1 and 2.
- Up to 3 colors can be selected.
- To deselect the highlighted color, press O.
- To remove all colors, press and hold O. A confirmation dialog will be displayed; select Yes.
-
Save changes.
Press J to save changes; the selected effect will be applied during shooting.
Note: Selective Color
- The camera may have difficulty detecting some colors. Saturated colors are recommended.
- Higher values for color range may include hues from other colors.