Features Available with “C” Firmware Version 1.30
The new features available with camera “C” firmware version 1.30 are described below.
Voice Memos (Z 6II Only)
A [] option has been added to the roles that can be assigned to the [] via Custom Setting f2 []. In the [] role, the movie-record button can be used to record and play voice memos up to about
60 seconds long while a picture is displayed.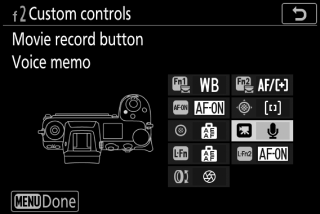
Recording Voice Memos
-
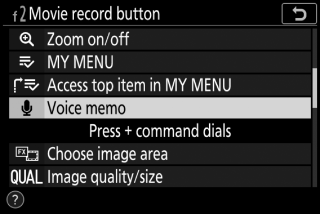
Select [] for Custom Setting f2 [] > [].
-
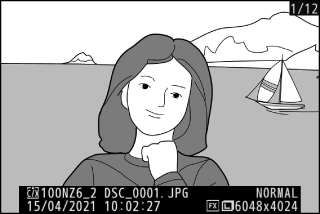
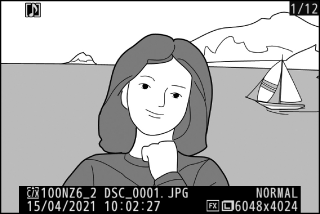
Select playback mode and display a picture to which you wish to add a voice memo.
-
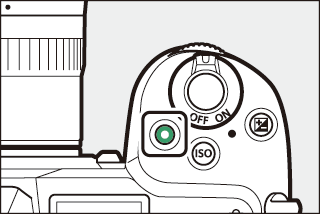
Press and hold the movie-record button.
-
Recording will continue while the button is pressed.
-
A b icon is displayed during recording.
-
-
Release the movie-record button to end recording.
-
Pictures with voice memos are indicated by h icons.
-
Recording ends automatically after 60 seconds.
-
-
Voice memos cannot be added to pictures with existing memos (indicated by h icons). Delete the existing memo before attempting to record a new memo.
-
You cannot view other pictures or use touch controls while recording is in progress.
-
Recording will end if you:
-
press the O button,
-
exit playback mode, or
-
turn the camera off.
-
-
Recording may end if you press the shutter-release button or operate other camera controls.
-
Voice memos cannot be recorded to SD memory cards if the cards are locked (write protected).
Voice memos for pictures taken with [] or [] selected for [] in the photo shooting menu will be added to the pictures on both memory cards.
Voice memos have file names of the form “DSC_nnnn.WAV”, where nnnn is a four-digit number copied from the picture with which the voice memo is associated.
-
Voice memos for pictures taken with [] selected for [] in the photo shooting menu have file names of the form “_DSCnnnn.WAV”.
-
In place of “DSC”, voice memos for pictures named via [] in the photo shooting menu will have the same three-letter prefix as the pictures with which they are associated.
Playing Voice Memos
-
Select [] for Custom Setting f2 [] > [].
-
Select playback mode and display a picture with a h icon.
-
Press the movie-record button.
-
Voice memo playback will start.
-
-
Press the movie-record button again.
-
Voice memo playback will end.
-
-
Playback zoom is disabled during voice memo playback.
-
Playback will end if you:
-
view other pictures,
-
press the O button,
-
exit playback mode, or
-
turn the camera off.
-
-
Playback may end if you press the shutter-release button or operate other camera controls.
-
Protecting pictures also protects any associated voice memos. Protection cannot be applied separately.
-
Voice memos are not included with pictures uploaded to a computer or ftp server using a WT-7. Voice memos are listed as separate files when pictures are viewed in HTTP server mode.
Deleting Voice Memos
Pressing the O button when viewing a picture marked with a h icon displays a confirmation dialog.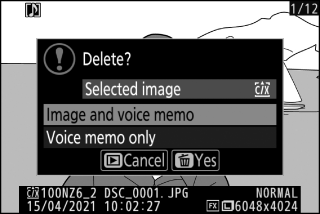
-
To delete both the picture and the voice memo, highlight [] and press O.
-
To delete only the voice memo, highlight [] and press O.
-
To resume playback without deleting either file, press K.
-
Deleting pictures deletes any associated voice memos.
-
With dual-format pictures, you may opt to delete the voice memo only from the picture on the card in the current slot, which you can do by choosing [] and then [].
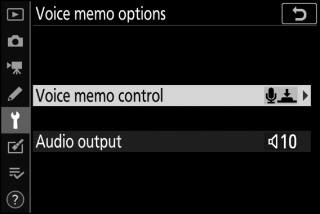
Voice Memo Options
The setup menu now offers a [] item containing the following options for voice memo recording and playback.
-
[] controls the behavior of the movie-record button during voice memo recording.
-
[] (default): Recording takes place only while the movie-record button is pressed and ends when the button is released.
-
[]: Press the movie record button once to begin recording and again to end recording.
-
-
[] controls voice memo playback volume.
-
[]: Choose the volume at which voice memos play over the camera speaker or headphones connected to the camera.
-
[]: Voice memos do not play when the movie-record button is pressed.
-
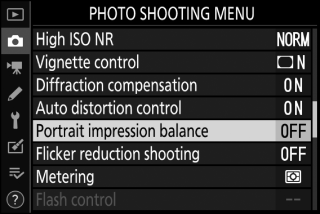
Hue and Brightness Settings for Portraits
[] items have been added to the photo and movie shooting menus. Settings can be fine-tuned on the hue and brightness axes and the results saved as [], [], or []. The saved modes can be applied to new pictures.
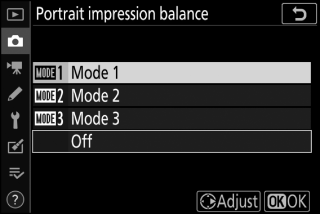
Creating Portrait Impression Balance Modes
-
Select [] in the photo or movie shooting menu.
-
Highlight a mode from [] through [] and press 2.
-
Options for the selected mode will be displayed.
-
-
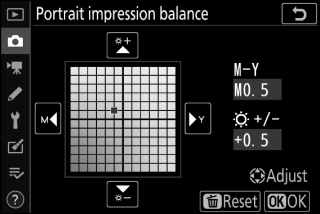
Adjust hue and brightness.
-
Press 4 or 2 to adjust hue on the M (magenta)–Y (yellow) axis. Magenta increases as you move toward M, amber (yellow) as you move toward Y.
-
Press 1 or 3 to adjust brightness. Brightness increases as the values go up and decreases as they go down.
-
The selected values are displayed to the right of the grid.
-
To restore default settings, press the O button.
-
-
Save changes.
-
Press J to save changes and exit to the menus.
-
Modes that have been altered from default values are indicated by asterisks (“U”).
-
Repeat Steps 1 through 4 to create additional modes.
-
-
Highlight [], [], [], or [] in the [] display and press J.
-
The selected mode will be applied to all subsequent pictures.
-
Selecting [] (the default setting) disables portrait impression balance.
-
-
[] will not be available if:
-
[] or [] is selected for [], or
-
[] or [] is selected for [] > [] > [] in the setup menu.
-
-
The values selected for portrait impression balance cannot be viewed in the camera playback display, in the [] display in the retouch menu, or in Nikon’s NX Studio software.
-
Portrait impression balance settings for existing pictures cannot be altered using NX Studio or the [] item in the retouch menu.