Features Available with “C” Firmware Version 1.60
- “Prioritize Viewfinder” Monitor Modes
- New Preview Settings for Flash Photography
- New Custom Setting: d10 “Warm Display Colors”
- New Custom Setting: d11 “Image Frame”
- New Custom Setting: g7 “Red REC Frame Indicator”
- New Option for the Setup Menu: “Finder Display Size (Photo Lv)”
“Prioritize Viewfinder” Monitor Modes
The [] monitor mode has been replaced by [] and [].
-
In [] mode, the viewfinder turns on only when you look through it. This behavior is identical to that for [] in earlier versions of the camera “C” firmware.
-
In [] mode, the viewfinder will turn on both when you look through it and also for a few seconds after the camera is turned on, the shutter-release button is pressed halfway, or the AF-ON button is pressed.
-
The [] option for [] in the setup menu has also been replaced by [] and [] options.
-
If [] or [] is selected when the monitor is tilted, putting your eye to the camera will not trigger the viewfinder.
New Preview Settings for Flash Photography
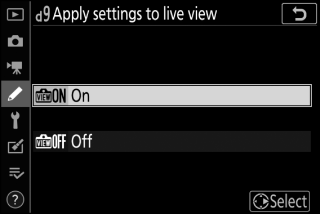
[] and [] have been added to the options available for Custom Setting d9 [] > [].
|
|
|
|

|
Option |
Description |
|---|---|
|
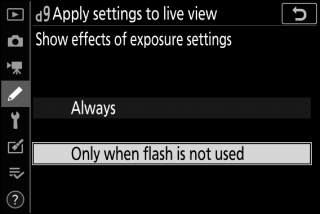
[] |
The effects of changes to settings such as white balance, Picture Controls, and exposure compensation are visible in the shooting display. Pressing 2 when [] is highlighted displays [] and [] options.
|
|
[] |
|
New Custom Setting: d10 “Warm Display Colors”
A [] option has been added to the Custom Settings menu at position d10. Use warmer colors
with reduced brightness in the shooting, menu, and/or playback displays. This makes
the displays easier to view with vision adapted to dark environments during astronomical
photography and the like.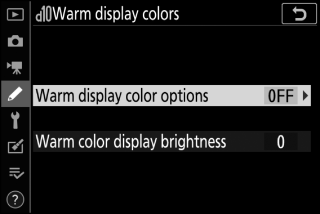
|
Option |
Description |
|---|---|
|
[] |
Choose from the following options.
|
|
[] |
Press 1 or 3 to adjust warm color display brightness. Choose higher values for increased brightness, lower values for reduced brightness. |
New Custom Setting: d11 “Image Frame”
An [] option has been added to the Custom Settings menu at position d11. Select [] to hide the white border around the shooting displays in the monitor and viewfinder.
With the addition of Custom Settings d10 [] and d11 [], the [], [], and [] Custom Settings have been renumbered as shown.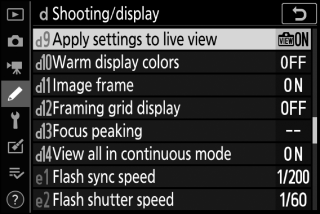
New Custom Setting: g7 “Red REC Frame Indicator”
A [] option has been added to the Custom Settings menu at position g7. If [] is selected, a red border will appear around the shooting display while movie shooting
is in progress. This helps prevent missed shots by alerting you when recording is
in progress.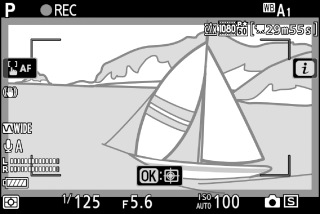
With the addition of [] in the g7 position, [] is now numbered g8.
New Option for the Setup Menu: “Finder Display Size (Photo Lv)”
A [] option has been added to the setup menu. Choose a magnification for the viewfinder display from [] and []. Selecting [] makes it easier to see the entire subject.