Choose image processing (“Picture Control”) options for new photos according to the scene or your creative intent. For more information, see “The i Menu” under “Set Picture Control” (Set Picture Control).
Modifying Picture Controls from the Menus
Existing preset or custom Picture Controls can be modified to suit the scene or the user’s creative intent.
-
Select a Picture Control.
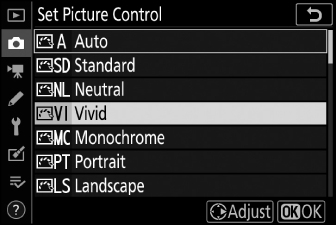
Highlight the desired Picture Control in the Picture Control list and press 2.
-
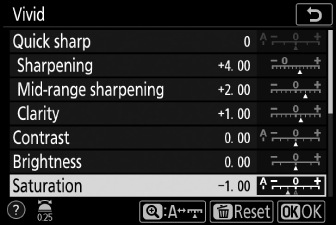
Edit the selected Picture Control.
-
Press 1 or 3 to highlight the desired setting (Picture Control Settings). Press 4 or 2 to choose a value in increments of 1, or rotate the sub-command dial to choose a value in increments of 0.25.
-
The options available vary with the Picture Control selected.
-
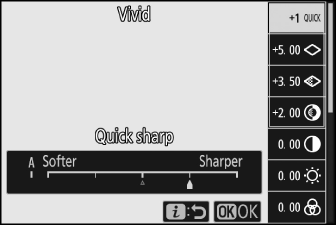
To quickly adjust levels for balanced [], [], and [], highlight [] and press 4 or 2.
-
To abandon any changes and start over from default settings, press the O button.
-
-
Save changes and exit.
Press J to save changes.
-
To select Picture Controls in the i menu, highlight [] and press J.
-
Press 4 and 2 to choose a Picture Control and press 3 to display Picture Control settings. The effect of any changes can be previewed in the display.
Modifications to existing Picture Controls can be saved using the [] item in the photo or movie shooting menu, creating custom Picture Controls that can then be copied to a memory card and used in compatible software or shared among cameras of the same model.