Connect to computers via Wi-Fi.
Wi-Fi Connection
Select Enable to connect using the settings currently selected for Network settings.
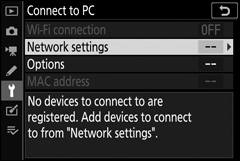
Network Settings
Select Create profile to create a new network profile (0 Connecting in Access-Point Mode, Connecting in Infrastructure Mode). If more than one profile already exists, you can press J to select a profile from a list. To edit an existing profile, highlight it and press 2. The following options will be displayed:
- General: The profile name and password. Select Profile name to rename the profile (by default, the profile name is the same as the network SSID). To require that a password be entered before the profile can be changed select On for Password protection (to change the password, highlight On and press 2).
-
Wireless: Adjust settings for connection to a network via a router (infrastructure mode) or for direct wireless connection to the camera (access-point mode).
- Infrastructure mode: Enter the network SSID and password and choose the type of authentication/encryption used on the network (OPEN or WPA2-PSK-AES). The channel is selected automatically.
- Access-point mode: Enter the SSID and choose a channel (select Auto for automatic channel selection or Manual to choose the channel manually) and authentication/encryption type (OPEN or WPA2-PSK-AES) used for connection to the camera. If WPA2-PSK-AES is selected for Authentication/encryption, you can also set the camera password.
- TCP/IP: If Enable is selected for Obtain automatically, the IP address and sub-net mask for infrastructure mode connections will be acquired via a DHCP server or automatic IP addressing. Select Disable manually to enter the IP address (Address) and sub-net mask (Mask). Note that an IP address is required for infrastructure mode connections.
Options
Adjust upload settings.
Auto Send
Select On to upload new photos as they are taken. Upload begins only after the photo has been recorded to the memory card; be sure a memory card is inserted in the camera. Movies and photos taken in movie mode are not uploaded automatically when recording is complete but must instead be uploaded from the playback display (0 Uploading Pictures).
Delete After Send
Select Yes to delete photographs from the camera memory card automatically once upload is complete (files marked for transfer before this option is selected are not deleted). Deletion may be suspended during some camera operations.
Send File As
When uploading NEF+JPEG images, choose whether to upload both the NEF (RAW) and JPEG files or only the JPEG copy.
Deselect All?
Select Yes to remove transfer marking from all images. Upload of images with a “sending” icon will immediately be terminated.
MAC Address
View the MAC address.