The Photo-Mode i Menu
At default settings, the following items appear in the i menu for photo mode.
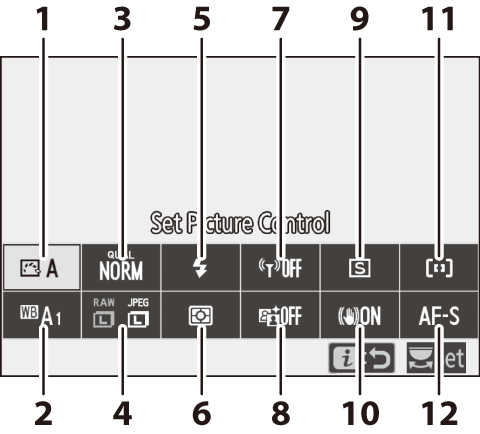
- Set Picture Control
- White Balance
- Image Quality
- Image Size
- Flash Mode
- Metering
- Wi-Fi Connection
- Active D-Lighting
- Release Mode
- Vibration Reduction
- AF-Area Mode
- Focus Mode
Set Picture Control
Choose a Picture Control according to the subject or type of scene.
| Option | Description | |
|---|---|---|
| n | Auto | The camera automatically adjusts hues and tones based on the Standard Picture Control. The complexions of portrait subjects will appear softer, and such elements as the foliage and sky in outdoor shots more vivid, than in pictures taken with the Standard Picture Control. |
| Q | Standard | Standard processing for balanced results. Recommended for most situations. |
| R | Neutral | Minimal processing for natural results. Choose for photographs that will later be processed or retouched. |
| S | Vivid | Pictures are enhanced for a vivid, photoprint effect. Choose for photographs that emphasize primary colors. |
| T | Monochrome | Take monochrome photographs. |
| o | Portrait | Process portraits for skin with natural texture and a rounded feel. |
| p | Landscape | Produces vibrant landscapes and cityscapes. |
| q | Flat | Details are preserved over a wide tone range, from highlights to shadows. Choose for photographs that will later be extensively processed or retouched. |
| k01–k20 | Creative Picture Control | Choose from the following Picture Controls, each a unique combination of hue, tone, saturation, and other settings tuned for a particular effect: Dream, Morning, Pop, Sunday, Somber, Dramatic, Silence, Bleached, Melancholic, Pure, Denim, Toy, Sepia, Blue, Red, Pink, Charcoal, Graphite, Binary, and Carbon. |
To view Picture Control settings, highlight a Picture Control and press 3. Changes to settings can be previewed in the display (0 Modifying Picture Controls).
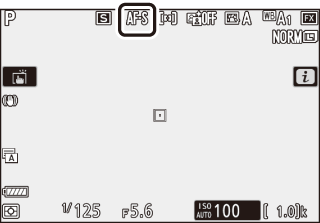
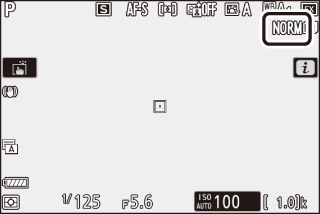
The current Picture Control is indicated by an icon in the display during shooting.

Modifying Picture Controls
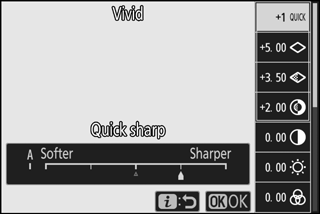
Picture Controls can be modified to suit the scene or the photographer’s creative intent. Highlight Set Picture Control in the i menu and press J to display the Picture Control list, then highlight a Picture Control and press 3 to display Picture Control settings. Press 1 or 3 to highlight the desired setting and press 4 or 2 to choose a value in increments of 1, or rotate the sub-command dial to choose a value in increments of 0.25 (the options available vary with the Picture Control selected). Default settings can be restored by pressing the O button.
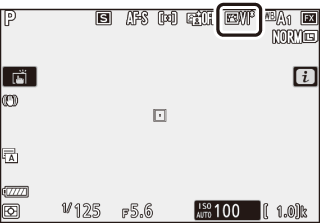
After adjusting settings to your satisfaction, press J to put the changes into effect and return to the i menu. Picture Controls that have been modified from default settings are indicated by an asterisk (“U”).
Previous Settings
The j indicator under the value display in the Picture Control setting menu indicates the previous value for the setting.
“A” (Auto)
Selecting the A (auto) option available for some settings lets the camera adjust the setting automatically. Results vary with exposure and the position of the subject in the frame.
The “n Auto“ Picture Control
If n Auto is selected for Set Picture Control, settings can be adjusted in the range A−2 to A+2.
The following settings are available:
| Option | Description | |
|---|---|---|
| Effect level | Mute or heighten the effect of Creative Picture Control. | |
| Quick sharp |
Quickly adjust levels for balanced Sharpening, Mid-range sharpening, and Clarity. You can also make individual adjustments to the following parameters:
|
|
| Sharpening | ||
| Mid-range sharpening | ||
| Clarity | ||
| Contrast | Adjust contrast. | |
| Brightness | Raise or lower brightness without loss of detail in highlights or shadows. | |
| Saturation | Control the vividness of colors. | |
| Hue | Adjust hue. | |
| Filter effects | Simulate the effect of color filters on monochrome pictures. | |
| Toning | Choose the tint used in monochrome pictures. Pressing 3 when an option other than B&W (black-and-white) is selected displays saturation options. | |
| Toning (Creative Picture Control) | Adjust the shade of color used for Creative Picture Controls. | |
Filter Effects
Choose from the following:
| Mode | Setting |
|---|---|
| Y (yellow) | These options enhance contrast and can be used to tone down the brightness of the sky in landscape photographs. Orange produces more contrast than yellow, red more contrast than orange. |
| O (orange) | |
| R (red) | |
| G (green) | Green softens skin tones and can be used for portraits. |
White Balance
Adjust white balance (for more information, see “White Balance”, 0 White Balance).
| Option | ||
|---|---|---|
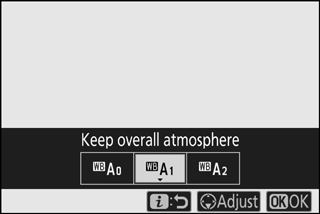
| 4 | Auto | |
| Keep white (reduce warm colors) | ||
| Keep overall atmosphere | ||
| Keep warm lighting colors | ||
| D | Natural light auto | |
| H | Direct sunlight | |
| G | Cloudy | |
| M | Shade | |
| J | Incandescent | |
| I | Fluorescent | |
| Sodium-vapor lamps | ||
| Warm-white fluorescent | ||
| White fluorescent | ||
| Cool-white fluorescent | ||
| Day white fluorescent | ||
| Daylight fluorescent | ||
| High temp. mercury-vapor | ||
| 5 | Flash | |
| K | Choose color temperature | |
| L | Preset manual | |
Pressing 3 when Auto or Fluorescent is highlighted displays sub-options for the highlighted item.
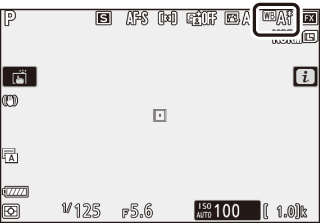
The current white balance option is indicated by an icon in the display during shooting.

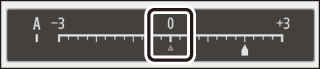
Fine-Tuning White Balance
Selecting White balance in the i menu displays a list of white balance options. If an option other than Choose color temperature is highlighted, fine-tuning options can be displayed by pressing 3. Any changes to fine-tuning options can be previewed in the display.


| G | Increase green |
|---|---|
| B | Increase blue |
| A | Increase amber |
| M | Increase magenta |
Tap the arrows in the display or use the multi selector to fine-tune white balance. Press J to save settings and return to the i menu.
An asterisk (“U”) next to the white balance icon in the shooting display indicates that fine-tuning is in effect.
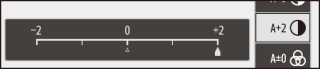
Choosing a Color Temperature
Selecting White balance in the i menu displays a list of white balance options. When Choose color temperature is highlighted, color temperature options can be viewed by pressing 3.
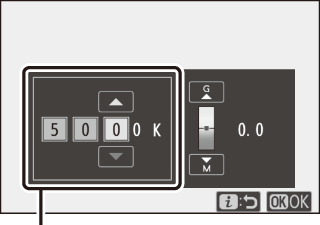
Value for
Amber–Blue axis
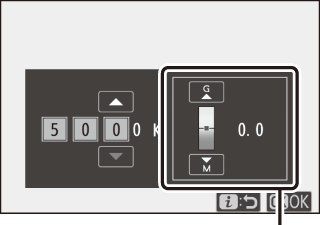
Value for
Green–Magenta axis
Press 4 or 2 to highlight digits on the Amber–Blue or Green–Magenta axis and press 1 or 3 to change. Press J to save settings and return to the i menu. If a value other than zero is selected for the Green–Magenta axis, an asterisk (“U“) will be displayed next to the white balance icon.
Choose Color Temperature
Note that the desired results will not be obtained with fluorescent lighting. Choose I (Fluorescent) for fluorescent light sources. With other light sources, take a test shot to determine if the selected value is appropriate.
Preset Manual
Preset manual is used to record and recall up to six custom white balance settings for shooting under mixed lighting or to compensate for light sources with a strong color cast. Follow the steps below to measure a value for preset manual white balance.
-
Display white balance presets.
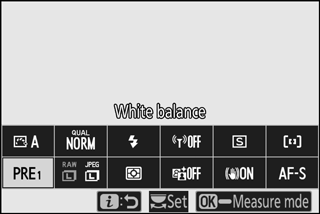
Highlight Preset manual in the i menu white balance display and press 3 to display a list of white balance presets.
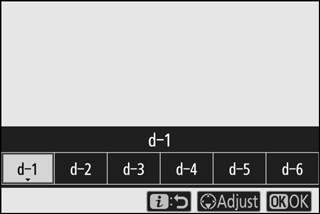
-
Select a preset.
Highlight the desired white balance preset (d-1 to d-6) and press J to select the highlighted preset and return to the i menu.
Protected Presets
Presets indicated by a g icon are protected and cannot be changed.
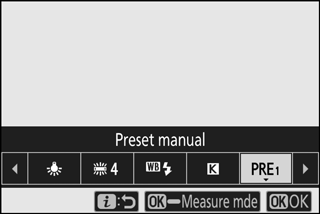
-
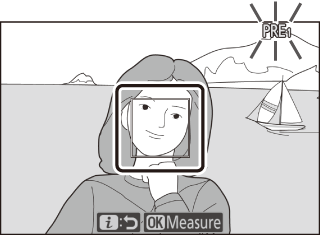
Select direct measurement mode.
Highlight White balance in the i menu and press and hold J until the L icons in the shooting display and control panel start to flash and white balance target (r) is displayed at the selected focus point.
-
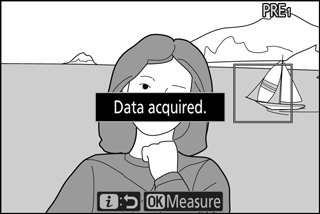
Measure white balance.
To measure white balance, tap a white or gray object, or use the multi selector to position the r over a white or gray area of the display and either press J or press the shutter-release button all the way down (note that the r cannot be repositioned when an optional flash unit is attached, in which case you will need to measure white balance with a white or gray object positioned in the center of the frame).
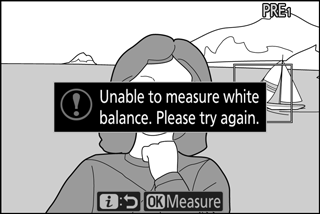
If the camera is unable to measure white balance, a message will be displayed. Try measuring white balance again with a different target.
-
Exit direct measurement mode.
Press the i button to exit direct measurement mode.
Measuring Preset Manual White Balance
Preset manual white balance cannot be measured while HDR or multiple exposure shooting is in progress.
Direct Measurement Mode
Direct measurement mode will end if no operations are performed in the time selected for Custom Setting c3 (Power off delay) > Standby timer.
Managing Presets
The White balance > Preset manual option in the photo shooting menu can be used to copy white balance from an existing photograph to a selected preset, add comments, or protect presets.
Preset Manual: Selecting a Preset
To choose a preset, select White balance > Preset manual in the photo shooting menu, then highlight a preset and press J. If no value currently exists for the selected preset, white balance will be set to 5200 K, the same as Direct sunlight.
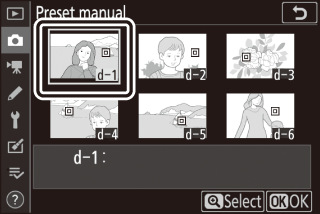
Image Quality
Choose a file format for photographs.
| Option | Description |
|---|---|
| NEF (RAW) + JPEG finem |
Record two copies of each photo: an NEF (RAW) image and a JPEG copy. Only the JPEG copy is displayed during playback, but deleting the JPEG copy also deletes the NEF (RAW) image. The NEF (RAW) image can only be viewed using a computer. |
| NEF (RAW) + JPEG fine |
|
| NEF (RAW) + JPEG normalm |
|
| NEF (RAW) + JPEG normal |
|
| NEF (RAW) + JPEG basicm |
|
| NEF (RAW) + JPEG basic |
|
| NEF (RAW) | Record photos in NEF (RAW) format. |
| JPEG finem | Record photos in JPEG format. Compression increases and file size decreases as quality progresses from “fine” through “normal” to “basic”. Choose options with m to maximize quality, options without m to ensure that all images have more or less the same file size. |
| JPEG fine | |
| JPEG normalm | |
| JPEG normal | |
| JPEG basicm | |
| JPEG basic | |
| TIFF (RGB) | Record photos in uncompressed TIFF-RGB format at a bit depth of 8 bits per channel (24-bit color). |
The option currently selected is shown in the display during shooting.
NEF (RAW)
- NEF (RAW) files have the extension “*.nef”.
- The process of converting NEF (RAW) pictures to other highly-portable formats such as JPEG is referred to as “NEF (RAW) processing”. During this process, Picture Controls and settings such as exposure compensation and white balance can be freely adjusted.
- The RAW data themselves are unaffected by NEF (RAW) processing and their quality will remain intact even if the pictures are processed multiple times at different settings.
- NEF (RAW) processing can be performed in-camera using the NEF (RAW) processing item in the retouch menu or on a computer using Nikon’s NX Studio software. NX Studio is available free-of-charge from the Nikon Download Center.
Image Size
Choose the size at which photographs are recorded.
| Option | Description | |
|---|---|---|
| NEF (RAW) | Large | Choose the size for photos recorded in NEF (RAW) format. NEF (RAW) is available only when an NEF (RAW) option is selected for image quality. |
| Medium | ||
| Small | ||
| JPEG/TIFF | Large | Choose the size for photos recorded in JPEG or TIFF format. |
| Medium | ||
| Small | ||
The option currently selected is shown in the display during shooting.
The physical dimensions of the photos in pixels varies with the option selected for Choose image area.
Z 7:
| Image size | ||||
|---|---|---|---|---|
| Large | Medium | Small | ||
| Image area | FX (36 × 24) | 8256 × 5504 | 6192 × 4128 | 4128 × 2752 |
| DX (24 × 16) | 5408 × 3600 | 4048 × 2696 | 2704 × 1800 | |
| 5 : 4 (30 × 24) | 6880 × 5504 | 5152 × 4120 | 3440 × 2752 | |
| 1 : 1 (24 × 24) | 5504 × 5504 | 4128 × 4128 | 2752 × 2752 | |
| 16 : 9 (36 × 20) | 8256 × 4640 | 6192 × 3480 | 4128 × 2320 | |
Z 6:
| Image size | ||||
|---|---|---|---|---|
| Large | Medium | Small | ||
| Image area | FX (36 × 24) | 6048 × 4024 | 4528 × 3016 | 3024 × 2016 |
| DX (24 × 16) | 3936 × 2624 | 2944 × 1968 | 1968 × 1312 | |
| 1 : 1 (24 × 24) | 4016 × 4016 | 3008 × 3008 | 2000 × 2000 | |
| 16 : 9 (36 × 20) | 6048 × 3400 | 4528 × 2544 | 3024 × 1696 | |
Flash Mode
Choose a flash mode for optional flash units (0 Flash Modes). The options available depend on the mode selected with the mode dial.
| Option | Available in | |
|---|---|---|
| I | Fill flash | b, P, S, A, M |
| J | Red-eye reduction | |
| K | Slow sync + red-eye | P, A |
| L | Slow sync | |
| M | Rear-curtain sync | P, S, A, M |
| s | Flash off | b, P, S, A, M |
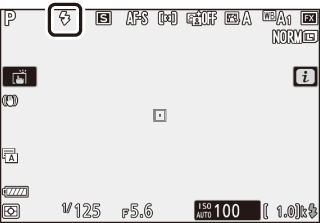
The option currently selected is indicated by an icon in the display during shooting.
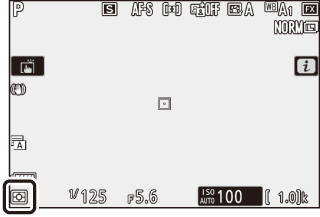
Metering
Metering determines how the camera sets exposure. The following options are available:
| Option | Description | |
|---|---|---|
| L | Matrix metering | The camera meters a wide area of the frame and sets exposure according to tone distribution, color, composition, and distance for results close to those seen by the naked eye. |
| M | Center-weighted metering | The camera meters the entire frame but assigns the greatest weight to an area in the center of the frame, the size of which can be chosen using Custom Setting b3 (Center-weighted area). This is the classic meter for portraits and is also recommended when using filters with an exposure factor (filter factor) over 1×. |
| N | Spot metering | The camera meters a ⌀4 mm circle (equivalent to approximately 1.5% of the frame) centered on the current focus point, making it possible to meter off-center subjects (if auto-area AF is in effect, the camera will instead meter the center focus point). Spot metering ensures that the subject will be correctly exposed, even when the background is much brighter or darker. |
| t | Highlight-weighted metering | The camera assigns the greatest weight to highlights. Use this option to reduce loss of detail in highlights, for example when photographing spotlit performers on-stage. |
The option currently selected is indicated by an icon in the display during shooting.
Wi-Fi Connection
Enable or disable Wi-Fi. Enable Wi-Fi to establish wireless connections to computers or between the camera and smartphones or tablets (smart devices) running the SnapBridge app.
The camera displays a Wi-Fi icon when Wi-Fi is enabled.
To turn Wi-Fi off, highlight Wi-Fi connection in the i menu and press J. If Wi-Fi is currently enabled, a Close Wi-Fi connection prompt will be displayed; press J to end the connection.
Wireless Connections
For information on establishing wireless connections to computers or smart devices, see the Network Guide, available from the Nikon Download Center:
Z 7: https://downloadcenter.nikonimglib.com/en/products/492/Z_7.html
Z 6: https://downloadcenter.nikonimglib.com/en/products/493/Z_6.html
More information on using SnapBridge is available via the app’s online help.
Active D-Lighting
Active D-Lighting preserves details in highlights and shadows, creating photographs with natural contrast. Use for high-contrast scenes, for example when photographing brightly lit outdoor scenery through a door or window or taking pictures of shaded subjects on a sunny day. It is most effective when used with matrix metering.
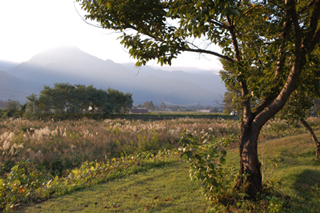
Off
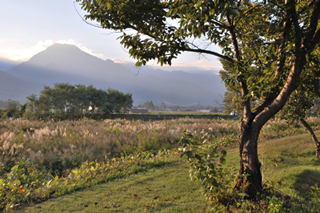
Y Auto
| Option | Description | |
|---|---|---|
| Y | Auto | The camera automatically adjusts Active D-Lighting in response to shooting conditions (in mode M, however, Y Auto is equivalent to Q Normal). |
| Z | Extra high | Choose the amount of Active D-Lighting performed from Z Extra high, P High, Q Normal, and R Low. |
| P | High | |
| Q | Normal | |
| R | Low | |
| c | Off | Active D-Lighting off. |
The option currently selected is indicated by an icon in the display during shooting.
Active D-Lighting
Noise (randomly-spaced bright pixels, fog, or lines) may appear in photos taken with Active D-Lighting. Uneven shading may be visible with some subjects. Active D-Lighting does not apply at high ISO sensitivities (Hi 0.3–Hi 2), including high sensitivities selected via auto ISO sensitivity control.
Release Mode
Choose the operation performed when the shutter-release button is pressed all the way down. For more information, see “The c/E (Release Mode/Self-Timer) Button” (0 The c/E (Release Mode/Self-Timer) Button).
| Option | |
|---|---|
| U | Single frame |
| V | Continuous L |
| W | Continuous H |
| X | Continuous H (extended) |
| E | Self-timer |
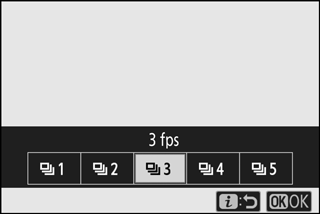
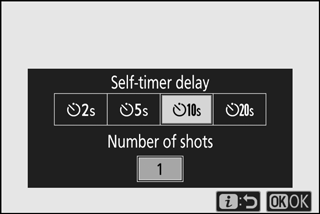
When Continuous L or Self-timer is highlighted, additional options can be displayed by pressing 3.
Pressing 3 when Continuous L is highlighted displays frame advance rate options.
Pressing 3 when Self-timer is highlighted displays options for the shutter-release delay and the number of shots taken when the timer expires.
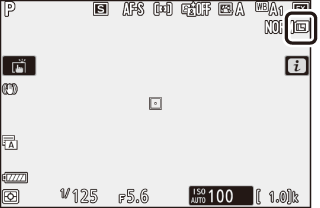
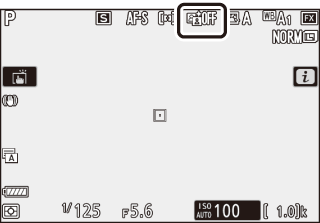
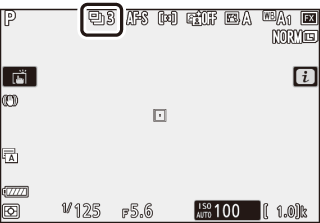
The current release mode is shown by icons in the shooting display and control panel.
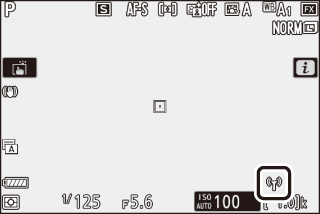
Vibration Reduction
Choose whether to enable vibration reduction. The options available vary with the lens.
| Option | Description | |
|---|---|---|
| C | On | Choose for enhanced vibration reduction when photographing static subjects. |
| Normal | ||
| D | Sport | Choose when photographing athletes and other subjects that are moving rapidly and unpredictably. |
| E | Off | Vibration reduction off. |
Options other than Off are shown by an icon in the display during shooting.
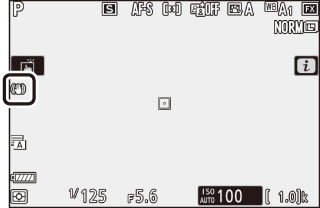
Vibration Reduction
Vibration reduction may be unavailable with some lenses. When using vibration reduction, wait for the image in the display to stabilize before shooting. With some lenses, the image in the display may also jiggle after the shutter is released; this is normal and does not indicate a malfunction.
Sport or On is recommended for panning shots. In Sport, Normal, and On modes, vibration reduction applies only to motion that is not part of the pan (if the camera is panned horizontally, for example, vibration reduction will be applied only to vertical shake).
To prevent unintended results, select Off when the camera is mounted on a tripod. Note that settings for VR lenses may differ; consult the lens manual for more information. Normal, Sport, or On is recommended if the tripod head is unsecured or the camera is mounted on a monopod.
AF-Area Mode
AF-area mode controls how the camera selects the focus-point for autofocus. For more information, see “AF-Area Mode” (0 AF-Area Mode).
| Option | |
|---|---|
| 3 | Pinpoint AF |
| d | Single-point AF |
| e | Dynamic-area AF |
| f | Wide-area AF (S) |
| g | Wide-area AF (L) |
| h | Auto-area AF |
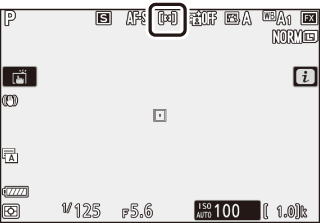
The option currently selected is shown by an icon in the display during shooting.
Focus Mode
The focus mode controls how the camera focuses. For more information, see “Choosing a Focus Mode” (0 Choosing a Focus Mode).
| Option | |
|---|---|
| AF-S | Single AF |
| AF-C | Continuous AF |
| MF | Manual focus |
The option currently selected is shown by an icon in the display during shooting.