Focus
Focus can be adjusted automatically, manually, or using touch controls. How the camera focuses is governed by your choice of focus mode and AF-area mode.
Choosing a Focus Mode
The focus mode controls how the camera focuses. The focus mode can be selected using the Focus mode items in the i menu and the photo and movie shooting menus (0 Focus Mode, Focus Mode, Focus Mode).
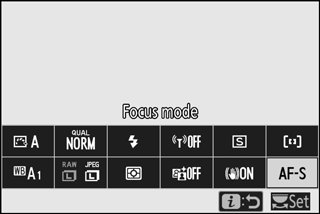
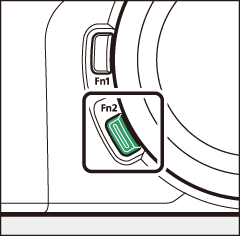
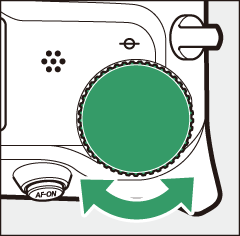
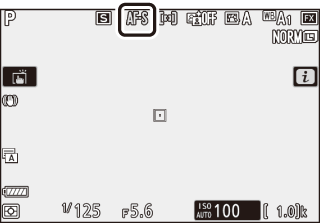
At default settings, the focus mode can also be selected by holding the Fn2 button and rotating the main command dial (0 The Function Buttons (Fn1 and Fn2)).
| Option | Description | |
|---|---|---|
| AF-S | Single AF | For stationary subjects. Press the shutter-release button halfway to focus. If the camera is able to focus, the focus point will turn from red to green; focus will lock while the shutter-release button is pressed halfway. If the camera fails to focus, the focus point will flash red. At default settings, the shutter can only be released if the camera is able to focus (focus priority). |
| AF-C | Continuous AF | For moving subjects. The camera focuses continuously while the shutter-release button is pressed halfway; if the subject moves, the camera will predict the final distance to the subject and adjust focus as necessary. At default settings, the shutter can be released whether or not the subject is in focus (release priority). |
| AF-F | Full-time AF | The camera adjusts focus continuously in response to subject movement or changes in composition. When the shutter-release button is pressed halfway, the focus point will turn from red to green and focus will lock. This option is only available in movie mode. |
| MF | Manual focus | Focus manually (0 Manual Focus). The shutter can be released whether or not the subject is in focus. |
Autofocus
The display may brighten or darken while the camera focuses and the focus point may sometimes be displayed in green when the camera is unable to focus. The camera may be unable to focus using autofocus in the following situations:
- The subject contains lines parallel to the long edge of the frame
- The subject lacks contrast
- The subject in the focus point contains areas of sharply contrasting brightness, or includes spot lighting or a neon sign or other light source that changes in brightness
- Flicker or banding appears under fluorescent, mercury-vapor, sodium-vapor, or similar lighting
- A cross (star) filter or other special filter is used
- The subject appears smaller than the focus point
- The subject is dominated by regular geometric patterns (e.g., blinds or a row of windows in a skyscraper)
Turning the Camera Off
The focus position may change if you turn the camera off and then on again after focusing.
Low-Light AF
For improved focus when lighting is poor, select AF-S and choose On for Custom Setting a11 (Low-light AF).
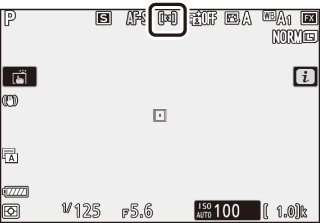
AF-Area Mode
The focus point can be positioned using the sub-selector (0 The Sub-Selector) or multi-selector. AF-area mode controls how the camera selects the focus-point for autofocus. The default setting is Single-point AF, but other options can be selected using the AF-area mode items in the i menu and the photo and movie shooting menus (0 AF-Area Mode, AF-Area Mode, AF-Area Mode).
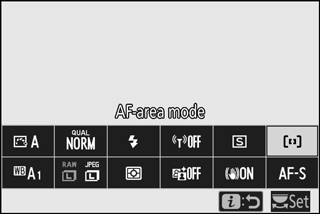
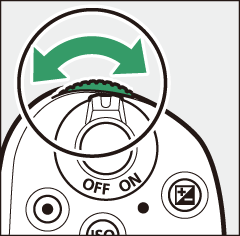
At default settings, AF-area mode can also be selected by holding the Fn2 button and rotating the sub-command dial (0 The Function Buttons (Fn1 and Fn2)).
| Option | Description | |
|---|---|---|
| 3 | Pinpoint AF | Recommended for shots involving static subjects, such as buildings, in-studio product photography, or close-ups. Pinpoint AF is used for pinpoint focus on a selected spot in the frame. This option is only available when photo mode is selected and Single AF is chosen for Focus mode. Focusing may be slower than with single-point AF. |
| d | Single-point AF | The camera focuses on a point selected by the user. Use with stationary subjects. |
| e | Dynamic-area AF | The camera focuses on a point selected by the user. If the subject briefly leaves the selected point, the camera will focus based on information from surrounding focus points. Use for photographs of athletes and other active subjects that are hard to frame using single-point AF. This option is only available when photo mode is selected and Continuous AF is chosen for Focus mode. |
| f | Wide-area AF (S) | As for Single-point AF, except the camera focuses on a wider area, the focus areas for Wide-area AF (L) being larger than those for Wide-area AF (S). Use for snapshots or photos of moving subjects that are hard to frame using single-point AF, or in movie mode for smooth focus during panning and tilting shots or when filming moving subjects. If the selected focus area contains subjects at different distances from the camera, the camera will assign priority to the closest subject. |
| g | Wide-area AF (L) | |
| h | Auto-area AF | The camera automatically detects the subject and selects the focus area. Use on occasions when you don’t have time to select the focus point yourself, for portraits, or for snapshots and other spur-of-the-moment photos. The camera gives priority to portrait subjects; if a portrait subject is detected, an amber border indicating the focus point will appear around the subject’s face or, if the camera detects the subject’s eyes, one or the other of their eyes (face/eye-detection AF; 0 Face/Eye-Detection AF). You can also configure the camera to detect the faces and eyes of dogs and cats by selecting Animal detection for Custom Setting a4 (Auto-area AF face/eye detection; for more information, see “Animal Face/Eye-Detection AF”, 0 Animal Face/Eye-Detection AF). Face- and eye-detection free you to concentrate on composition and your subject’s expression when photographing active human and animal portrait subjects. Subject tracking can be activated by pressing the J button (0 Subject Tracking). It can also be assigned to the camera Fn1 or Fn2 or lens Fn or Fn2 button using Custom Setting f2 or g2 (Custom control assignment; 0 f2: Custom Control Assignment, g2: Custom Control Assignment). |
s: The Center Focus Point
In all AF-area modes except Auto-area AF, a dot appears in the focus point when it is in the center of the frame.
Quick Focus-Point Selection
For quicker focus-point selection, choose Every other point for Custom Setting a5 (Focus points used) to use only a quarter of the available focus points. The number of points available for Pinpoint AF and Wide-area AF (L) does not change. If you prefer to use the sub-selector for focus-point selection, you can choose Select center focus point for Custom Setting f2 (Custom control assignment) > Sub-selector center to allow the center of the sub-selector to be used to quickly select the center focus point.
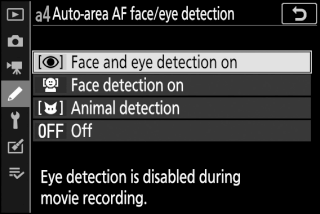
Face/Eye-Detection AF
When photographing portrait subjects with Auto-area AF, use Custom Setting a4 (Auto-area AF face/eye detection) to choose whether the camera detects both faces and eyes (face/eye-detection AF) or only faces (face-detection AF). If Face and eye detection on is selected and a portrait subject is detected, an amber border indicating the focus point will appear around the subject’s face or, if the camera detects the subject’s eyes, one or the other of their eyes (face/eye-detection AF). Faces detected when Face detection on is selected are similarly indicated by an amber focus point. If AF-C is selected for focus mode, the focus point will light amber when faces or eyes are detected, while if AF-S is selected, the focus point will turn green when the camera focuses.
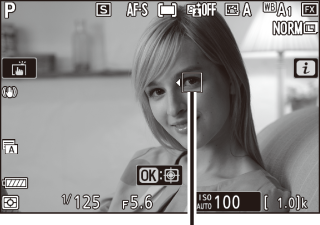
Focus point
If more than one portrait subject or more than one eye is detected, e and f icons will appear on the focus point, and you will be able to position the focus point over a different face or eye by pressing 4 or 2. If the subject looks away after their face is detected, the focus point will move to track their motion.
During playback, you can zoom in on the face or eye used for focus by pressing J.
Face/Eye-Detection AF
-
Eye detection is not available in movie mode. Eye and face detection may not perform as expected if:
- the subject’s face occupies a very large or very small proportion of the frame,
- the subject’s face is lit too brightly or too poorly,
- the subject is wearing glasses or sunglasses,
- the subject’s face or eyes are obscured by hair or other objects, or
- the subject moves excessively during shooting.
-
The performance of face- and eye-detection may drop if:
- the camera is connected to an HDMI device with 10 bit selected for HDMI > Advanced > Output data depth in the setup menu, or
- On (cannot record to card) is selected for HDMI > Advanced > N-Log setting in the setup menu.
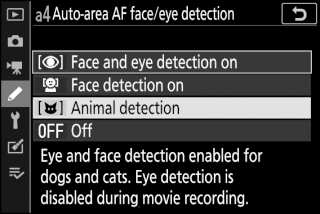
Animal Face/Eye-Detection AF
If Animal detection is selected for Custom Setting a4 (Auto-area AF face/eye detection) and the camera detects a dog or cat, an amber border indicating the focus point will appear around the subject’s face or, if the camera detects the subject’s eyes, one or the other of their eyes. If AF-C is selected for focus mode, the focus point will light amber when faces or eyes are detected, while if AF-S is selected, the focus point will turn green when the camera focuses.
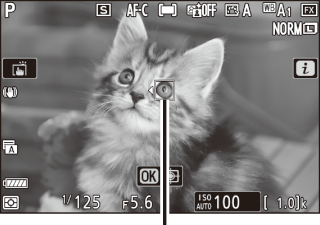
Focus point
If more than one animal or more than one eye is detected, e and f icons will appear on the focus point, and you will be able to position the focus point over a different face or eye by pressing 4 or 2.
During playback, you can zoom in on the face or eye used for focus by pressing J.
Animal Detection AF
-
Animal eye-detection is not available in movie mode. Animal face- and eye-detection may fail to detect the faces or eyes of some breeds and may not perform as expected if:
- the subject’s face occupies a very large or very small proportion of the frame,
- the subject’s face is lit too brightly or too poorly,
- the subject’s face or eyes are obscured by fur or other objects,
- the subject’s eyes are similar in color to the rest of their face, or
- the subject moves excessively during shooting.
-
The performance of face- and eye-detection may drop if:
- the camera is connected to an HDMI device with 10 bit selected for HDMI > Advanced > Output data depth in the setup menu, or
- On (cannot record to card) is selected for HDMI > Advanced > N-Log setting in the setup menu.
- The light from the AF-assist illuminator may adversely affect the eyes of some animals; we recommend that you select Off for Custom Setting a12 (Built-in AF-assist illuminator).
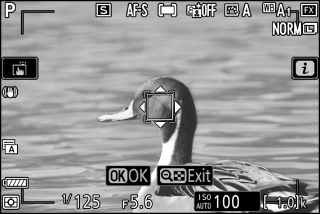
Subject Tracking
When Auto-area AF is selected for AF-area mode, pressing J enables focus tracking. The focus point will change to a targeting reticule; position the reticule over the target and either press J again or press the AF-ON button to start tracking. The focus point will track the selected subject as it moves through the frame. To end tracking and select the center focus point, press J a third time. To exit subject-tracking mode, press the W (Q) button.
If AF-C is selected for focus mode during still photography and tracking is started using the AF-ON button or by pressing the shutter-release button halfway, the camera will track the subject only while the control is pressed. Releasing the control restores the focus point selected before tracking started.
Subject Tracking
The camera may be unable to track subjects if they move quickly, leave the frame or are obscured by other objects, change visibly in size, color, or brightness, or are too small, too large, too bright, too dark, or similar in color or brightness to the background.
The Touch Shutter
Touch controls can be used to focus and release the shutter. Touch the display to focus and lift your finger to release the shutter.
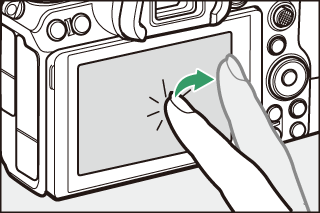
Tap the icon shown in the illustration to choose the operation performed by tapping the display in shooting mode. Choose from the following options:
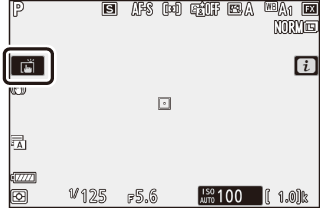
| W |
|
|---|---|
| V |
|
| X | Touch shutter disabled. |
When choosing an eye using touch controls, note that the camera may not focus on the eye on the side you intend. Use the multi selector to choose the desired eye.
Taking Pictures Using Touch Shooting Options
- Touch controls cannot be used for manual focus.
- The shutter-release button can be used to take pictures when the W icon is displayed.
- Touch controls cannot be used to take photographs during movie recording.
- During burst photography, touch controls can be used only to take one picture at a time. Use the shutter-release button for burst photography.
- In self-timer mode, focus locks on the selected subject when you touch the monitor and the shutter is released about 10 seconds after you lift your finger from the display. If the number of shots selected is greater than 1, the remaining shots will be taken in a single burst.
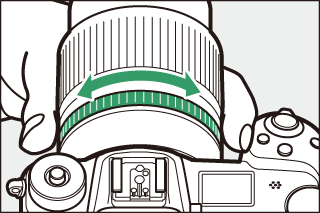
Manual Focus
Manual focus can be used when autofocus does not produce the desired results. Position the focus point over your subject and rotate the focus or control ring until the subject is in focus.
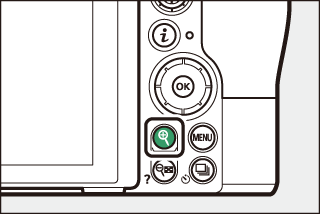
For greater precision, press the X button to zoom in on the view through the lens.
When the subject is in focus, the focus point will light green and the in-focus indicator (I) will appear in the display.
Focus distance indicator
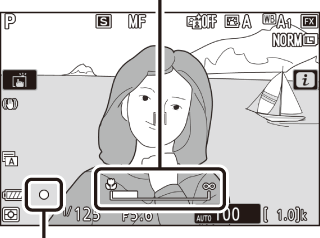
In-focus indicator
| In-focus indicator | Description | ||
|---|---|---|---|
| I | Subject in focus. | ||
| F | Focus point is between camera and subject. | ||
| H | Focus point is behind subject. | ||
| F | H | Camera unable to determine whether subject is in focus. | |
| (flashes) | |||
When using manual focus with subjects not suited to autofocus, note that the in-focus indicator (I) may be displayed when the subject is not in focus. Zoom in on the view through the lens and check focus. Use of a tripod is recommended when the camera is having trouble focusing.
Lenses with Focus-Mode Selection
Manual focus can be selected using the controls on the lens.
Focal Plane Position
To determine the distance between your subject and the camera, measure from the focal plane mark (E) on the camera body. The distance between the lens mounting flange and the focal plane is 16 mm (0.63 in.).
16 mm
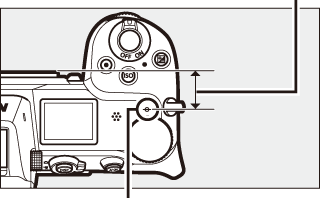
Focal plane mark
Focus Peaking
If focus peaking is enabled using Custom Setting d10 (Peaking highlights), objects that are in focus will be indicated by colored outlines in manual focus mode. Note that peaking highlights may not be displayed if the camera is unable to detect outlines, in which case focus can be checked using the view through the lens in the display.
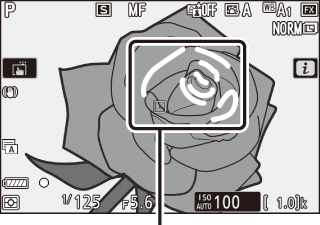
Area in focus