Choose the operations performed in photo mode using camera or lens controls or by pressing camera controls and rotating command dials.
-
Choose the roles played by the controls below. Highlight the desired control and press J.
|
Control |
|
|---|---|
|
w |
[] |
|
y |
[] |
|
V |
[] |
|
7 |
[] |
|
8 |
[] |
|
z |
[] |
|
S |
[] |
|
3 |
[] |
|
l |
[] |
-
The roles that can be assigned to these controls are as follows:
|
Option |
w |
y |
V |
7 |
8 |
z |
S |
3 |
l |
|
|---|---|---|---|---|---|---|---|---|---|---|
|
K |
[] |
— |
— |
4 |
— |
4 |
— |
— |
— |
— |
|
A |
[] |
4 |
4 |
4 |
— |
4 |
— |
4 |
4 |
— |
|
F |
[] |
4 |
4 |
4 |
— |
4 |
— |
4 |
4 |
— |
|
E |
[] |
4 |
4 |
4 |
— |
4 |
4 |
4 |
4 |
— |
|
D |
[] |
4 |
4 |
4 |
— |
4 |
4 |
4 |
4 |
— |
|
C |
[] |
4 |
4 |
4 |
— |
4 |
— |
4 |
4 |
— |
|
B |
[] |
4 |
4 |
4 |
— |
4 |
— |
4 |
4 |
— |
|
r |
[] |
4 |
4 |
— |
— |
4 |
— |
4 |
4 |
— |
|
h |
[] |
4 |
4 |
— |
— |
4 |
— |
4 |
4 |
— |
|
q |
[] |
4 |
4 |
— |
— |
4 |
4 |
4 |
4 |
— |
|
L |
[] |
4 |
4 |
— |
— |
4 |
— |
4 |
4 |
— |
|
M |
[] |
4 |
4 |
— |
— |
4 |
— |
4 |
4 |
— |
|
N |
[] |
4 |
4 |
— |
— |
4 |
— |
4 |
4 |
— |
|
t |
[] |
4 |
4 |
— |
— |
4 |
— |
4 |
4 |
— |
|
1 |
[] |
4 |
4 |
— |
— |
4 |
— |
4 |
4 |
— |
|
c |
[] |
4 |
4 |
— |
— |
4 |
— |
4 |
4 |
— |
|
4 |
[] |
4 |
4 |
— |
— |
4 |
4 |
4 |
4 |
— |
|
n |
[] |
4 |
4 |
— |
— |
— |
— |
4 |
4 |
— |
|
L |
[] |
4 |
4 |
— |
— |
— |
— |
— |
— |
— |
|
b |
[] |
4 |
4 |
4 |
— |
4 |
4 |
— |
— |
— |
|
b |
[] |
4 |
4 |
— |
— |
4 |
4 |
4 |
4 |
— |
|
p |
[] |
4 |
4 |
4 |
— |
— |
4 |
4 |
4 |
— |
|
O |
[] |
4 |
4 |
— |
— |
— |
4 |
4 |
4 |
— |
|
3 |
[] |
4 |
4 |
— |
— |
— |
4 |
4 |
4 |
— |
|
K |
[] |
4 |
4 |
— |
— |
— |
— |
4 |
4 |
— |
|
g |
[] |
4 |
4 |
— |
— |
— |
— |
— |
— |
— |
|
J |
[] |
4 |
4 |
— |
— |
4 |
4 |
— |
— |
— |
|
8 |
[] |
4 |
4 |
— |
— |
— |
4 |
— |
— |
— |
|
m |
[] |
4 |
4 |
— |
— |
— |
4 |
— |
— |
— |
|
h |
[] |
4 |
4 |
— |
— |
— |
4 |
— |
— |
— |
|
y |
[] |
4 |
4 |
— |
— |
— |
4 |
— |
— |
— |
|
w |
[] |
4 |
4 |
— |
— |
— |
4 |
— |
— |
— |
|
I/Y |
[] |
4 |
4 |
— |
— |
— |
4 |
— |
— |
— |
|
z |
[] |
4 |
4 |
— |
— |
— |
4 |
— |
— |
— |
|
t |
[] |
4 |
4 |
— |
— |
— |
4 |
— |
— |
— |
|
$ |
[] |
4 |
4 |
— |
— |
— |
4 |
— |
— |
— |
|
2 |
[] |
4 |
4 |
— |
— |
— |
4 |
— |
— |
— |
|
z |
[] |
4 |
4 |
— |
— |
— |
4 |
— |
— |
— |
|
$ |
[] |
4 |
4 |
— |
— |
— |
4 |
— |
— |
— |
|
W |
[] |
4 |
4 |
— |
— |
— |
— |
— |
— |
— |
|
c |
[] |
4 |
4 |
— |
— |
— |
— |
— |
— |
— |
|
w |
[] |
4 |
4 |
— |
— |
4 |
4 |
— |
— |
— |
|
Y |
[] |
— |
— |
— |
4 |
— |
— |
— |
— |
— |
|
x |
[] |
— |
— |
— |
4 |
— |
— |
— |
— |
— |
|
X |
[] |
— |
— |
— |
— |
— |
— |
— |
— |
41, 2 |
|
q |
[] |
— |
— |
— |
— |
— |
— |
— |
— |
42 |
|
E |
[] |
— |
— |
— |
— |
— |
— |
— |
— |
42 |
|
9 |
[] |
— |
— |
— |
— |
— |
— |
— |
— |
42 |
|
[] |
4 |
4 |
4 |
— |
4 |
4 |
4 |
4 |
42 |
|
-
Available with compatible lenses only.
-
Regardless of the option selected, in manual focus mode the control ring can only be used to adjust focus.
-
The following options are available:
|
Role |
Description |
|
|---|---|---|
|
K |
[] |
Pressing the control selects the center focus point. |
|
A |
[] |
Pressing the control initiates autofocus, duplicating the function of the AF-ON button. |
|
F |
[] |
Focus locks while the control is pressed. |
|
E |
[] |
Exposure locks when the control is pressed. Exposure lock does not end when the shutter is released. Exposure remains locked until the control is pressed a second time or the standby timer expires. |
|
D |
[] |
Exposure locks when the control is pressed. Exposure remains locked until the control is pressed a second time, the shutter is released, or the standby timer expires. |
|
C |
[] |
Exposure locks while the control is pressed. |
|
B |
[] |
Focus and exposure lock while the control is pressed. |
|
r |
[] |
Press the control to lock flash value for optional flash units; press again to cancel FV lock. |
|
h |
[] |
If the flash is currently enabled, it will be disabled while the control is pressed. If the flash is currently off, front-curtain sync will be selected while the control is pressed. |
|
q |
[] |
Keep the control pressed to preview photo color, exposure, and depth of field. |
|
L |
[] |
[] is activated while the control is pressed. |
|
M |
[] |
[] is activated while the control is pressed. |
|
N |
[] |
[] is activated while the control is pressed. |
|
t |
[] |
[] is activated while the control is pressed. |
|
1 |
[] |
|
|
c |
[] |
When an optional wireless remote controller is connected, the control can be used to toggle between remote release and master or synchronized release. The options available depend on the setting chosen for Custom Setting d3 [].
|
|
4 |
[] |
|
|
n |
[] |
Pressing the control when [], [], or [] is selected for AF-area mode enables subject tracking; the focus point will change to a targeting reticle and the monitor and viewfinder to subject-tracking displays.
|
|
b |
[] |
Press the control to display a framing grid. Press the control again to turn the display off. |
|
L |
[] |
Press the control to start silent photography. Press again to end. |
|
b |
[] |
Press the control to hide the indicators in the live view display. Press again to view indicators. |
|
p |
[] |
Press the control to zoom the display in on the area around the current focus point. Press again to cancel zoom. |
|
O |
[] |
Press the control to display “MY MENU”. |
|
3 |
[] |
Press the control to jump to the top item in “MY MENU”. Select this option for quick access to a frequently-used menu item. |
|
K |
[] |
Press the control to start playback. |
|
g |
[] |
Press the control during playback to protect the current picture. |
|
J |
[] |
Press the control and rotate a command dial to choose the image area. |
|
8 |
[] |
Press the control and rotate the main command dial to choose an image quality option and the sub-command dial to select image size. |
|
m |
[] |
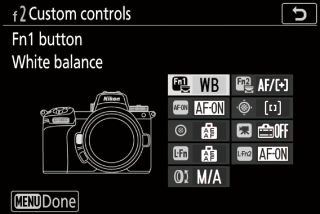
To choose a white balance option, hold the button and rotate the main command dial. Some options offer sub-options that can be selected by rotating the sub-command dial. |
|
h |
[] |
Press the control and rotate a command dial to choose a Picture Control. |
|
y |
[] |
Press the control and rotate a command dial to adjust Active D-Lighting. |
|
w |
[] |
Press the control and rotate a command dial to choose a metering option. |
|
I/Y |
[] |
Press the control and rotate the main command dial to choose a flash mode and the sub-command dial to adjust flash output. |
|
z |
[] |
Hold the control and rotate the main command dial to choose the focus mode, the sub-command dial to choose the AF-area mode. |
|
t |
[] |
Press the control and rotate the main command dial to choose the number of shots and the sub-command dial to select the bracketing increment or Active D-Lighting amount. |
|
$ |
[] |
Press the control and rotate the main command dial to choose the mode and the sub-command dial to choose the number of shots. |
|
2 |
[] |
Press the control and rotate the main command dial to choose the mode and the sub-command dial to choose the exposure differential. |
|
z |
[] |
Press the control and rotate a command dial to choose the shutter-release delay. |
|
$ |
[] |
Press the control and rotate the main command dial to lock shutter speed (modes S and M). To lock aperture (modes A and M), press the control and rotate the sub-command dial. |
|
W |
[] |
Press the control and rotate the main command dial to choose a peaking level and the sub-command dial to select the peaking color. |
|
c |
[] |
To rate the current picture in playback mode, press the control and rotate the main command dial.
|
|
w |
[] |
Press the control and rotate a command dial to choose a lens number saved using the [] item in the setup menu. |
|
Y |
[] |
Pressing the sub-selector up, down, left, or right during shooting or playback has the same effect as pressing 1, 3, 4, or 2 on the multi selector. To choose the role played by the sub-selector during focus or playback zoom, highlight [] and press 2.
|
|
x |
[] |
Use the control to select the focus point. Using the control during playback ends playback and enables focus-point selection. |
|
X |
[] |
Autofocus can be over-ridden by rotating the lens control ring (autofocus with manual override). The control ring can be used for manual focus while the shutter-release button is pressed halfway. To refocus using autofocus, lift your finger from the shutter-release button and then press it halfway again. |
|
q |
[] |
Rotate the lens control ring to adjust aperture. |
|
E |
[] |
Rotate the lens control ring to adjust exposure compensation. |
|
9 |
[] |
Rotate the lens control ring to adjust ISO sensitivity. |
|
[] |
The control has no effect. |
|