Choose the operations performed in movie mode using camera or lens controls or by pressing camera controls and rotating command dials.
-
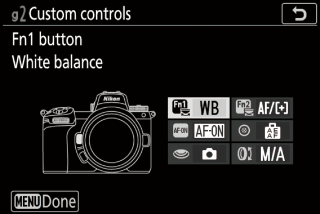
Choose the roles played by the controls below. Highlight the desired control and press J.
|
Control |
|
|---|---|
|
w |
[] |
|
y |
[] |
|
V |
[] |
|
8 |
[] |
|
G |
[] |
|
l |
[] |
-
The roles that can be assigned to these controls are as follows:
|
Option |
w |
y |
V |
8 |
G |
l |
|
|---|---|---|---|---|---|---|---|
|
t |
[] |
4 |
— |
— |
— |
— |
— |
|
q |
[] |
— |
4 |
— |
— |
— |
— |
|
i |
[] |
4 |
— |
— |
— |
— |
— |
|
h |
[] |
— |
4 |
— |
— |
— |
— |
|
n |
[] |
4 |
4 |
— |
— |
— |
— |
|
b |
[] |
4 |
4 |
4 |
4 |
— |
— |
|
b |
[] |
4 |
4 |
— |
4 |
— |
— |
|
p |
[] |
4 |
4 |
4 |
4 |
— |
— |
|
g |
[] |
4 |
4 |
— |
— |
— |
— |
|
K |
[] |
— |
— |
4 |
4 |
— |
— |
|
A |
[] |
— |
— |
4 |
— |
— |
— |
|
F |
[] |
— |
— |
4 |
4 |
— |
— |
|
E |
[] |
— |
— |
4 |
4 |
— |
— |
|
C |
[] |
— |
— |
4 |
4 |
— |
— |
|
B |
[] |
— |
— |
4 |
4 |
— |
— |
|
C |
[] |
— |
— |
— |
— |
4 |
— |
|
1 |
[] |
— |
— |
4 |
4 |
4 |
— |
|
J |
[] |
4 |
4 |
— |
4 |
— |
— |
|
m |
[] |
4 |
4 |
— |
— |
— |
— |
|
h |
[] |
4 |
4 |
— |
— |
— |
— |
|
y |
[] |
4 |
4 |
— |
— |
— |
— |
|
w |
[] |
4 |
4 |
— |
— |
— |
— |
|
z |
[] |
4 |
4 |
— |
— |
— |
— |
|
H |
[] |
4 |
4 |
— |
— |
— |
— |
|
W |
[] |
4 |
4 |
— |
— |
— |
— |
|
c |
[] |
4 |
4 |
— |
— |
— |
— |
|
X |
[] |
— |
— |
— |
— |
— |
41, 2 |
|
q |
[] |
— |
— |
— |
— |
— |
42 |
|
E |
[] |
— |
— |
— |
— |
— |
42 |
|
9 |
[] |
— |
— |
— |
— |
— |
42 |
|
[] |
4 |
4 |
4 |
4 |
— |
42 |
|
-
Available with compatible lenses only.
-
Regardless of the option selected, in manual focus mode the control ring can only be used to adjust focus.
-
The following options are available:
|
Role |
Description |
|
|---|---|---|
|
t |
[] |
Aperture widens while the Fn1 button is pressed. Use in combination with Custom Setting g2 [] > [] > [] for button-controlled aperture adjustment. |
|
q |
[] |
Aperture narrows while the Fn2 button is pressed. Use in combination with Custom Setting g2 [] > [] > [] for button-controlled aperture adjustment. |
|
i |
[] |
Exposure compensation increases while the Fn1 button is pressed. Use in combination with Custom Setting g2 [] > [] > [] for button-controlled exposure compensation. |
|
h |
[] |
Exposure compensation decreases while the Fn2 button is pressed. Use in combination with Custom Setting g2 [] > [] > [] for button-controlled exposure compensation. |
|
n |
[] |
Pressing the control when [], [], or [] is selected for AF-area mode enables subject tracking; the focus point will change to a targeting reticle and the monitor and viewfinder to subject-tracking displays.
|
|
b |
[] |
Press the control to hide the indicators in the live view display. Press again to view indicators. |
|
b |
[] |
Press the control to display a framing grid. Press the control again to turn the display off. |
|
g |
[] |
Press the control during playback to protect the current picture. |
|
K |
[] |
Pressing the control selects the center focus point. |
|
A |
[] |
Pressing the control initiates autofocus, duplicating the function of the AF-ON button. |
|
F |
[] |
Focus locks while the control is pressed. |
|
E |
[] |
Exposure locks when the control is pressed. Exposure lock does not end when the shutter is released. Exposure remains locked until the control is pressed a second time or the standby timer expires. |
|
C |
[] |
Exposure locks while the control is pressed. |
|
B |
[] |
Focus and exposure lock while the control is pressed. |
|
p |
[] |
Press the control to zoom the display in on the area around the current focus point (the zoom ratio is selected in advance). Press again to cancel zoom. |
|
C |
[] |
Press the shutter-release button all the way down to take a photograph with an aspect ratio of 16:9. |
|
1 |
[] |
Press the control to start recording. Press again to end recording. |
|
J |
[] |
Press the control and rotate a command dial to choose the image area for movies. Note that the image area cannot be changed while recording is in progress. |
|
m |
[] |
Hold the control and rotate the main command dial to adjust white balance for movies. Some options offer sub-options that can be selected by rotating the sub-command dial. |
|
h |
[] |
Press the control and rotate a command dial to choose a Picture Control. |
|
y |
[] |
Press the control and rotate a command dial to adjust Active D-Lighting for movies. |
|
w |
[] |
Press the control and rotate a command dial to choose a movie metering option. |
|
z |
[] |
Hold the control and rotate the main command dial to choose the focus mode, the sub-command dial to choose the AF-area mode. |
|
H |
[] |
Press the control and rotate a command dial to adjust microphone sensitivity. |
|
W |
[] |
Press the control and rotate the main command dial to choose a peaking level and the sub-command dial to select the peaking color. |
|
c |
[] |
To rate the current picture in playback mode, press the control and rotate the main command dial.
|
|
X |
[] |
The lens control ring can be used for manual focus regardless of the option selected for focus mode. To refocus using autofocus, press the shutter-release button halfway or press a control to which AF-ON has been assigned. |
|
q |
[] |
Rotate the lens control ring to adjust aperture. |
|
E |
[] |
Rotate the lens control ring to adjust exposure compensation. |
|
9 |
[] |
Rotate the lens control ring to adjust ISO sensitivity. |
|
[] |
The control has no effect. |
|
-
Power aperture is available only in modes A and M.
-
A 6 icon in the shooting display indicates that power aperture cannot be used.
-
The display may flicker while aperture is adjusted.