Choose how new photos will be processed. For more information, see “Set Picture Control” (0 Set Picture Control).
Set Picture Control: Modifying Picture Controls
Existing preset or custom Picture Controls can be modified to suit the scene or the user’s creative intent.
-
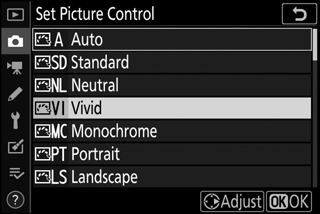
Select a Picture Control.
Highlight the desired Picture Control in the Picture Control list and press 2.
-
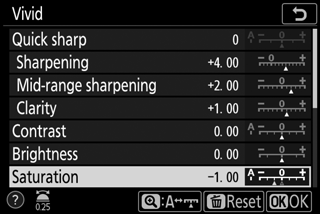
Adjust settings.
Press 1 or 3 to highlight the desired setting and press 4 or 2 to choose a value in increments of 1, or rotate the sub-command dial to choose a value in increments of 0.25 (the options available vary with the Picture Control selected). To quickly adjust levels for balanced Sharpening, Mid-range sharpening, and Clarity, highlight Quick sharp and press 4 or 2. Repeat this step until all settings have been adjusted. Default settings can be restored by pressing the O button.
-
Save changes and exit.
Press J to save changes and return to the Picture Control list.
Custom Picture Controls
Modifications to existing Picture Controls can be saved as custom Picture Controls using the Manage Picture Control option in the photo or movie shooting menu. Custom Picture Controls can be copied to a memory card and used in compatible software or shared among cameras of the same model.
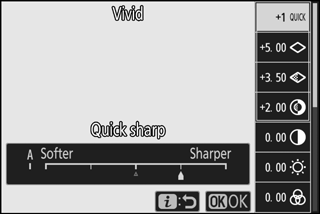
Modifying Picture Controls from the i menu allows the effect to be previewed in the display. Highlight Set Picture Control in the i menu and press J, then press 4 and 2 to choose a Picture Control and press 3 to display Picture Control settings.