Options Available in Live View
Settings for the selected effect are adjusted in the live view display.
U Photo Illustration
-
Select live view.
Rotate the live view switch. The view through the lens will be displayed in the monitor.
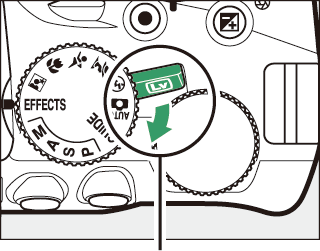
Live view switch
-
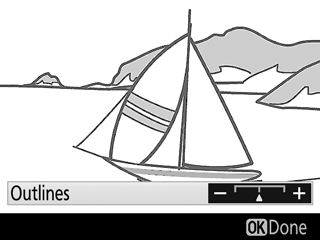
Adjust outline thickness.
Press J to display options. Press 4 or 2 to make outlines thicker or thinner.
-
Press J.
Press J to exit when settings are complete. To exit live view, rotate the live view switch.
' Toy Camera Effect
-
Select live view.
Rotate the live view switch. The view through the lens will be displayed in the monitor.
Live view switch
-
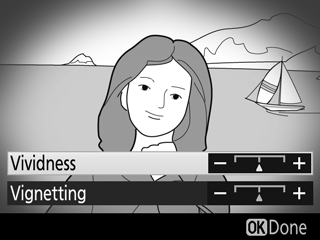
Adjust options.
Press J to display options. Press 1 or 3 to highlight Vividness or Vignetting and press 4 or 2 to change. Adjust vividness to make colors more or less saturated, vignetting to control the amount of vignetting.
-
Press J.
Press J to exit when settings are complete. To exit live view, rotate the live view switch.
( Miniature Effect
-
Select live view.
Rotate the live view switch. The view through the lens will be displayed in the monitor.
Live view switch
-
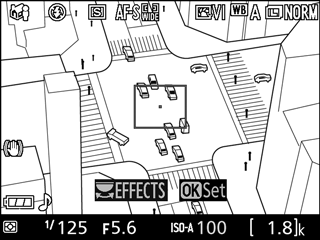
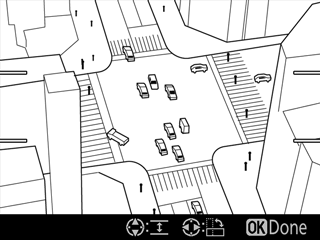
Position the focus point.
Use the multi selector to position the focus point in the area that will be in focus and then press the shutter-release button halfway to focus. To temporarily clear miniature effect options from the display and enlarge the view in the monitor for precise focus, press X. Press W (Q) to restore the miniature effect display.
-
Display options.
Press J to display miniature effect options.
-
Adjust options.
Press 4 or 2 to choose the orientation of the area that will be in focus and press 1 or 3 to adjust its width.

-
Press J.
Press J to exit when settings are complete. To exit live view, rotate the live view switch.
3 Selective Color
-
Select live view.
Rotate the live view switch. The view through the lens will be displayed in the monitor.
Live view switch
-
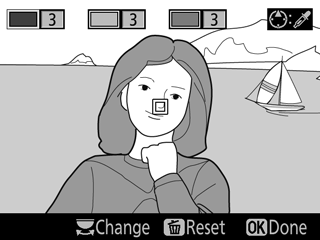
Display options.
Press J to display selective color options.
-
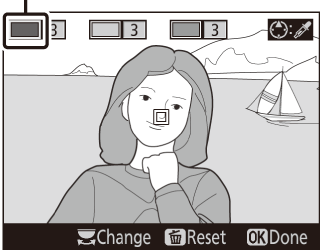
Select a color.
Frame an object in the white square in the center of the display and press 1 to choose the color of the object as one that will remain in the final image (the camera may have difficulty detecting unsaturated colors; choose a saturated color). To zoom in on the center of the display for more precise color selection, press X. Press W (Q) to zoom out.
Selected color
-
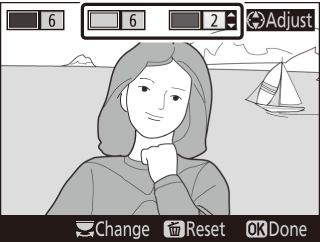
Choose the color range.
Press 1 or 3 to increase or decrease the range of similar hues that will be included in the final image. Choose from values between 1 and 7; note that higher values may include hues from other colors.
Color range

-
Select additional colors.
To select additional colors, rotate the command dial to highlight another of the three color boxes at the top of the display and repeat Steps 3 and 4 to select another color. Repeat for a third color if desired. To deselect the highlighted color, press O (To remove all colors, press and hold O. A confirmation dialog will be displayed; select Yes).
-
Press J.
Press J to exit when settings are complete. During shooting, only objects of the selected hues will be recorded in color; all others will be recorded in black-and-white. To exit live view, rotate the live view switch.