Other Accessories
A variety of accessories are available for your Nikon camera.
| Power sources |
|
|---|---|
| Filters |
|
| Viewfinder eyepiece accessories |
|
| Body cap | BF-1B Body Cap/BF-1A Body Cap: The body cap keeps the mirror, viewfinder screen, and image sensor free of dust when a lens is not in place. |
| Accessory shoe covers | BS-1 Accessory Shoe Cover: A cover protecting the accessory shoe. The accessory shoe is used for optional flash units. |
| USB cables | UC-E20 USB Cable (0 Copying Pictures to the Computer, Connecting the Printer): A USB cable with a Micro-B connector for connection to the camera. |
| HDMI cables | HC-E1 HDMI Cable (0 Viewing Pictures on TV): An HDMI cable with a type C connector for connection to the camera and a type A connector for connection to HDMI devices. |
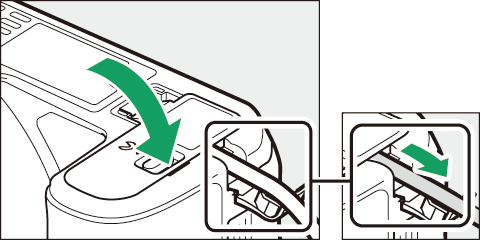
Attaching and Removing the Accessory Shoe Cover
The accessory shoe cover slides into the accessory shoe as shown. To remove the cover, hold the camera firmly, press the cover down with a thumb and slide it in the direction shown.
Attaching and Removing Viewfinder Eyepiece Accessories
To attach accessories, remove the rubber eyecup (q) and slide the accessory into the eyepiece as shown (w). Keep the eyecup in a safe place until it is needed again.
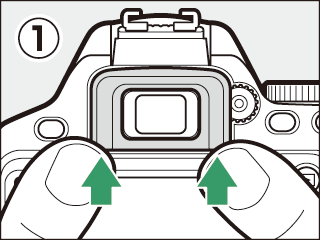

Remove accessories as shown in Figure e. Replace the eyecup after the accessory has been removed (r).
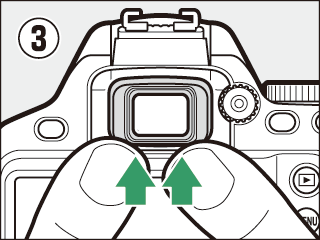
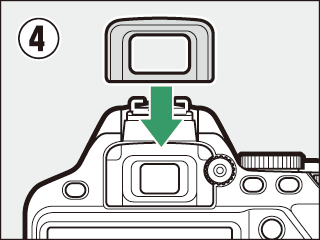
Hold the camera securely when removing the eyecup or viewfinder eyepiece accessories.
Optional Accessories
Availability may vary with country or region. See our website or brochures for the latest information.
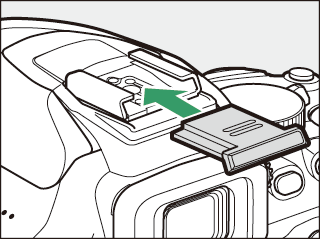
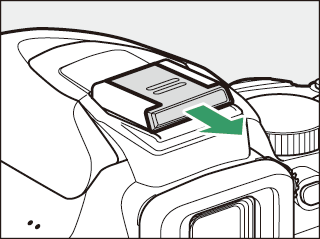
Approved Memory Cards
![]()
The camera supports SD, SDHC, and SDXC memory cards, including SDHC and SDXC cards compliant with UHS-I. Cards rated SD Speed Class 6 or better are recommended for movie recording; using slower cards may result in recording being interrupted. When choosing cards for use in card readers, be sure they are compatible with the device. Contact the manufacturer for information on features, operation, and limitations on use.
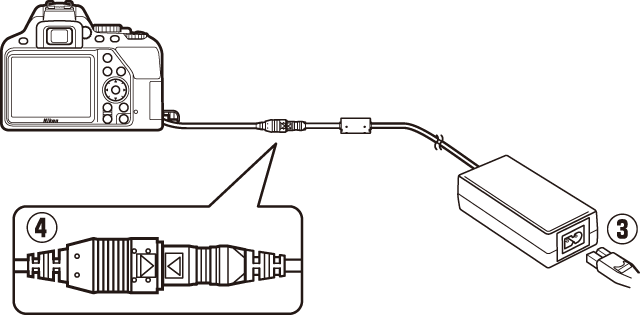
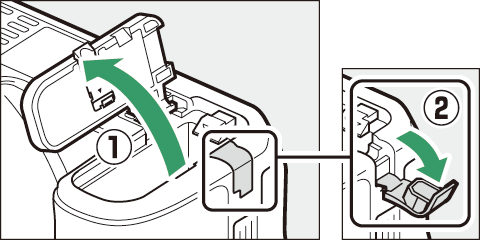
Attaching a Power Connector and AC Adapter
Turn the camera off before attaching an optional power connector and AC adapter.
-
Ready the camera.
Open the battery-chamber (q) and power connector (w) covers.
-
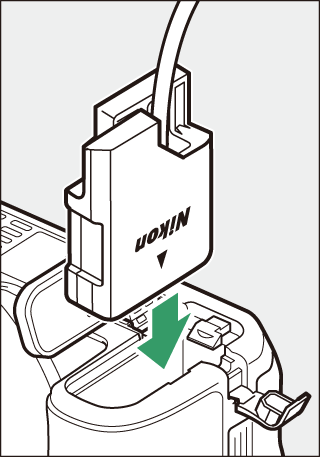
Insert the EP-5A power connector.
Be sure to insert the connector in the orientation shown, using the connector to keep the orange battery latch pressed to one side. Be sure the connector is fully inserted.
-
Close the battery-chamber cover.
Position the power connector cable so that it passes through the power connector slot and close the battery-chamber cover.
-
Connect the EH-5b AC adapter.
Connect the AC adapter power cable to the AC socket on AC adapter (e) and the power cable to the DC socket (r). A P icon is displayed in the monitor when the camera is powered by the AC adapter and power connector.