Focus
Focus can be adjusted automatically (see below) or manually (0 Manual Focus). The user can also select the focus point for automatic or manual focus (0 Manual Focus-Point Selection) or use focus lock to focus to recompose photographs after focusing (0 Focus Lock).
Focus Mode
The following focus modes can be selected during viewfinder photography:
| Option | Description | |
|---|---|---|
| AF-A | Auto-servo AF | Camera automatically selects single-servo autofocus if subject is stationary, continuous-servo autofocus if subject is moving. Shutter can only be released if camera is able to focus. |
| AF-S | Single-servo AF | For stationary subjects. Focus locks when shutter-release button is pressed halfway. Shutter can only be released if camera is able to focus. |
| AF-C | Continuous-servo AF | For moving subjects. Camera focuses continuously while shutter-release button is pressed halfway. Shutter can only be released if camera is able to focus. |
| MF | Manual focus | Focus manually (0 Manual Focus). |
Note that AF-S and AF-C are available only in modes P, S, A, and M.
The following focus modes can be selected during live view:
| Option | Description | |
|---|---|---|
| AF-S | Single-servo AF | For stationary subjects. Focus locks when shutter-release button is pressed halfway. |
| AF-F | Full-time-servo AF | For moving subjects. Camera focuses continuously until shutter-release button is pressed. Focus locks when shutter-release button is pressed halfway. |
| MF | Manual focus | Focus manually (0 Manual Focus). |
Note that AF-F is not available in U, ', and ( modes.
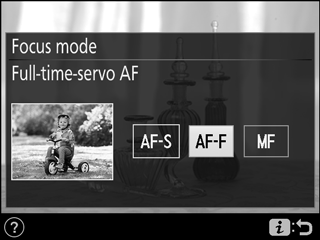
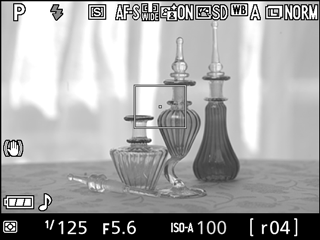
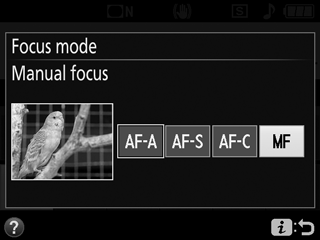
Choosing the Focus Mode
Follow the steps below to choose the focus mode.
-
Display focus mode options.
Press the P button, then highlight the current focus mode in the information display and press J.
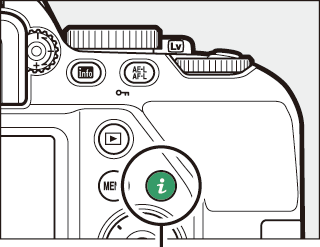
P button
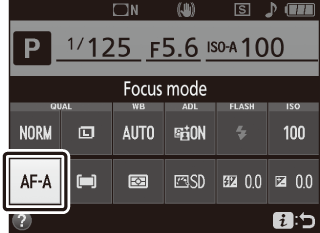
Viewfinder photography
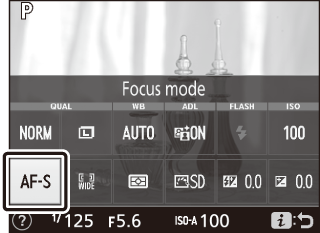
Live view
-
Choose a focus mode.
Highlight a focus mode and press J.
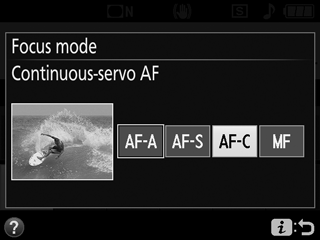
Viewfinder photography
Live view
Predictive Focus Tracking
In AF-C mode or when continuous-servo autofocus is selected in AF-A mode during viewfinder photography, the camera will initiate predictive focus tracking if the subject moves toward the camera while the shutter-release button is pressed halfway. This allows the camera to track focus while attempting to predict where the subject will be when the shutter is released.
Continuous-Servo Autofocus
In AF-C mode or when continuous-servo autofocus is selected in AF-A mode, the camera gives higher priority to focus response (has a wider focus range) than in AF-S mode, and the shutter may be released before the in-focus indicator is displayed.
Getting Good Results with Autofocus
Autofocus does not perform well under the conditions listed below. The shutter release may be disabled if the camera is unable to focus under these conditions, or the in-focus indicator (I) may be displayed and the camera may sound a beep, allowing the shutter to be released even when the subject is not in focus. In these cases, focus manually (0 Manual Focus) or use focus lock (0 Focus Lock) to focus on another subject at the same distance and then recompose the photograph.
There is little or no contrast between the subject and the background.
Example: Subject is the same color as the background.
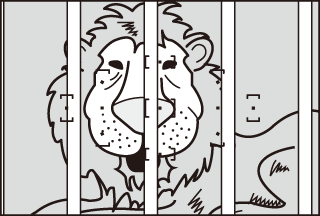
The focus point contains objects at different distances from the camera.
Example: Subject is inside a cage.
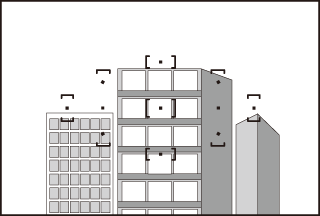
The subject is dominated by regular geometric patterns.
Example: Blinds or a row of windows in a skyscraper.

The focus point contains areas of sharply contrasting brightness.
Example: Subject is half in the shade.

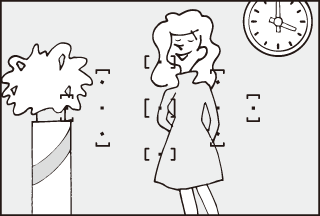
Background objects appear larger than the subject.
Example: A building is in the frame behind the subject.
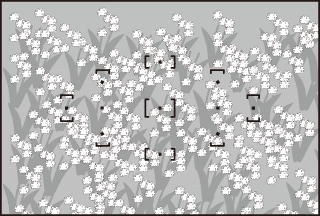
The subject contains many fine details.
Example: A field of flowers or other subjects that are small or lack variation in brightness.
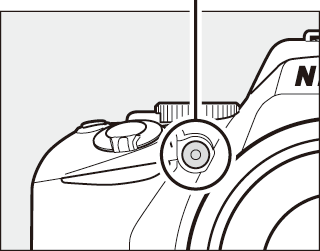
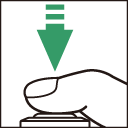
The AF-Assist Illuminator
If the subject is poorly lit, the AF-assist illuminator will light automatically to assist the autofocus operation when the shutter-release button is pressed halfway (some restrictions apply; 0 AF-assist illuminator does not light). Note that the illuminator may become hot when used multiple times in quick succession and will turn off automatically to protect the lamp after a period of continuous use. Normal function will resume after a brief pause.
AF-assist illuminator
AF-Area Mode
Choose how the focus point for autofocus is selected. The following options are available during viewfinder photography:
| Option | Description | |
|---|---|---|
| c | Single-point AF | For stationary subjects. Focus point is selected manually; camera focuses on subject in selected focus point only. |
| d | Dynamic-area AF | For non-stationary subjects. In AF-A and AF-C focus modes, user selects focus point using multi selector (0 Manual Focus-Point Selection), but camera will focus based on information from surrounding focus points if subject briefly leaves selected point. |
| f | 3D-tracking (11 points) |
In AF-A and AF-C focus modes, user selects focus point using multi selector (0 Manual Focus-Point Selection). If subject moves after camera has focused, camera uses 3D-tracking to select new focus point and keep focus locked on original subject while shutter-release button is pressed halfway.
|
| e | Auto-area AF | Camera automatically detects subject and selects focus point. |

Note that d (Dynamic-area AF) and f (3D-tracking (11 points)) AF-area modes are not available when AF-S is selected for focus mode.
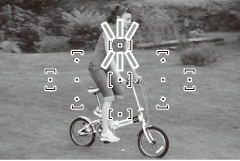
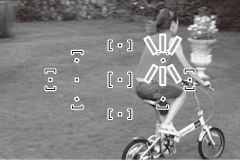
3D-Tracking (11 Points)
If subject leaves the viewfinder, remove your finger from the shutter-release button and recompose the photograph with the subject in the selected focus point. Note that when the shutter-release button is pressed halfway, the colors in the area surrounding the focus point are stored in the camera. Consequently 3D-tracking may not produce the desired results with subjects that are similar in color to the background or that occupy a very small area of the frame.
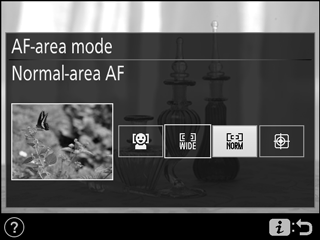
In modes other than i, j, and (, the following AF-area modes can be selected in live view:
| Option | Description | |
|---|---|---|
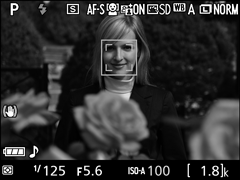
| 6 | Face-priority AF |
Use for portraits. The camera automatically detects and focuses on portrait subjects; the selected subject is indicated by a double yellow border (if multiple faces are detected, the camera will focus on the closest subject; to choose a different subject, use the multi selector). If the camera can no longer detect the subject (because, for example, the subject has turned to face away from the camera), the border will no longer be displayed.
|
| 7 | Wide-area AF |
Use for hand-held shots of landscapes and other non-portrait subjects.
|
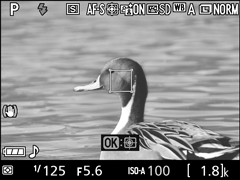
| 8 | Normal-area AF |
Use for pin-point focus on a selected spot in the frame. A tripod is recommended.
|
| 9 | Subject-tracking AF |
Use the multi selector to position the focus point over your subject and press J to start tracking. The focus point will track the selected subject as it moves through the frame. To end tracking, press J again. Note that the camera may be unable to track subjects if they move quickly, leave the frame or are obscured by other objects, change visibly in size, color, or brightness, or are too small, too large, too bright, too dark, or similar in color or brightness to the background.
|


Note that subject-tracking AF is not available in %, U, ' , and 3 modes.
Manual Focus-Point Selection
The multi selector can be used to select the focus point. Except in subject-tracking AF, pressing J during focus-point selection selects the center focus point. In subject-tracking AF, pressing J starts subject tracking instead. Manual focus-point selection is not available in auto-area AF.
Choosing the AF-Area Mode
Follow the steps below to choose the AF-area mode.
-
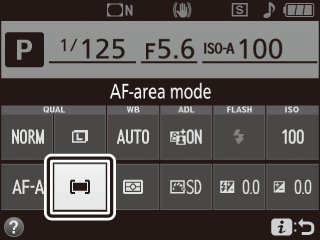
Display AF-area mode options.
Press the P button, then highlight the current AF-area mode in the information display and press J.
P button
Viewfinder photography
Live view
-
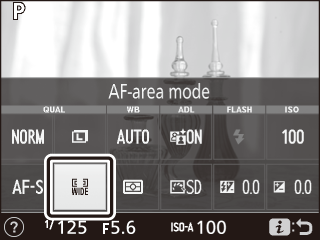
Choose an AF-area mode.
Highlight an option and press J.

Viewfinder photography
Live view
AF-Area Mode
AF-area mode selections made in shooting modes other than P, S, A, or M are reset when another shooting mode is selected.
Using Autofocus in Live View
The desired results may not be achieved with teleconverters. Note that in live view, autofocus is slower and the monitor may brighten or darken while the camera focuses. The focus point may sometimes be displayed in green when the camera is unable to focus. The camera may be unable to focus in the following situations:
- The subject contains lines parallel to the long edge of the frame
- The subject lacks contrast
- The subject in the focus point contains areas of sharply contrasting brightness, or includes spot lighting or a neon sign or other light source that changes in brightness
- Flicker or banding appears under fluorescent, mercury-vapor, sodium-vapor, or similar lighting
- A cross (star) filter or other special filter is used
- The subject appears smaller than the focus point
- The subject is dominated by regular geometric patterns (e.g., blinds or a row of windows in a skyscraper)
- The subject is moving
Focus Lock
Focus lock can be used to change the composition after focusing in AF-A, AF-S, and AF-C focus modes (0 Focus Mode), making it possible to focus on a subject that will not be in a focus point in the final composition. If the camera is unable to focus using autofocus (0 Getting Good Results with Autofocus), focus lock can also be used to recompose the photograph after focusing on another object at the same distance as your original subject. Focus lock is most effective when an option other than e (Auto-area AF) is selected for AF-area mode (0 AF-Area Mode).
-
Focus.
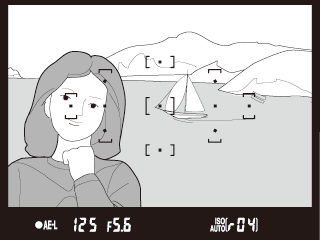
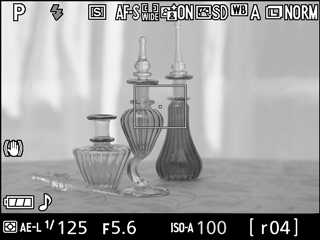
Position the subject in the selected focus point and press the shutter-release button halfway to initiate focus. Check that the in-focus indicator (I) appears in the viewfinder (viewfinder photography) or that the focus point has turned green (live view).
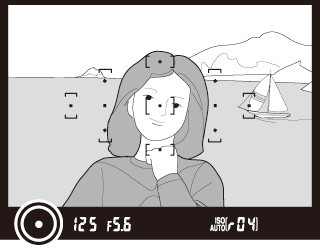
Viewfinder photography
Live view
Autoexposure Lock
Pressing the A (L) button in Step 2 also locks exposure (0 Autoexposure Lock).
-
Lock focus.
AF-A and AF-C focus modes (viewfinder photography): With the shutter-release button pressed halfway (q), press the A (L) button (w) to lock focus. Focus will remain locked while the A (L) button is pressed, even if you later remove your finger from the shutter-release button.
Shutter-release button
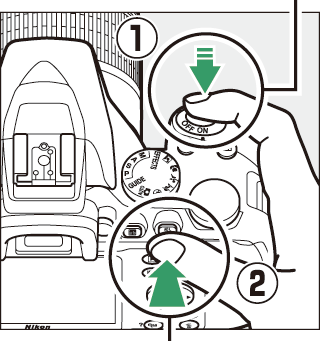
A (L) button
AF-S (viewfinder photography) and live view: Focus locks automatically and remain locked until you remove your finger from the shutter-release button. Focus can also be locked by pressing the A (L) button (see above).
-
Recompose the photograph and shoot.
Focus will remain locked between shots if you keep the shutter-release button pressed halfway (AF-S and live view) or keep the A (L) button pressed, allowing several photographs in succession to be taken at the same focus setting.
Do not change the distance between the camera and the subject while focus lock is in effect. If the subject moves, focus again at the new distance.
Viewfinder photography
Live view
Manual Focus
Manual focus can be used when autofocus is not available or does not produce the desired results (0 Getting Good Results with Autofocus).
-
Select manual focus.
If the lens is equipped with an A-M, M/A-M, or A/M-M mode switch, slide the switch to M.

If the lens is not equipped with a focus-mode switch, select MF (manual focus) for Focus mode (0 Focus Mode) in the P-button menu.
-
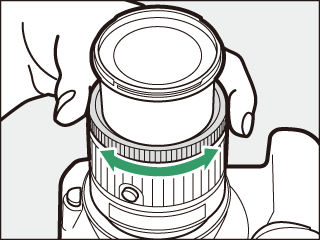
Focus.
To focus manually, adjust the lens focus ring until the image displayed on the clear matte field in the viewfinder is in focus. Photographs can be taken at any time, even when the image is not in focus.
AF-P Lenses
When an AF-P lens (0 Compatible CPU Lenses) is used in manual focus mode, the in-focus indicator (I) will flash in the viewfinder (or in live view, the focus point will flash in the monitor) to warn that continuing to rotate the focus ring in the current direction will not bring the subject into focus.
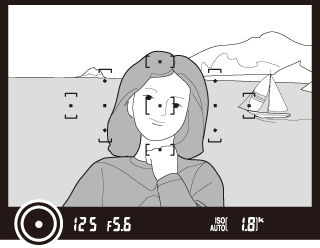
The Electronic Rangefinder (Viewfinder Photography)
The viewfinder focus indicator can be used to confirm whether the subject in the selected focus point is in focus (the focus point can be selected from any of the 11 focus points). After positioning the subject in the selected focus point, press the shutter-release button halfway and rotate the lens focus ring until the in-focus indicator (I) is displayed. Note that with the subjects listed in “Getting Good Results with Autofocus” (0 Getting Good Results with Autofocus), the in-focus indicator may sometimes be displayed when the subject is not in focus; confirm focus in the viewfinder before shooting.
Selecting Manual Focus with the Camera
If the lens supports M/A (autofocus with manual override) or A/M (autofocus with manual override/AF priority), manual focus can also be selected by setting the camera focus mode to MF (manual focus; 0 Focus Mode). Focus can then be adjusted manually, regardless of the mode selected with the lens.
Focal Plane Position
To determine the distance between your subject and the camera, measure from the focal plane mark (E) on the camera body. The distance between the lens mounting flange and the focal plane is 46.5 mm (1.83 in.).
46.5 mm
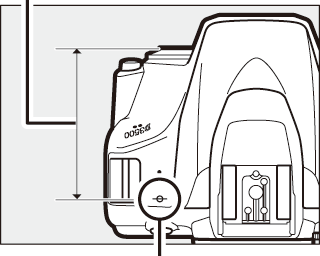
Focal plane mark
Live View
Press the X button to zoom in for precise focus in live view (0 Live View Zoom Preview).
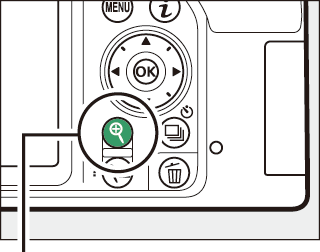
X button