“Point-and-Shoot” Modes (i and j)

This section describes how to take photographs in i and j modes. i and j are automatic “point-and-shoot” modes in which the majority of settings are controlled by the camera in response to shooting conditions; the only difference between the two is that the flash will not fire in j mode.
-
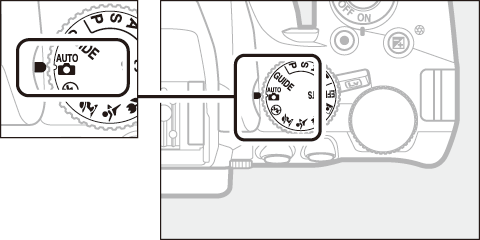
Rotate the mode dial to i or j.
Mode dial
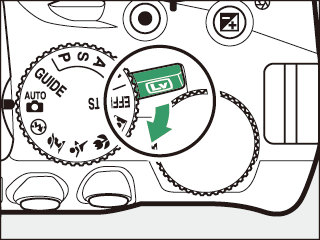
Photographs can be framed in the viewfinder or in the monitor (live view). To start live view, rotate the live view switch.
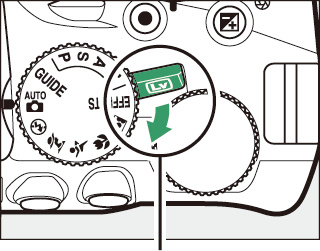
Live view switch
Framing pictures in the viewfinder
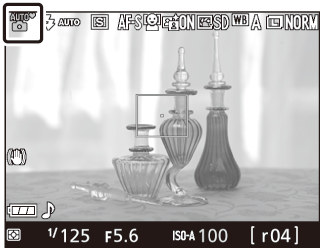
Framing pictures in the monitor (live view)
-
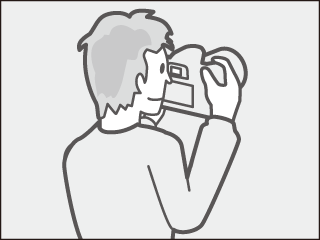
Ready the camera.
Viewfinder photography: When framing photographs in the viewfinder, hold the handgrip in your right hand and cradle the camera body or lens with your left. Bring your elbows in against the sides of your chest.


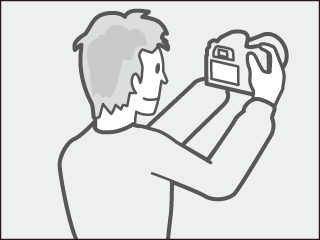
Live view: When framing photographs in the monitor, hold the handgrip in your right hand and cradle the lens with your left.


Framing Photographs in Portrait (Tall) Orientation
When framing photographs in portrait (tall) orientation, hold the camera as shown below.

Framing photographs in the viewfinder

Framing photographs in the monitor
-
Frame the photograph.
Viewfinder photography: Frame a photograph in the viewfinder with the main subject in at least one of the 11 focus points.
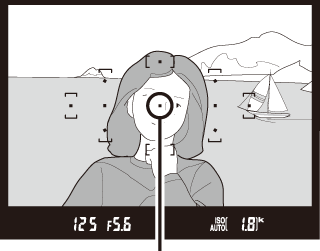
Focus point
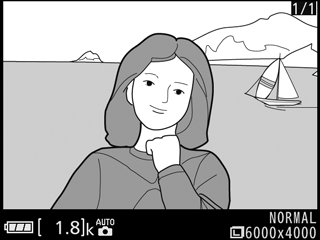
Live view: At default settings, the camera automatically detects faces and selects the focus point. If no face is detected, the camera will focus on subjects near the center of the frame.
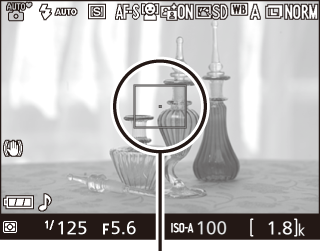
Focus point
Using a Zoom Lens
Before focusing, rotate the zoom ring to adjust the focal length and frame the photograph. Use the zoom ring to zoom in on the subject so that it fills a larger area of the frame, or zoom out to increase the area visible in the final photograph (select longer focal lengths on the lens focal length scale to zoom in, shorter focal lengths to zoom out).
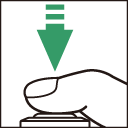
Zoom in
Zoom out
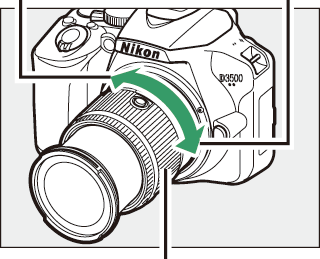
Zoom ring
-
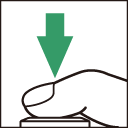
Press the shutter-release button halfway.
Viewfinder photography: Press the shutter-release button halfway to focus (if the subject is poorly lit, the flash may pop up and the AF-assist illuminator may light). When the focus operation is complete, a beep will sound (a beep may not sound if the subject is moving) and the in-focus indicator (I) will appear in the viewfinder.
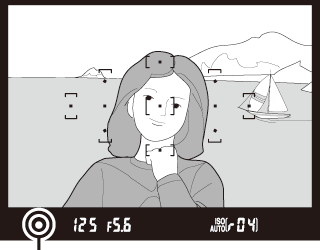
In-focus indicator
In-focus indicator Description I Subject in focus. I
(flashes)
Camera unable to focus using autofocus (0 Getting Good Results with Autofocus). Live view: The focus point flashes green while the camera focuses. If the camera is able to focus, the focus point will be displayed in green; otherwise, the focus point will flash red.

-
Shoot.
Smoothly press the shutter-release button the rest of the way down to take the photograph. The memory card access lamp will light and the photograph will be displayed in the monitor for a few seconds. Do not eject the memory card or remove or disconnect the power source until the lamp has gone out and recording is complete.
Memory card access lamp
Rotate the live view switch to exit live view.
The Shutter-Release Button
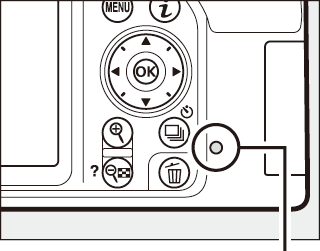
The camera has a two-stage shutter-release button. The camera focuses when the shutter-release button is pressed halfway. To take the photograph, press the shutter-release button the rest of the way down.

![]()
Focus: press halfway
![]()
Shoot: press all the way down
Pressing the shutter-release button halfway also ends playback and readies the camera for immediate use.
Automatic Scene Selection (Scene Auto Selector)
If live view is selected in i or j mode, the camera will automatically analyze the subject and select the appropriate shooting mode when the shutter-release button is pressed halfway to focus using autofocus. The selected mode is shown in the monitor.
| c Portrait | Human portrait subjects |
|---|---|
| e Close up | Subjects close to the camera |
| f Night portrait | Portrait subjects framed against a dark background |
|
Z Auto/ b Auto (flash off) |
Subjects suited to i or j mode or that do not fall into the categories listed above |
The Standby Timer (Viewfinder Photography)
The viewfinder display will turn off if no operations are performed for about eight seconds, reducing the drain on the battery. Press the shutter-release button halfway to reactivate the display. The length of time before the standby timer expires automatically can be selected using the Auto off timers option in the setup menu (0 Auto off Timers).

Exposure meters off
![]()

Exposure meters on
The Standby Timer (Live View)
The monitor will turn off if no operations are performed for about ten minutes. The length of time before the monitor turns off automatically can be selected using the Auto off timers option in the setup menu (0 Auto off Timers).
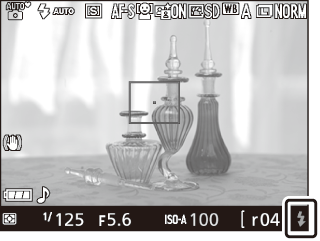
The Built-in Flash
If additional lighting is required for correct exposure in i mode, the built-in flash will pop up automatically when the shutter-release button is pressed halfway (0 Auto Pop-up Modes). If the flash is raised, photographs can only be taken when the flash-ready indicator (M) is displayed. If the flash-ready indicator is not displayed, the flash is charging; remove your finger briefly from the shutter-release button and try again.


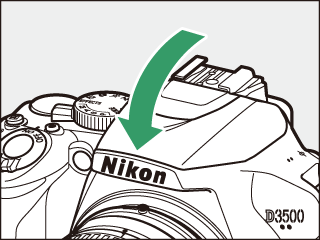
When the flash is not in use, return it to its closed position by pressing it gently downward till the latch clicks into place.
Live View Zoom Preview
Press the X button to magnify the view in the monitor up to a maximum of about 8.3 ×. A navigation window will appear in a gray frame at the bottom right corner of the display. Use the multi selector to scroll to areas of the frame not visible in the monitor, or press W (Q) to zoom out. Press J to exit zoom.
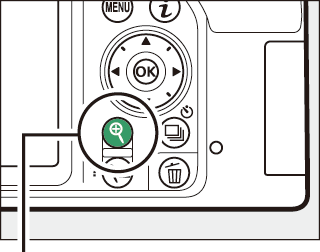
X button
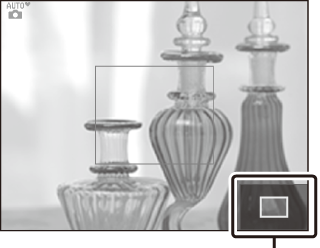
Navigation window
Shooting in Live View
Although they will not appear in the final picture, jagged edges, color fringing, moiré, and bright spots may appear in the monitor, while bright regions or bands may appear in some areas with flashing signs and other intermittent light sources or if the subject is briefly illuminated by a strobe or other bright, momentary light source. In addition, distortion may occur with moving subjects, particularly if the camera is panned horizontally or an object moves horizontally at high speed through the frame. Flicker and banding visible in the monitor under fluorescent, mercury vapor, or sodium lamps can be reduced using Flicker reduction (0 Flicker Reduction), although they may still be visible in the final photograph at some shutter speeds. Avoid pointing the camera at the sun or other strong light sources. Failure to observe this precaution could result in damage to the camera’s internal circuitry. Live view ends automatically if the mode dial is rotated to g or the mode dial is rotated from g to another setting.
To prevent light entering via the viewfinder from appearing in the photograph or interfering with exposure, we recommend that you cover the viewfinder with your hand or other objects such as an optional eyepiece cap before taking pictures without your eye to the viewfinder (0 Cover the Viewfinder).
Exposure
Depending on the scene, exposure may differ from that which would be obtained when live view is not used.
HDMI
When the camera is attached to an HDMI video device, the video device will display the view through the lens. If the device supports HDMI-CEC, select Off for the HDMI > Device control option in the setup menu (0 Controlling the Camera with the TV Remote) before shooting in live view.