Picture Controls
Picture Controls are preset combinations of image processing settings that include sharpening, clarity, contrast, brightness, saturation, and hue. You can select a Picture Control to match the scene or customize settings to suit your creative intent.
Selecting a Picture Control
Choose a Picture Control according to the subject or type of scene.
| Option | Description | |
|---|---|---|
| Q | Standard | Recommended for most situations, this option uses standard processing for balanced results. |
| R | Neutral | A good choice for photographs that will later be processed or retouched, this option uses minimal processing for natural results. |
| S | Vivid | Choose this option for photographs that emphasize primary colors. Pictures are enhanced for a vivid, photoprint effect. |
| T | Monochrome | Take monochrome photographs. |
| e | Portrait | Process portraits for skin with natural texture and a rounded feel. |
| f | Landscape | Produces vibrant landscapes and cityscapes. |
| q | Flat | Choose for photographs that will later be extensively processed or retouched. Details are preserved over a wide tone range, from highlights to shadows. |
-
Display Picture Control options.
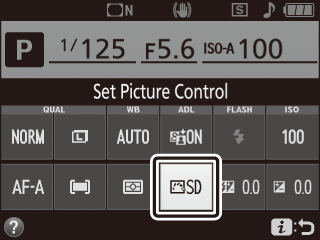
Press the P button, then highlight the current Picture Control and press J.
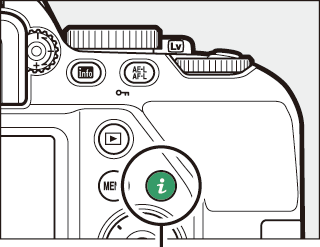
P button
-
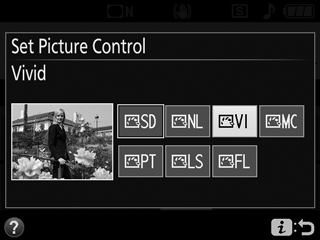
Select a Picture Control.
Highlight a Picture Control and press J.
Modifying Picture Controls
Picture Controls can be modified to suit the scene or the user’s creative intent. Choose a balanced combination of settings using Quick adjust, or make manual adjustments to individual settings.
-
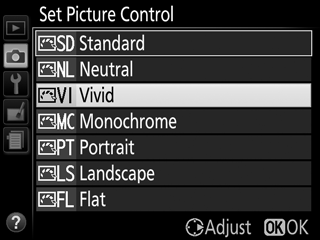
Select a Picture Control.
Highlight Set Picture Control in the shooting menu and press 2. Highlight the desired Picture Control and press 2.
-
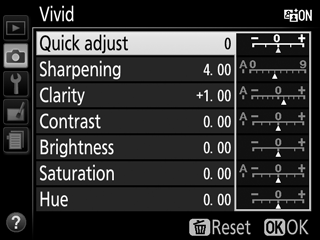
Adjust settings.
Press 1 or 3 to highlight the desired setting and press 4 or 2 to choose a value in increments of 1, or rotate the command dial to choose a value in increments of 0.25 (0 Picture Control Settings; the options available vary with the Picture Control selected). Repeat this step until all settings have been adjusted, or select a preset combination of settings by using the multi selector to choose Quick adjust and pressing 4 or 2. Default settings can be restored by pressing the O button.
-
Save changes and exit.
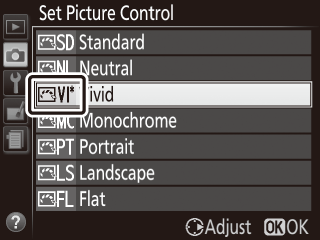
Press J.
Picture Controls that have been modified from default settings are indicated by an asterisk (“*”).
Picture Control Settings
| Option | Description | |
|---|---|---|
| Quick adjust | Mute or heighten the effect of the selected Picture Control (note that this resets all manual adjustments). Not available with Neutral, Monochrome, or Flat Picture Controls. | |
| Manual adjustments | Sharpening | Control the sharpness of outlines. Select A to adjust sharpening automatically according to the type of scene. |
| Clarity | Adjust clarity manually or select A to let the camera adjust clarity automatically. Depending on the scene, shadows may appear around bright objects or halos may appear around dark objects at some settings. Clarity is not applied to movies. | |
| Contrast | Adjust contrast manually or select A to let the camera adjust contrast automatically. | |
| Brightness | Raise or lower brightness without loss of detail in highlights or shadows. | |
| Saturation | Control the vividness of colors. Select A to adjust saturation automatically according to the type of scene. | |
| Hue | Adjust hue. | |
| Filter effects | Simulate the effect of color filters on monochrome photographs (0 Filter Effects (Monochrome Only)). | |
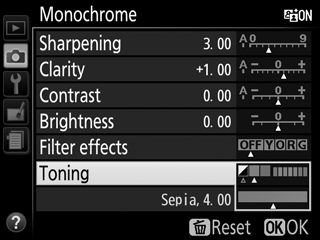
| Toning | Choose the tint used in monochrome photographs (0 Toning (Monochrome Only)). | |
“A” (Auto)
Results for auto sharpening, clarity, contrast, and saturation vary with exposure and the position and size of the subject relative to the frame.
Switching Between Manual and Auto
Press the X button to switch back and forth between manual and auto (A) settings for sharpening, clarity, contrast, and saturation.

Previous Settings
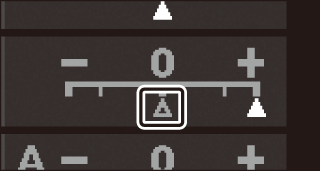
The j indicator under the value display in the Picture Control setting menu indicates the previous value for the setting. Use this as a reference when adjusting settings.
Filter Effects (Monochrome Only)
The options in this menu simulate the effect of color filters on monochrome photographs. The following filter effects are available:
| Option | Description | |
|---|---|---|
| Y | Yellow | Enhances contrast. Can be used to tone down the brightness of the sky in landscape photographs. Orange produces more contrast than yellow, red more contrast than orange. |
| O | Orange | |
| R | Red | |
| G | Green | Softens skin tones. Can be used for portraits. |
Toning (Monochrome Only)
Pressing 3 when Toning is selected displays saturation options. Press 4 or 2 to adjust saturation. Saturation control is not available when B&W (black-and-white) is selected.
