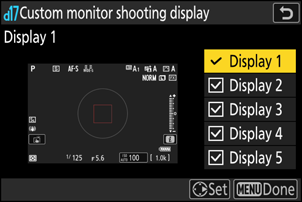
d19: Custom Monitor Shooting Display
G button U A Custom Settings menu
Choose the monitor displays accessible by pressing the DISP button during shooting.
Highlight items ([Display 2] through [Display 5]) and press J to select (M) or deselect (U). Only displays marked with a check (M) can be accessed by pressing the DISP button during shooting. [Display 1] cannot be deselected (U).

To choose indicators that appear in displays [Display 1] through [Display 4], highlight the corresponding option and press 2. You can then highlight items and press J to select (M) or deselect (U).

Option Description A [Basic shooting info] View the shooting mode, shutter speed, aperture, and other basic shooting info. B [Detailed shooting info] View the focus mode, AF-area mode, white balance, and other detailed shooting info. C [Touch controls] View options that can be accessed via touch controls, including touch AF and the i menu. D [Virtual horizon] Enable the virtual horizon. The display type can be selected using Custom Setting d17 [Virtual horizon type]. E [Histogram] Enable the histogram. b [Framing grid] Enable the framing grid. The display type can be selected using Custom Setting d16 [Grid type]. F [Center indicator] Display crosshairs at the center of the frame. G [Center-weighted area] Add an 8 or 12 mm circle to the center of the shooting display whenever [Center-weighted metering] is selected for [Metering] in the photo shooting menu.
- The size of the circle varies with the option selected for Custom Setting b5 [Center-weighted area]. The circle is not displayed when [Average] is selected for Custom Setting b5 [Center-weighted area].
- [Display 5] consists solely of the information display and cannot be customized.
- To complete the operation, press G.
