Portrait Impression Balance
G button U C photo shooting menu
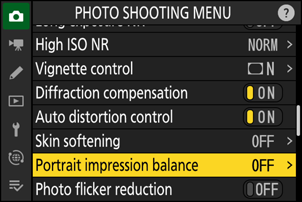
Fine-tune hue and brightness settings for human portrait subjects and save the results for application during shooting as [Mode 1], [Mode 2], or [Mode 3].
Creating Portrait Impression Balance Modes
Select [Portrait impression balance] in the photo shooting menu.
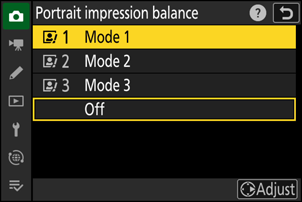
Highlight a mode from [Mode 1] through [Mode 3] and press 2.
- Options for the selected mode will be displayed.
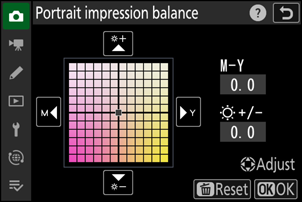
Adjust hue and brightness.
- Press 4 or 2 to adjust hue on the M (magenta)–Y (yellow) axis. Magenta increases as you move toward M, amber (yellow) as you move toward Y.
- Press 1 or 3 to adjust brightness. Brightness increases as the values go up and decreases as they go down.
- The selected values are displayed to the right of the grid.
- To restore default settings, press the O (Q) button.
Save changes.
- Press J to save changes and exit to the menus.
- Modes that have been altered from default values are indicated by asterisks (“U”).
- Repeat Steps 1 through 4 to create additional modes.
Applying Saved Modes
To enable portrait impression balance during shooting, select the desired mode ([Mode 1] through [Mode 3]) for [Portrait impression balance] in the photo shooting menu.
[Portrait impression balance] will not be available if:
- [Monochrome], [Flat Monochrome], [Deep Tone Monochrome], or [Creative Picture Control] is selected for [Set Picture Control] or
- [Monochrome] is selected for [Set Picture Control (HLG)].
If [Portrait impression balance] has been assigned a place in the i menu using Custom Setting f1 [Customize i menu], you can select this option, rotate the main command dial to choose a mode, and then adjust hue and brightness using the multi selector while previewing their effects on the subject framed in the display.