Nikon

عربي

Български

Čeština

Dansk

Deutsch

Ελληνικά

English

Español

Eesti

Suomi

Français

हिन्दी

Magyar

Indonesia

Italiano

日本語

Қазақ

한글

Lietuvių

Latviski

Nederlands

Norsk

Polski

Português

Română

Русский

Slovenčina

Slovenščina

Српски

Svenska

ภาษาไทย

Türkçe

Українська

简体中文

繁體中文

Select language

Timecode

G button U 1 video recording menu

Choose whether to record time codes giving the hour, minute, second, and frame number for each frame when shooting videos. Time codes are not included in videos shot with [H.264 8-bit (MP4)] selected for [Video file type] in the video recording menu.

Option Description
[Record timecodes]
  • [On]: Record time codes. The time code appears in the shooting display.
  • [On (with HDMI output)]: Time codes will be included with footage saved to external recorders connected to the camera via an HDMI cable. The camera supports Atomos SHOGUN, NINJA, and SUMO-series Monitor recorders.
  • [Off]: Time codes are not recorded.
[Count-up method]
  • [Record run]: Time codes are incremented only while recording is in progress.
  • [Free run]: Time codes are incremented continuously. Time codes continue to be incremented while the camera is off.
[Timecode origin]
  • [Reset]: Reset the time code to 00:00:00.00.
  • [Reset using remote]: The time code can be reset by pressing the shutter-release button on an optional WR‑T10 wireless remote controller (0‘Reset Using Remote’).
  • [Enter manually]: Enter the hour, minute, second, and frame number manually.
  • [Current time]: Set the time code to the current time as reported by the camera clock. Before proceeding, select [Time zone and date] in the setup menu and make sure that the camera clock is set to the correct time and date.
[Drop frame] Select [ON] to compensate for discrepancies between the frame count and the actual recording time at frame rates of 30 and 60 fps.

Caution: HDMI Devices

Selecting [On (with HDMI output)] for [Record timecodes] may disrupt footage output to HDMI devices.

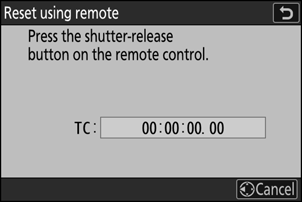
“Reset Using Remote”

This option allows the time code to be reset by pressing the shutter-release button on an optional WR‑T10 paired with an optional WR‑R11a or WR‑R10 wireless remote controller attached to the camera.

  • Selecting [Reset using remote] displays a time-code reset dialog. Press the shutter-release button on the WR-T10 to reset the time code.

  • Paring a single WR-T10 with multiple WR-R11a/WR-R10 wireless remote controllers allows the time codes for multiple cameras to be reset simultaneously with a single press of the WR-T10’s shutter-release button. The time codes for multiple cameras can thus be synchronized, making editing easier.

The Time-Code Reset Dialog

Pressing the camera shutter-release button all the way down while the time-code reset dialog is displayed resets the time code. No photograph will be taken.