Connect to Smart Device
G button U F network menu
Connect to smartphones or tablets (smart devices) via Bluetooth or Wi-Fi.
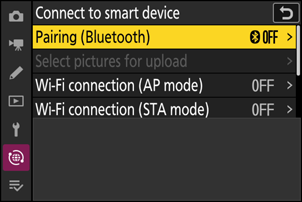
Pairing (Bluetooth)
Pair with or connect to smart devices using Bluetooth.
| Option | Description |
|---|---|
| [Start pairing] | Pair the camera with a smart device (0 Connecting via Bluetooth (Pairing)). |
| [Paired devices] | List paired smart devices. To connect, select a device from the list. |
| [Bluetooth connection] | Select [ON] to enable Bluetooth. |
Select Pictures for Upload
Select pictures for upload to a smart device. You can also opt to upload pictures as they are taken.
| Option | Description |
|---|---|
| [Auto select for upload] | Select [ON] to upload pictures as they are taken. |
| [Manually select for upload] | Upload selected pictures. Transfer marking appears on the selected pictures. |
| [Deselect all] | Cancel upload of all pictures currently selected for transfer. |
Wi-Fi Connection (AP Mode)
Connect directly to smart devices in Wi-Fi access point mode.
Establish Wi-Fi Connection
Initiate a Wi-Fi connection to a smart device in Wi-Fi access point mode.
- The camera SSID and password will be displayed. To connect, select the camera SSID on the smart device and enter the password (0 Direct Wireless Connection to a Smart Device (Wi-Fi Access Point Mode)).
- Once a connection is established, this option will change to [Close Wi‑Fi connection].
- Use [Close Wi-Fi connection] to end the connection.
Wi-Fi Connection Settings
Access the following Wi-Fi settings:
| Option | Description |
|---|---|
| [SSID] | Choose the camera SSID. |
| [Authentication/encryption] | Choose [OPEN], [WPA2-PSK], [WPA3-SAE], or [WPA2-PSK/WPA3-SAE]. |
| [Password] | Choose the camera password. |
| [Channel] | Choose a channel.
|
| [Current settings] | View current Wi-Fi settings. |
| [Reset connection settings] | Select [Yes] to reset Wi-Fi settings to default values. |
Wi-Fi Connection (STA Mode)
Add camera network profiles. This item can also be used to choose from existing network profiles.
Create Profile
Create new network profiles (0 Connecting to an Existing Network (Wi-Fi Station Mode).
- If more than one profile already exists, you can press J to choose a profile and connect to the selected network.
- To edit an existing profile, highlight it and press 2.
| Option | Description |
|---|---|
| [General] |
|
| [TCP/IP] | Adjust the TCP/IP settings. An IP address is required.
|
End Current Connection
End the connection to the current network.
Upload While Off
If [ON] is selected, upload of pictures to smart devices via wireless connections will continue even when the camera is off.
Location Data (Smart Device)
Display latitude, longitude, altitude, and UTC (Universal Coordinated Time) data downloaded from a smart device.
- For information on downloading location data from smart devices, see the online help for the SnapBridge app.
- Note that the camera may be unable to download or display location data from smart devices depending on the version of the device operating system and/or SnapBridge app used.