Choose the date information imprinted on photographs as they are taken. Date stamps cannot be added to or removed from existing photos.
| Option | Description | ||
|---|---|---|---|
| Off | The time and date do not appear on photographs. | ||
| a | Date | The date or date and time are imprinted on photographs taken while this option is in effect. |
|
| b | Date and time | ||
| c | Date counter | New photos are imprinted with a time stamp showing the number of days between the date of shooting and a selected date (0 Date Counter). | |

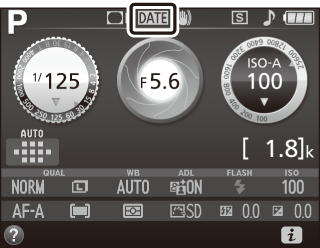
At settings other than Off, the selected option is indicated by a d icon in the information display.
Date Stamp
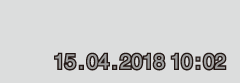
The date is recorded in the order selected for Time zone and date (0 Time Zone and Date). The imprinted data may be cropped out or rendered illegible in copies created when images are retouched (0 N The Retouch Menu: Creating Retouched Copies). The date does not appear on NEF (RAW) or NEF (RAW)+JPEG images.
Date Counter
Pictures taken while this option is in effect are imprinted with the number of days remaining until a future date or the number of days elapsed since a past date. Use it to track the growth of a child or count down the days until a birthday or wedding.
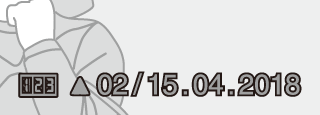
Future date
(two days remaining)
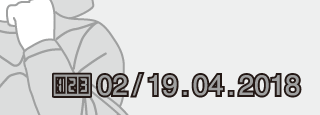
Past date
(two days elapsed)
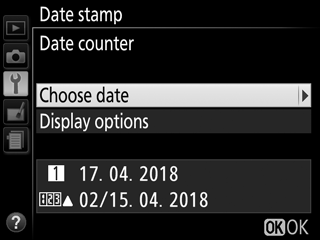
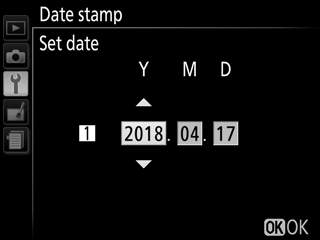
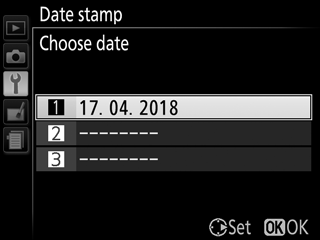
The camera offers three slots for storing dates.
-
Enter the first date.
The first time you select Date counter, you will be prompted to enter a date for the first slot. Enter a date using the multi selector and press J to exit to the date list.
-
Enter additional dates or edit existing dates.
To change a date or enter additional dates, highlight a slot, press 2, and enter a date as described above.
-
Choose a date.
Highlight a slot in the date list and press J.
-
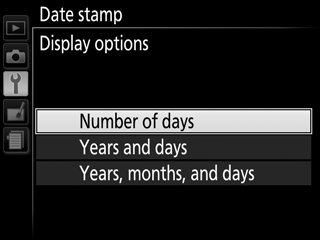
Choose a date counter format.
Highlight Display options and press 2, then highlight a date format and press J.
-
Exit the date counter menu.
Press J to exit the date counter menu.