Inserting the Battery
Turn the camera off before inserting or removing the battery.
-
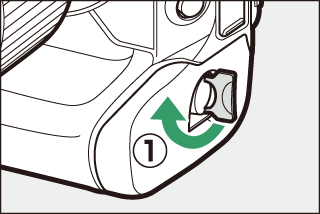
Remove the BL-7 battery chamber cover.
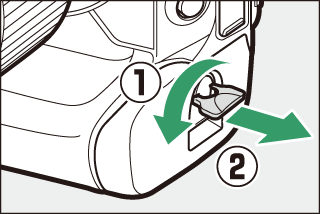
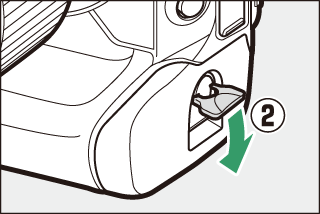
Lift the battery chamber cover latch, turn it to the open (A) position (q) and remove the battery chamber cover (w).
-
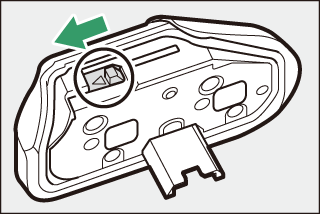
Attach the cover to the battery.
-
If the battery release is positioned so that the arrow (H) is visible, slide the battery release to cover the arrow (H).
-
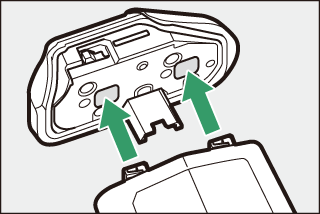
Insert the two projections on the battery into the matching slots in the cover as shown. The battery release will slide aside to completely reveal the arrow (H).
-
-
Insert the battery.
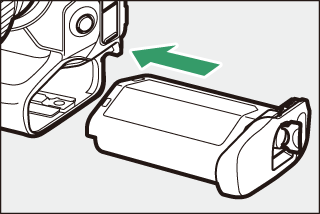
Insert the battery fully and securely as shown.
-
Latch the cover.
-
Rotate the battery chamber cover latch to the closed position (q) and fold it down as shown (w).
-
Be sure the cover is securely latched to prevent the battery from becoming dislodged during operation.
-
Removing the Battery
Before removing the battery, turn the camera off, lift the battery chamber cover latch,
and turn it to the open (A) position.
To unlatch the battery chamber cover so that it can be removed from the battery, slide the battery release in the direction indicated by the arrow (H) until it stops.
-
Use BL-7 battery chamber covers only; other battery chamber covers cannot be used with this camera.
-
You can leave the cover attached when charging batteries in a charger.
-
To prevent dust accumulating inside the battery chamber, replace the battery chamber cover on the camera when the battery is not inserted.
Battery Level
-
The battery level is shown in the shooting display and control panel while the camera is on.
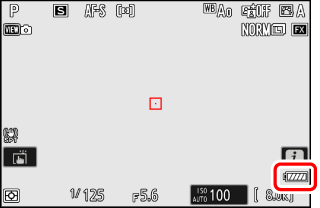
Monitor
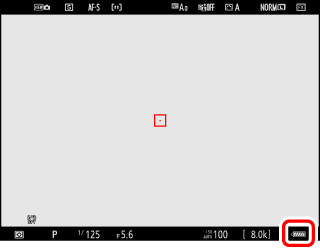
Viewfinder
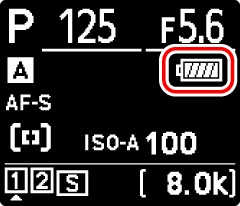
Control panel
-
The battery level display changes as the battery level diminishes, from L through K, J, I, and H. When the battery level falls to H, suspend shooting and charge the battery or ready a spare battery.
-
If the message [] is displayed, charge or exchange the battery.
The camera uses a standby timer to help reduce the drain on the battery. If no operations are performed for about 30 seconds, the standby timer will expire and the monitor, viewfinder, and control panel will turn off. A few seconds prior to turning off, the monitor and viewfinder will dim. They can be reactivated by pressing the shutter-release button halfway. The length of time before the standby timer expires automatically can be selected using Custom Setting c3 [] > [].