Image Recording Options (Image Area, Quality, and Size)
Adjusting Image Area Settings
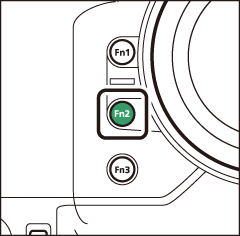
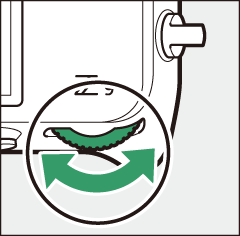
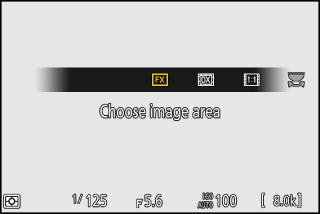
At default settings, image area can be selected by holding the Fn2 button and rotating a command dial.
|
|
|
|
-
Image area settings can be displayed by selecting [] in the photo shooting menu.
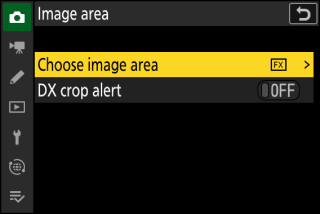
Choose Image Area
Choose the image area. The following options are available:
|
Option |
Description |
|
|---|---|---|
|
c |
[] |
Record pictures in FX format with an angle of view equivalent to a 35 mm format camera. |
|
a |
[] |
Pictures are recorded in DX format. To calculate the approximate focal length of the lens in 35 mm format, multiply by 1.5.
|
|
m |
[] |
Pictures are recorded with an aspect ratio of 1:1. |
|
Z |
[] |
Pictures are recorded with an aspect ratio of 16:9. |
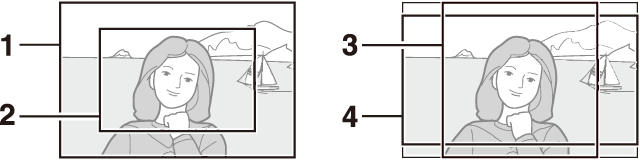
| 1 |
FX (36×24) |
|---|---|
| 2 |
DX (24×16) |
| 3 |
1:1 (24×24) |
|---|---|
| 4 |
16:9 (36×20) |
DX Crop Alert
If [] is selected for this option in the camera menus, the image area icon in the shooting
display will flash when DX (24×16) is selected.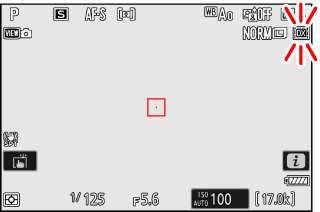
Adjusting Image Quality
Choose the image quality option used when photographs are recorded.
Choosing an Image Quality Option
Hold the T button and rotate the main command dial.
|
|
|
|
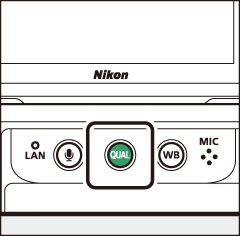
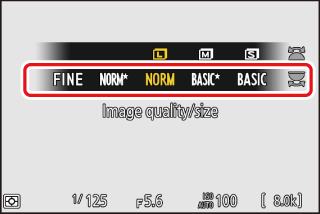
Image quality can also be adjusted using the [] item in the photo shooting menu.
|
Option |
Description |
|---|---|
|
[] |
Record two copies of each photo: an NEF (RAW) picture and a JPEG copy.
|
|
[] |
|
|
[] |
|
|
[] |
|
|
[] |
|
|
[] |
|
|
[] |
Record photos in NEF (RAW) format. |
|
[] |
Record photos in JPEG format. ”Fine” produces higher quality pictures than ”normal” and ”normal” higher quality pictures than “basic”.
|
|
[] |
|
|
[] |
|
|
[] |
|
|
[] |
|
|
[] |
-
NEF (RAW) files have the extension “*.nef”.
-
The process of converting NEF (RAW) pictures to other highly-portable formats such as JPEG is referred to as “NEF (RAW) processing”. During this process, Picture Controls and settings such as exposure compensation and white balance can be freely adjusted.
-
The RAW data themselves are unaffected by NEF (RAW) processing and their quality will remain intact even if the pictures are processed multiple times at different settings.
-
NEF (RAW) processing can be performed using [] > [] or [] in the playback i menu or on a computer using Nikon’s NX Studio software. NX Studio is available free-of-charge from the Nikon Download Center.
If [] is selected for [], the NEF (RAW) copies will be recorded to the card in Slot 1 and the JPEG copies to the card in Slot 2 (Role Played by Card in Slot 2).
Choosing an Image Size
Choose a size for new JPEG pictures. The size for JPEG pictures can be selected from [], [], and [].
Choosing an Image Size
Hold the T button and rotate the sub-command dial.
|
|
|
|
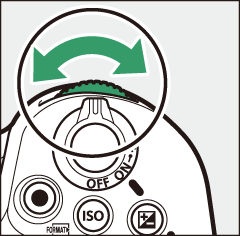
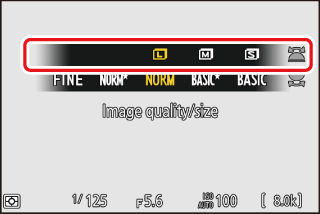
Image size can also be adjusted using the [] item in the photo shooting menu.
The number of pixels in the picture varies with the option selected for image area (Adjusting Image Area Settings).
|
Image area |
Image size |
Size when printed at 300 dpi |
|---|---|---|
|
[] |
Large (8256 × 5504 pixels) |
Approx. 69.9 × 46.6 cm/ 27.5 × 18.3 in. |
|
Medium (6192 × 4128 pixels) |
Approx. 52.4 × 35.0 cm/ 20.6 × 13.8 in. |
|
|
Small (4128 × 2752 pixels) |
Approx. 35.0 × 23.3 cm/ 13.8 × 9.2 in. |
|
|
[] |
Large (5392 × 3592 pixels) |
Approx. 45.7 × 30.4 cm/ 18.0 × 12.0 in. |
|
Medium (4032 × 2688 pixels) |
Approx. 34.1 × 22.8 cm/ 13.4 × 9.0 in. |
|
|
Small (2688 × 1792 pixels) |
Approx. 22.8 × 15.2 cm/ 9.0 × 6.0 in. |
|
|
[] |
Large (5504 × 5504 pixels) |
Approx. 46.6 × 46.6 cm/ 18.3 × 18.3 in. |
|
Medium (4128 × 4128 pixels) |
Approx. 35.0 × 35.0 cm/ 13.8 × 13.8 in. |
|
|
Small (2752 × 2752 pixels) |
Approx. 23.3 × 23.3 cm/ 9.2 × 9.2 in. |
|
|
[] |
Large (8256 × 4640 pixels) |
Approx. 69.9 × 39.3 cm/ 27.5 × 15.5 in. |
|
Medium (6192 × 3480 pixels) |
Approx. 52.4 × 29.5 cm/ 20.6 × 11.6 in. |
|
|
Small (4128 × 2320 pixels) |
Approx. 35.0 × 19.6 cm/ 13.8 × 7.7 in. |
Print size in inches equals image size in pixels divided by printer resolution in dots per inch (dpi; 1 inch = 2.54 cm).