The Menus
The G Button
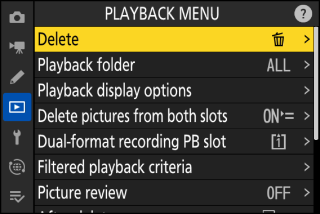
Press the G button to view the menus.
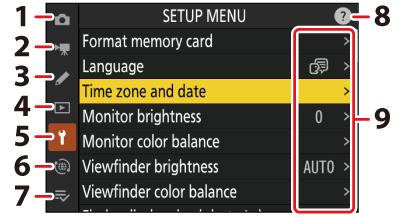
| 1 | |
|---|---|
| 2 | |
| 3 | |
| 4 | |
| 5 |
| 6 | |
|---|---|
| 7 |
O []/ |
| 8 |
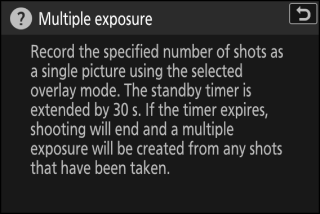
d (help) icon (The d (Help) Icon) |
| 9 |
Current settings |
-
You can choose the menu displayed. The default is [].
Using the Menus
You can navigate the menus using the multi selector and J button.
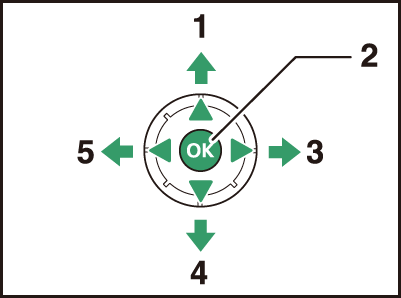
| 1 |
Move cursor up |
|---|---|
| 2 |
Select the highlighted item |
| 3 |
Display sub-menu, select highlighted item, or move cursor right |
| 4 |
Move cursor down |
|---|---|
| 5 |
Cancel and return to previous menu, or move cursor left |
-
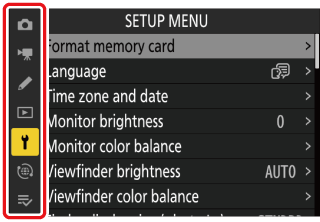
Highlight the icon for the current menu.
Press 4 to place the cursor in the menu-selection area.

-
Select a menu.
Press 1 or 3 to select the desired menu.

-
Position the cursor in the selected menu.
Press 2 to position the cursor in the selected menu.

-
Highlight a menu item.
Press 1 or 3 to highlight a menu item.
-
Display options.
Press 2 to display options for the selected menu item.
-
Highlight an option.
Press 1 or 3 to highlight an option.
-
Select the highlighted option.

-
Press J to save changes and exit.
-
To exit without making a selection, press the G button.
-
To exit the menus and return to shooting mode, press the shutter-release button halfway.
-
-
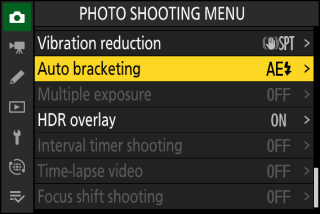
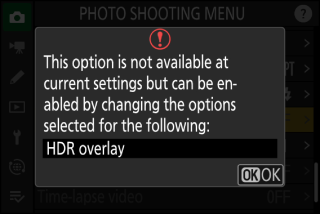
Some items and menu options may be unavailable depending on camera status. Unavailable items are displayed in gray.
-
In some cases, pressing J when a grayed-out item is highlighted will display a message explaining why the item is unavailable.
If the only options available for the current item are [] and [], you can switch from [] to [] or vice versa simply by pressing J, pressing the multi selector right (2), or tapping the item in the display.
-
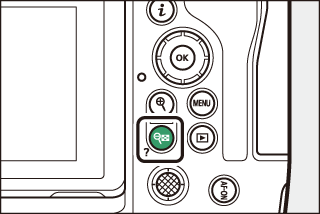
Where available, a description of the currently-selected item can be viewed by pressing the W (Q) button.
-
Press 1 or 3 to scroll.
-
Press W (Q) again to return to the menus.
You can also navigate the menus using touch controls (Touch Controls).
A keyboard is displayed when text entry is required, for example if you are called on to enter a file name or the like. Enter text as described below.
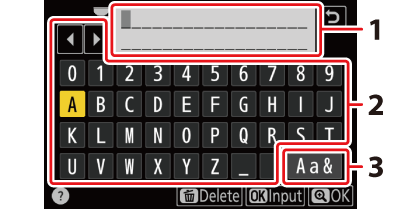
| 1 |
Text display area |
|---|---|
| 2 |
Keyboard area |
| 3 |
Keyboard selection |
|---|
-
Enter characters at the current cursor position by highlighting them with the multi selector arrow keys and then pressing J.
-
The cursor can be moved left or right in the text display area by rotating either of the command dials.
-
To cycle through the upper- and lower-case and symbol keyboards, highlight the keyboard selection icon and press J. The keyboard selection icon may not be available in some cases.
-
If a character is entered when the text display area is full, the rightmost character will be deleted.
-
To delete the character under the cursor, press the O (Q) button.
-
To complete entry, press X.
-
To exit without completing text entry, press G.
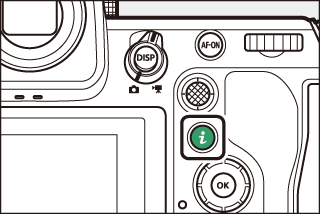
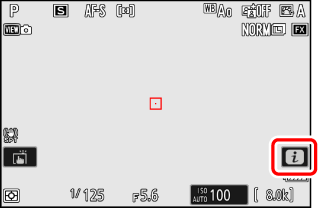
The i Button (the i Menu)
For quick access to frequently-used settings, press the i button or tap the i icon to view the i menu.
|
|
|
-
Different menus are displayed in photo and video modes.
-
Options can be viewed by tapping items in the display or by highlighting items and pressing J; selections can then be made using the multi selector.
-
Items for which the camera displays a command dial guide can be adjusted by highlighting them in the i menu and rotating a command dial. In some cases, adjustments can be made using both the main and sub-command dials.
Some items and menu options may be unavailable depending on camera status. Unavailable
items are displayed in gray.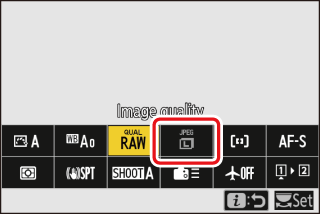
When the camera is rotated to take pictures in “tall” (portrait) orientation, the
i menu for photo mode rotates to match.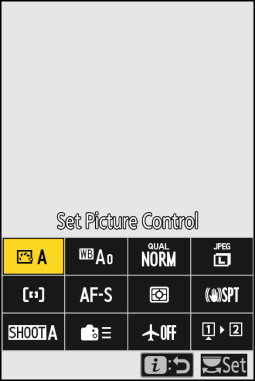
The Still Photography i Menu
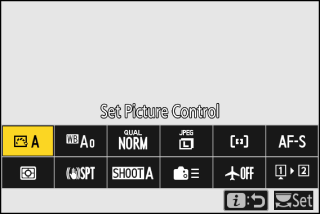
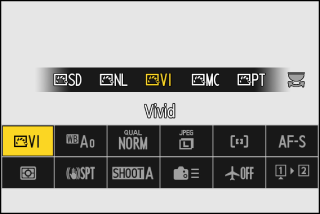
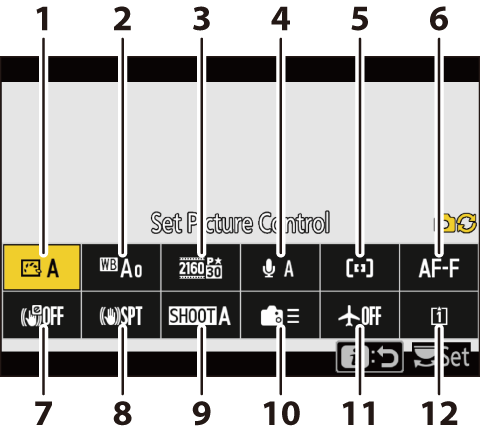
Pressing the i button during still photography displays the items listed below. Highlight the desired item using the multi selector and press J to view options.

| 1 |
Set Picture Control (Picture Controls) |
|---|---|
| 2 |
White balance (White Balance) |
| 3 |
Image quality (Adjusting Image Quality) |
| 4 |
Image size (Choosing an Image Size) |
| 5 |
AF-area mode/subj. detection (AF-Area Mode) |
| 6 |
Focus mode (Focus Mode) |
| 7 |
Metering (Metering) |
|---|---|
| 8 |
Vibration reduction (Vibration Reduction) |
| 9 |
Shooting menu bank (Shooting Menu Bank) |
| 10 |
Custom controls (shooting) (f2: Custom Controls (Shooting)) |
| 11 |
Airplane mode (Airplane Mode) |
| 12 |
View memory card info (View Memory Card Info) |
The Video i Menu
Pressing the i button during video recording displays the items listed below. Highlight the desired item using the multi selector and press J to view options.
| 1 |
Set Picture Control (Picture Controls) |
|---|---|
| 2 |
White balance (White Balance) |
| 3 |
Frame size/frame rate (Video Frame Size and Rate Options) |
| 4 |
Microphone sensitivity (Microphone Sensitivity) |
| 5 |
AF-area mode/subj. detection (AF-Area Mode) |
| 6 |
Focus mode (Focus Mode) |
| 7 |
Electronic VR (Electronic VR) |
|---|---|
| 8 |
Vibration reduction (Vibration Reduction) |
| 9 |
Shooting menu bank (Shooting Menu Bank) |
| 10 |
Custom controls (g2: Custom Controls) |
| 11 |
Airplane mode (Airplane Mode) |
| 12 |
Destination (Destination) |
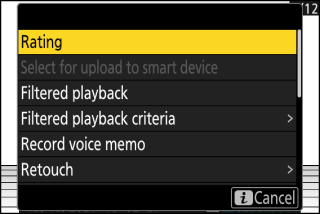
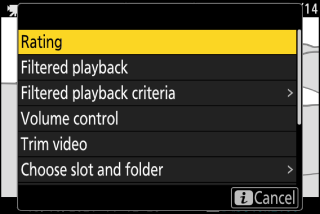
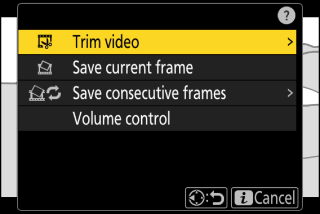
The Playback i Menu
Pressing the i button during playback displays a context-sensitive i menu of playback options.
|
Photos |
|
Videos |
Videos (playback paused) |
Customizing the i Menu
The items displayed in the i menu during shooting can be chosen using Custom Setting f1 or g1 [].
-
Highlight Custom Setting f1 or g1 [] and press J.
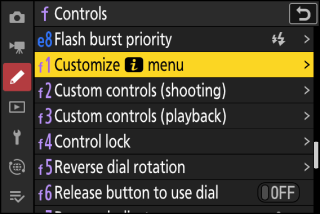
See “The G Button” (The G Button) for information on using the menus.
-
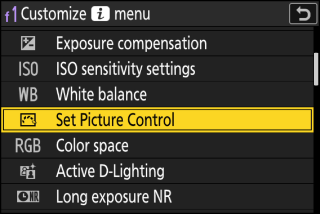
Highlight the position you want to change and press J.
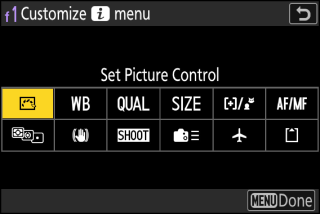
A list of the items available for the selected position will be displayed.
-
Highlight the desired item and press J.
-
The item will be assigned to the selected position and the options shown in Step 2 will be displayed.
-
Repeat Steps 2 and 3 as desired.
-
-
Press the G button.
Changes will be saved and the Custom Settings menu will be displayed.