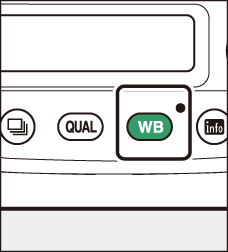
The U Button
The U button can be used to adjust white balance. White balance delivers natural colors with light sources of different hues.
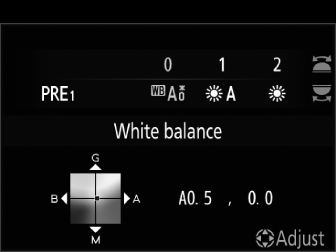
Adjusting White Balance
Hold the U button and rotate the main command dial.
|
|
|
|
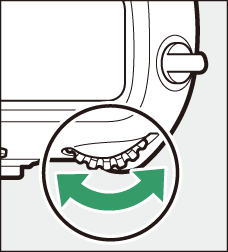

Options for the selected setting, if any, can be selected by holding the U button and rotating the sub-command dial.
|
|
|
|


|
Option |
Description |
|
|---|---|---|
|
v [] |
White balance is adjusted automatically for optimal results with most light sources. |
|
|
v0 [] |
Eliminate the warm color cast produced by incandescent lighting. |
|
|
v1 [] |
Partially preserve the warm color cast produced by incandescent lighting. |
|
|
v2 [] |
Preserve the warm color cast produced by incandescent lighting. |
|
|
D [] |
When used under natural light in place of [], this option produces colors closer to those seen by the naked eye. |
|
|
H [] |
Use with subjects lit by direct sunlight. |
|
|
G [] |
Use in daylight under overcast skies. |
|
|
M [] |
Use in daylight with subjects in shade. |
|
|
J [] |
Use under incandescent lighting. |
|
|
I [] |
Use under fluorescent lighting; choose the bulb type according to the light source. |
|
|
[] |
||
|
[] |
||
|
[] |
||
|
[] |
||
|
[] |
||
|
[] |
||
|
[] |
||
|
N [] |
Use for flash photography. |
|
|
K [] |
Choose the color temperature directly. |
|
|
L [] |
Measure white balance for the subject or light source or copy white balance from an existing photograph. |
|
To fine-tune white balance, use the multi selector while holding the U button.
-
When an option other than [] or [] is selected, you can fine-tune white balance on the amber-blue axis by pressing 4 or 2 and on the green-magenta axis by pressing 1 or 3.
-
When [] is selected, you can press 4 or 2 to highlight a digit. Press 1 or 3 to change.
-
Release the U button to return to shooting mode.
-
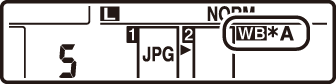
At settings other than 0, an asterisk (“U”) appears in the rear control panel.
-
To view the current value, press the U button while shooting information is displayed.