Features Available with “C” Firmware Version 1.30
The new features available with camera “C” firmware version 1.30 are described below.
- Focus Point Selection Speed (C 1.20 and Later)
- Exposure Maintenance (C 1.30 and Later)
- Recalling Shooting Functions (C 1.20 and Later)
- New Sub-Selector Center Option (C 1.20 and Later)
- Auto AF Fine-Tuning (C 1.11 and Later)
- Band Selection (C 1.10 and Later)
Focus Point Selection Speed (C 1.20 and Later)
A [] option has been added to Custom Setting a17 []. The speed at which the focus points for viewfinder photography can be cycled by
holding the sub-selector or 1, 3, 4, or 2 on the multi selector can be chosen from [], [], and [].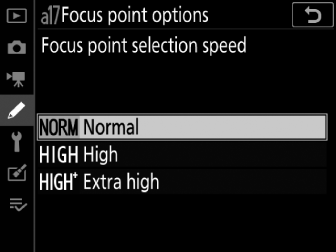
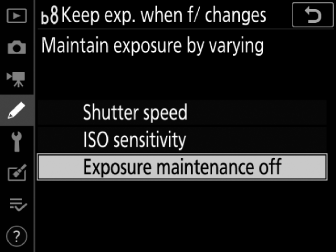
Exposure Maintenance (C 1.30 and Later)
A new option, [], has been added to the Custom Settings menu at position b8. In exposure mode M, actions such as changing to a lens with a different aperture range when [] is selected for [] > [] in the photo shooting menu may cause unintended changes to aperture and consequently also to exposure. Selecting an option other than [] for [] lets the camera adjust shutter speed or ISO sensitivity to keep exposure constant.
-
Exposure maintenance also keeps exposure constant when you:
-
adjust zoom on zoom lenses that have different maximum apertures at minimum and maximum zoom,
-
attach a teleconverter, or
-
change the shooting distance while using a micro lens.
-
-
The setting varied to compensate for changes in aperture can be chosen from [] and []. Choose [] to disable exposure maintenance.
-
Depending on the lens and shooting conditions, the camera may sometimes fail to keep exposure constant.
-
Exposure maintenance is not available with movies.
Recalling Shooting Functions (C 1.20 and Later)
A [] item has been added to Custom Setting f3 []. Assigning this role to a control lets you recall previously-saved values for such
settings as exposure mode and metering by pressing the control once during viewfinder
photography. The previous values can be restored by pressing the control a second
time.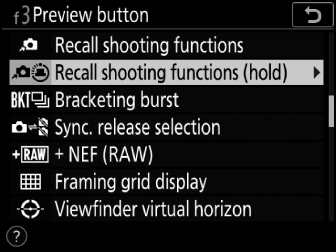
-
To choose the settings recalled when the button is pressed, highlight [] and press 2. The items and options available are mostly shared with []. The exception is the option chosen for [], which cannot be saved using [].
-
The exposure mode indicators in the viewfinder and top control panel flash while the recalled settings are in effect.
-
After recalling settings, you can adjust shutter speed and aperture using the command dials.
-
Adjustments for mode P are made using flexible program.
-
If an option other than [] is selected for Custom Setting b4 [], exposure compensation can be adjusted by rotating a command dial.
-
-
The conditions under which settings cannot be saved or recalled are the same as those for [].
-
[] can be assigned to the [], [], [], [], [], [], [], [], or [].
New Sub-Selector Center Option (C 1.20 and Later)
A new option, [], has been added to the Custom Settings menu at position f13. Although at default
settings the sub-selector cannot be used to position the focus point while the center
is pressed, selecting [] for [] lets you hold the center and still position the focus point by pressing the sub-selector
up, down, left, or right.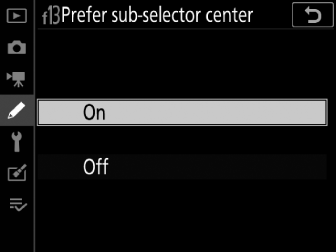
-
This lets you position the focus point while simultaneously using the center of the sub-selector in the role chosen for Custom Setting f3 [] > []. Of particular note is that if [] is assigned to the center of the sub-selector, you can now hold the center of the sub-selector to temporarily switch AF-area modes without losing the ability to choose the focus point.
Auto AF Fine-Tuning (C 1.11 and Later)
The prompt displayed for zoom lenses in Step 4 of “Auto AF Fine-Tuning” (Auto AF Fine-Tuning) has changed. Pressing the X button will now return you directly to a dialog where you can choose the remaining zoom position ([] or []).
Was
After completing AF fine-tuning for either the maximum angle or maximum zoom, you
will need to repeat the process for the remaining item. Press the X button, select [], and repeat Steps 2 to 4.
Is Now
After completing AF fine-tuning for either the maximum angle or maximum zoom, press
the X button and choose the remaining zoom position ([] or []). Repeat Steps 3 and 4 to complete auto fine-tuning for the selected item.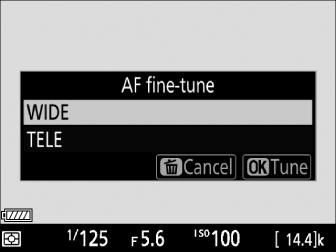
Band Selection (C 1.10 and Later)
Users can now choose the band (2.4 GHz or 5 GHz) for the selected SSID when connecting to a wireless network via a WT-6 wireless transmitter attached to the D6. To connect to networks operating on selected bands:
-
In the setup menu, go to [] > [] > [] and choose a router frequency band.

-
Select [] or [] to connect only to networks operating on the chosen band.
-
Select [] to connect to networks operating on either band.
-
-
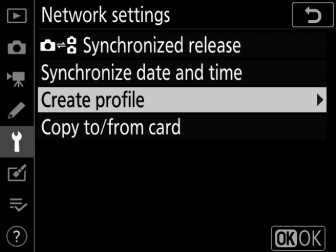
In the setup menu, go to [] > [] and select [].
-
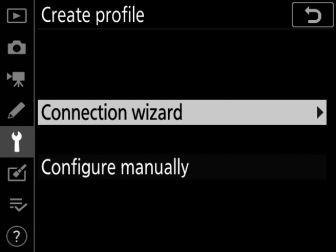
Select [].
-
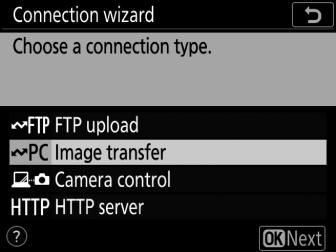
Choose a connection type and name the profile.
-
When prompted to choose a connection method, select [].
-
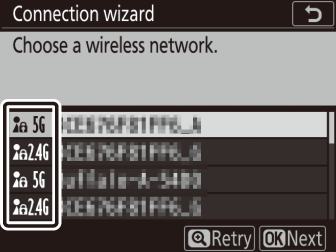
The camera will search for networks active in the vicinity and list their SSIDs.
-
Only networks operating on the band or bands chosen for [] will be listed. The band is listed next to the network SSID.
-
If you select [] when connecting via wireless routers that operate on both bands, the camera will list the SSIDs in the band or bands detected by the wireless transmitter.
-
-
Follow the on-screen instructions.
-
The camera can connect to the selected network when setup is complete.
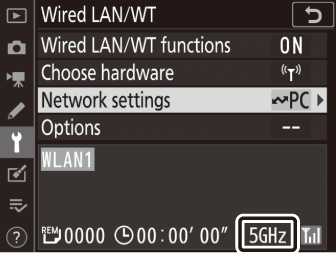
-
The band for the current network appears in the [] display once a connection is established.
-