Image Recording Options (Image Area, Quality, and Size)
Adjusting Image Area Settings
Image area settings can be displayed by selecting [] in the photo shooting menu.
Choose Image Area
Choose the image area. The following options are available:
|
Option |
Description |
|
|---|---|---|
|
c |
[] |
Record pictures in FX format with an angle of view equivalent to a 35 mm format camera. Use this option when taking photographs with NIKKOR lenses for 35 mm format cameras. |
|
6 |
[] |
Reduces the angle of view of the lens mounted on the camera to that of a lens with a focal length approximately 1.2 times longer. |
|
a |
[] |
Pictures are recorded in DX format. To calculate the approximate focal length of the lens in 35 mm format, multiply by 1.5. |
|
b |
[] |
Pictures are recorded with an aspect ratio of 5:4. |
|
m |
[] |
Pictures are recorded with an aspect ratio of 1:1. |
|
Z |
[] |
Pictures are recorded with an aspect ratio of 16:9. |
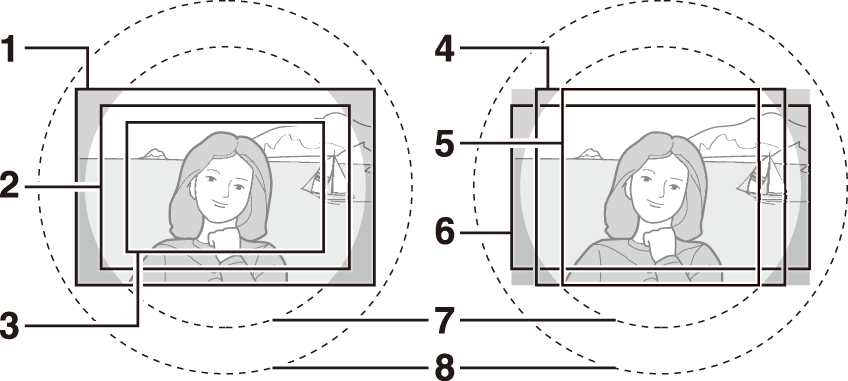
| 1 |
FX (36×24) |
|---|---|
| 2 |
1.2× (30×20) |
| 3 |
DX (24×16) |
| 4 |
5:4 (30×24) |
| 5 |
1:1 (24×24) |
|---|---|
| 6 |
16:9 (36×20) |
| 7 |
DX format image circle |
| 8 |
35 mm format image circle |
Auto DX Crop
Choose whether the camera automatically selects the [] (DX format) image area when a DX lens is attached.
|
Option |
Description |
|---|---|
|
[] |
The camera automatically selects the [] (DX format) image area when a DX lens is attached. |
|
[] |
Automatic image-area selection disabled. |
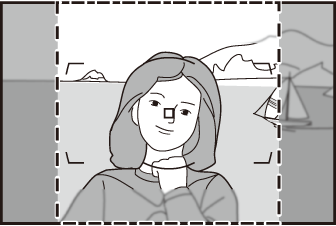
DX lenses are designed for use with DX format cameras and have a smaller angle of view than lenses for 35 mm format cameras. If [] is selected for [] and an option other than [] (DX format) is selected for [] when a DX lens is attached, the edges of the image may be eclipsed. This is referred to as “cropping”. Cropping may not be apparent in the viewfinder, but when the images are played back you may notice a drop in resolution or that the edges of the picture are blacked out.
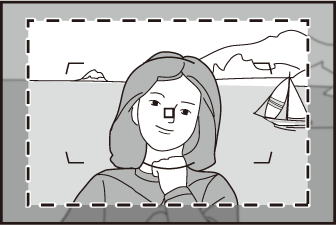
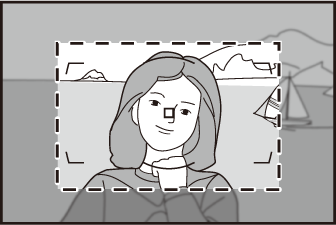
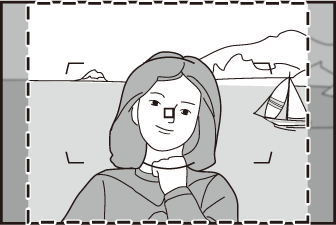
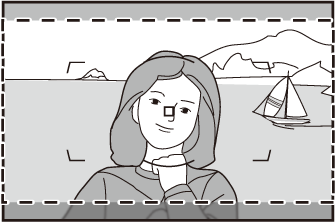
The viewfinder displays for image area options other than [] are shown below. The area outside the current crop is shown in gray.
|
1.2× (30×20) |
DX (24×16) |
5:4 (30×24) |
||
|
1:1 (24×24) |
16:9 (36×20) |
If [] has been assigned to a button using Custom Setting f3 [], the image area can be selected by pressing the button and rotating a command dial.
-
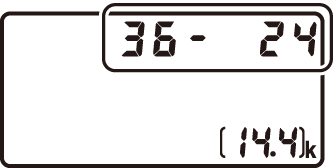
The selected crop is displayed in the viewfinder.
-
The option currently selected for image area can be displayed in the top control panel and viewfinder by pressing the button to which [] is assigned.
-
Camera controls assigned [] cannot be used for image area selection when a DX lens is attached and [] is selected for [].
|
Image area |
Display |
|---|---|
|
[] |
|
|
[] |
|
|
[] |
|
|
[] |
|
|
[] |
|
|
[] |
|


Image size varies with the option selected for [].
Adjusting Image Quality
Choose the image quality option used when photographs are recorded.
|
Option |
Description |
|---|---|
|
[] |
Record two copies of each photo: an NEF (RAW) image and a JPEG copy.
|
|
[] |
|
|
[] |
|
|
[] |
|
|
[] |
|
|
[] |
|
|
[] |
Record photos in NEF (RAW) format. |
|
[] |
Record photos in JPEG format. ”Fine” produces higher quality pictures than ”normal” and ”normal” higher quality pictures than “basic”.
|
|
[] |
|
|
[] |
|
|
[] |
|
|
[] |
|
|
[] |
-
NEF (RAW) files have the extension “*.nef”.
-
The process of converting NEF (RAW) pictures to other highly-portable formats such as JPEG is referred to as “NEF (RAW) processing”. During this process, Picture Controls and settings such as exposure compensation and white balance can be freely adjusted.
-
The RAW data themselves are unaffected by NEF (RAW) processing and their quality will remain intact even if the pictures are processed multiple times at different settings.
-
NEF (RAW) processing can be performed in-camera using the [] item in the retouch menu or on a computer using Nikon’s NX Studio software. NX Studio is available free-of-charge from the Nikon Download Center.
Choosing an Image Quality Option
To choose an image quality option during viewfinder photography, hold the T button and rotate the main command dial. The selected option is displayed in the rear control panel.
|
|
|
|
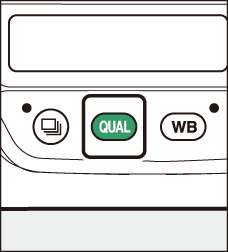
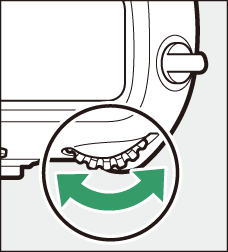
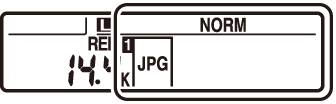
Image quality can also be adjusted using the [] item in the photo shooting menu. Use the [] item in the photo shooting menu to adjust image quality during live view.
-
The camera displays only the JPEG copies of photos recorded at image quality settings of “NEF (RAW) + JPEG”. If only one memory card was inserted in the camera when the photos were recorded, the NEF (RAW) copies can only be viewed using a computer.
-
In the case of photos recorded with only one memory card inserted, deleting the JPEG copies on the camera also deletes the NEF (RAW) images.
-
If [] is selected for [], the NEF (RAW) copies will be recorded to the card in Slot 1 and the JPEG copies to the card in Slot 2 ( Using Two Memory Cards ).
Choosing an Image Size
Choose a size for new JPEG pictures. The size for JPEG pictures can be selected from [], [], and []. The number of pixels in the image varies with the option selected for image area ( Adjusting Image Area Settings ).
|
Image area |
Image size |
|---|---|
|
[] |
Large (5568 × 3712 pixels) |
|
Medium (4176 × 2784 pixels) |
|
|
Small (2784 × 1856 pixels) |
|
|
[] |
Large (4640 × 3088 pixels) |
|
Medium (3472 × 2312 pixels) |
|
|
Small (2320 × 1544 pixels) |
|
|
[] |
Large (3648 × 2432 pixels) |
|
Medium (2736 × 1824 pixels) |
|
|
Small (1824 × 1216 pixels) |
|
|
[] |
Large (4640 × 3712 pixels) |
|
Medium (3472 × 2784 pixels) |
|
|
Small (2320 × 1856 pixels) |
|
|
[] |
Large (3712 × 3712 pixels) |
|
Medium (2784 × 2784 pixels) |
|
|
Small (1856 × 1856 pixels) |
|
|
[] |
Large (5568 × 3128 pixels) |
|
Medium (4176 × 2344 pixels) |
|
|
Small (2784 × 1560 pixels) |
Print size in inches equals image size in pixels divided by printer resolution in dots per inch (dpi; 1 inch = 2.54 cm).
Choosing an Image Size
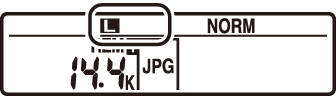
To choose a size for JPEG images during viewfinder photography, hold the T button and rotate the sub-command dial. The selected option is displayed in the rear control panel.
|
|
|
|

-
To choose a size for NEF (RAW) images, use the [] > [] option in the photo shooting menu.
-
Image size can also be adjusted using the [] > [] and [] options in the photo shooting menu.
-
Selecting a size of [] or [] for NEF (RAW) pictures fixes the [] > [] and [] options in the photo shooting menu at [] and [], respectively.