Exposure-Related Settings (Metering and Exposure Compensation)
- Choosing How the Camera Sets Exposure
- Choosing an Exposure Mode
- Long Time-Exposures (Mode M Only)
- Shutter Speed and Aperture Lock
- Autoexposure Lock
- Exposure Compensation
Choosing How the Camera Sets Exposure
Metering determines how the camera sets exposure. Choose the method used and area metered when the camera sets exposure.
|
Option |
Description |
|
|---|---|---|
|
L |
[] |
Produces natural results in most situations. The camera meters a wide area of the frame and sets exposure according to tone distribution, color, composition, and distance for results close to those seen by the naked eye. |
|
M |
[] |
The camera meters the entire frame but assigns the greatest weight to an area in the center. Choose for shots in which, for example, the main subject occupies a large area at the center of the frame.
|
|
N |
[] |
The camera meters a circle with a diameter of 4 mm/0.16 in. (equivalent to approximately 1.5% of the frame). This ensures that the subject will be correctly exposed even when the background is much brighter or darker. The metered area is centered on the current focus point. Note, however, that the camera will instead meter the center focus point if:
|
|
t |
[] |
The camera assigns the greatest weight to highlights. Use this option to reduce loss of detail in highlights, for example when photographing spotlit performers on stage. |
Choosing a Metering Option
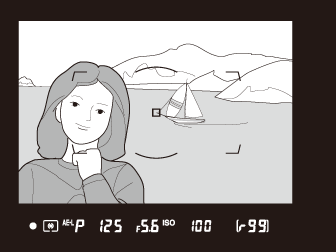
Hold the Y button and rotate the main command dial. The selected option is displayed in the viewfinder and top control panel.
|
|
|
|
||
|
|


The metering method used when matrix metering is selected varies with the lens.
-
CPU lenses:
-
3D color matrix metering III: Available with type D, E, and G CPU lenses. The camera includes distance information when calculating exposure.
-
Color matrix metering III: Available with CPU lenses of types other than D, E, and G. Distance information is not included.
-
-
Non-CPU lenses:
-
Color matrix metering is available if lens data are provided using the [] option in the setup menu. [] will be used if lens data are not provided.
-
[] will be used if [] is selected when non-CPU lenses and certain CPU lenses (AI-P NIKKOR lenses and AF lenses of types other than D, E, or G) are attached.
Choosing an Exposure Mode
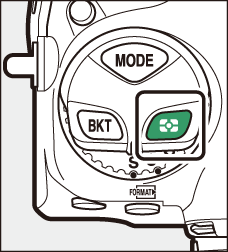
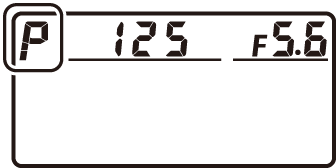
To choose an exposure mode, hold the I button and rotate the main command dial. The selected option is displayed in the top control panel.
|
|
|
|
|
Mode |
Description |
|
|---|---|---|
|
P |
Programmed auto ( P (Programmed Auto) ) |
Use for snapshots and in other situations in which there is little time to adjust camera settings. The camera chooses both shutter speed and aperture automatically. |
|
S |
Shutter-priority auto ( S (Shutter-Priority Auto) ) |
Use to freeze or blur motion. You choose the shutter speed; the camera adjusts aperture automatically. |
|
A |
Aperture-priority auto ( A (Aperture-Priority Auto) ) |
Use to blur backgrounds or bring both foreground and background into focus. You choose the aperture; the camera adjusts shutter speed automatically. |
|
M |
Manual ( M (Manual) ) |
You control both shutter speed and aperture. Choose a shutter speed of “Bulb” or “Time” for long time-exposures. |
-
When using a CPU lens of a type other than G or E, lock the aperture ring at the minimum aperture (highest f-number).
-
Mode A will be selected automatically if a non-CPU lens is attached in mode P or S.
P (Programmed Auto)
In this mode, the camera automatically adjusts shutter speed and aperture according to a built-in program to ensure optimal exposure in most situations. You also have the option of choosing different combinations of shutter speed and aperture without altering exposure (“flexible program”).
Mode P offers “flexible program”, in which although the camera chooses the initial shutter
speed and aperture, the main command dial can (while the standby timer is on) be rotated
to select different combinations without altering exposure from the value chosen by
the camera. While flexible program is in effect, a flexible program indicator (“U”) appears in the viewfinder and top control panel.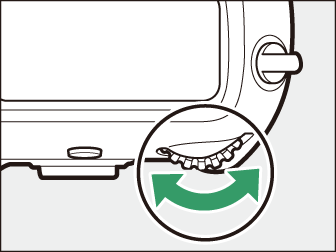
-
To restore default shutter speed and aperture settings, rotate the dial until the flexible program indicator is no longer displayed. The default shutter speed and aperture are also restored when you turn the camera off or select another mode.
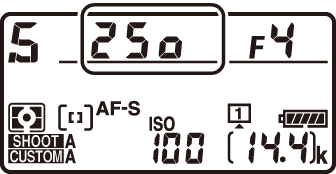
S (Shutter-Priority Auto)
In shutter-priority auto, you choose the shutter speed while the camera automatically
adjusts aperture for optimal exposure. Choose fast shutter speeds to “freeze” motion,
slow shutter speeds to suggest motion by blurring moving objects. To choose a shutter
speed, rotate the main command dial while the exposure meters are on.
|
|
|

-
Shutter speed can be set to “p” or to values between 1/8000 s (o) and 30 s (q).
-
Shutter speed can be locked at the selected value ( Shutter Speed and Aperture Lock ).
A (Aperture-Priority Auto)
In aperture-priority auto, you choose the aperture while the camera automatically
adjusts shutter speed for optimal exposure. To adjust aperture, rotate the sub-command
dial while the exposure meters are on.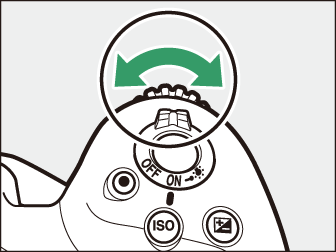
|
|
|

-
The minimum and maximum values for aperture vary with the lens.
-
Aperture can be locked at the selected value ( Shutter Speed and Aperture Lock ).
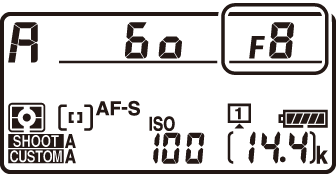
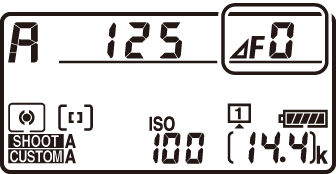
If when using a non-CPU lens you enter its maximum aperture using the [] item in setup menu, the current f-number will be displayed in the viewfinder and top control panel. Use the lens aperture ring to adjust aperture. Although other values can be selected, the value shown in the displays will be rounded to the nearest full aperture stop.
-
If you do not supply the maximum aperture, the aperture displays in the viewfinder and top control panel will show only the number of stops (F, with maximum aperture displayed as F0) and the f-number must be read from the lens aperture ring.
|
|
|

Aperture can be stopped down by pressing and holding the Pv button. Depth of field (the range of distances that appears to be in focus) can then
be previewed in the viewfinder.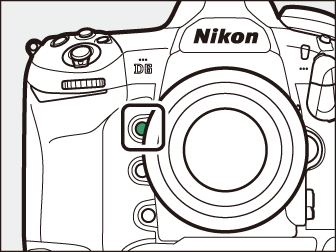
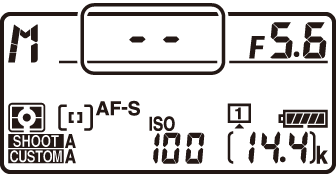
M (Manual)
You control both shutter speed and aperture. Choose this mode for long time-exposures of such subjects as fireworks or the night sky (“Bulb” or “Time” photography, Long Time-Exposures (Mode M Only) ). Shutter speed and aperture can be adjusted with reference to the exposure indicators by rotating the command dials as follows while the standby timer is on:
-
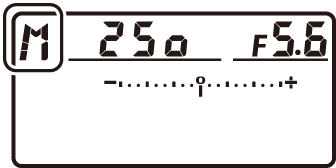
Rotate the main command dial to choose the shutter speed. Shutter speed can be set to values between 1/8000 s (o) and 30 s (q), to A (“Bulb”) or % (“Time”), or to p.
-
Aperture can be adjusted by rotating the sub-command dial.
-
The minimum and maximum values for aperture vary with the lens.
-
Shutter speed and aperture can be locked at the selected values ( Shutter Speed and Aperture Lock ).
Aperture:
|
|
|
|
||
|
|


Shutter speed:
|
|
|
|
||
|
|


For shutter speeds as slow as 900 s (15 minutes), select [] for Custom Setting d7 [].
Users of external exposure meters need not take the exposure ratio into account when adjusting aperture via the sub-command dial. Users will however need to consider the exposure ratio when using the lens aperture ring.
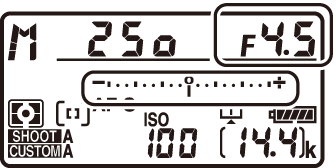
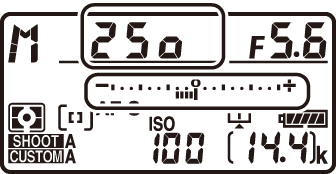
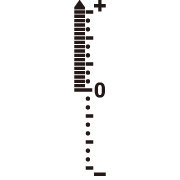
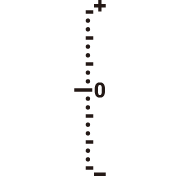
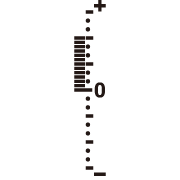
The exposure indicators in the viewfinder and top control panel show whether the photograph would be under- or over-exposed at current settings. The exposure indicators can be read as follows (the display varies with the option selected for Custom Setting b2 []):
|
Display |
[] selected for [] |
||
|---|---|---|---|
|
Optimal exposure |
Underexposed by 1/3 EV |
Overexposed by over 3 1/3 EV |
|
|
Top control panel |
|
|
|
|
Viewfinder |
|
|
|

-
The orientation of the exposure indicators can be reversed using Custom Setting f9 [].
The displays will flash if the selected settings exceed the limits of the exposure metering system or the exposure limits for live view.
Long Time-Exposures (Mode M Only)
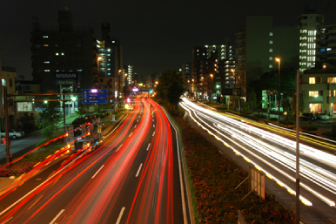
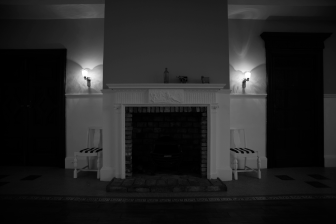
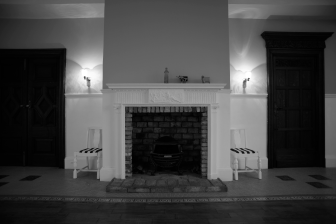
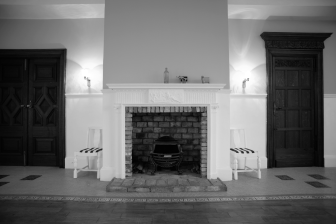
The camera offers two options for long time-exposures: “Bulb” and “Time”. Long time-exposures can be used for pictures of fireworks, night scenery, the stars, or moving lights.
|
A 35-second exposure shot at a shutter speed of “Bulb” and an aperture of f/25 |
|
Shutter speed |
Description |
|---|---|
|
Bulb |
The shutter remains open while the shutter-release button is held down. |
|
Time |
The exposure starts when the shutter-release button is pressed and ends when the button is pressed a second time. |
-
To prevent blur, use a tripod or a device such as an optional wireless remote controller or remote cord that can be used to operate the shutter remotely.
-
Keep the camera steady, for example by using a tripod.
-
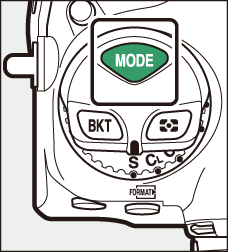
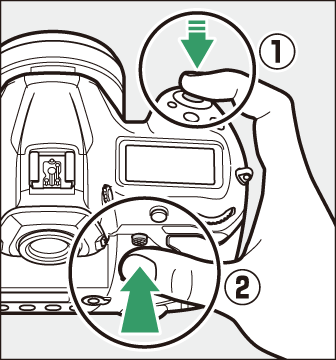
Hold the I button and rotate the main command dial to select mode M.
-
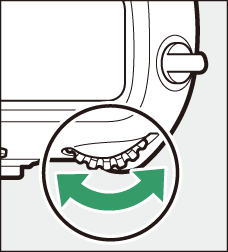
Rotate the main command dial to choose a shutter speed of A (“Bulb”) or % (“Time”).
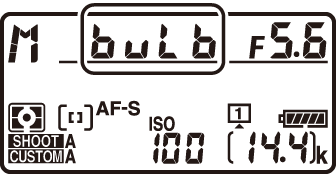
Note that the exposure indicators are not displayed at a shutter speed of A or %.
-
Focus and start the exposure.
-
“Bulb”: Press the shutter-release button all the way down to start the exposure. Keep the shutter-release button pressed during the exposure.
-
“Time”: Press the shutter-release button all the way down to start the exposure.
-
-
End the exposure.
-
“Bulb”: Lift your finger from the shutter-release button.
-
“Time”: Press the shutter-release button all the way down a second time.
-
-
To prevent light entering via the viewfinder from appearing in the photograph or interfering with exposure, raise the viewfinder eyepiece shutter lever to close the viewfinder eyepiece shutter before pressing the shutter-release button to start the exposure ( The Viewfinder Eyepiece Shutter ).
-
Note that “noise” (bright spots, randomly-spaced bright pixels or fog) may be present in long exposures.
-
Bright spots and fog can be reduced by choosing [] for [] in the photo shooting menu.
-
Nikon recommends using a fully-charged battery or an optional AC adapter and power connector to prevent loss of power during long exposures.
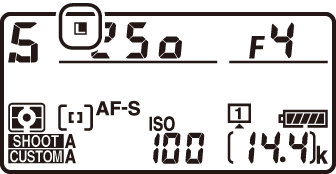
Shutter Speed and Aperture Lock
You can lock shutter speed (mode S), aperture (mode A), or both shutter speed and aperture (mode M).
Shutter speed and aperture lock are not available in mode P.
-
Assign [] to a control using Custom Setting f3 [].
-
Lock shutter speed and/or aperture.
Shutter speed:
-
After confirming that camera is in mode S or M, press the control to which [] has been assigned and rotate the main command dial until P (shutter-speed lock) icons appear in the viewfinder and top control panel.

-
To unlock shutter speed, press the control to which [] has been assigned and rotate the main command dial until the P icons are no longer displayed.
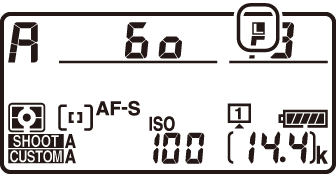
Aperture:
-
After confirming that camera is in mode A or M, press the control to which [] has been assigned and rotate the sub-command dial until P (aperture lock) icons appear in the viewfinder and top control panel.

-
To unlock aperture, press the control to which [] has been assigned and rotate the sub-command dial until the P icons are no longer displayed.
-
Autoexposure Lock
Use autoexposure lock to recompose photographs after setting exposure for a specific area of the subject. Exposure lock comes in handy when the area used to set exposure is much brighter or darker than its surroundings.
-
Select [] or [] ( Choosing How the Camera Sets Exposure ).
-
With the subject positioned in the selected focus point and the shutter-release button pressed halfway, press the center of the sub-selector to lock exposure.
-
While the center of the sub-selector is pressed, exposure will lock at the value metered in an area of the subject determined by the selected metering option.
-
An AE-L icon will be displayed in the viewfinder.

-
If you are using autofocus, you should also confirm that the in-focus indicator (I) is displayed.

-
-
Keeping the center of the sub-selector pressed, recompose the photograph and shoot.
If [] is selected for Custom Setting c1 [], exposure will lock while the shutter-release button is pressed halfway.
-
In [], exposure will be locked at the value metered in a circle centered on the current focus point ( Choosing How the Camera Sets Exposure ).
-
In [], exposure will be locked at the value metered in a 12-mm circle in the center of the viewfinder.
The following settings can be adjusted while the center of the sub-selector is pressed:
|
Mode |
Setting |
|---|---|
|
P |
Shutter speed and aperture (flexible program; Flexible Program ) |
|
S |
Shutter speed |
|
A |
Aperture |
-
The new values can be confirmed in the viewfinder and top control panel.
-
The option selected for metering cannot be changed while exposure lock is in effect.
Exposure Compensation
Exposure compensation is used to alter exposure from the value suggested by the camera. It can be used to make pictures brighter or darker. It is most effective when used with [] or [] ( Choosing How the Camera Sets Exposure ).
|
−1 EV |
No exposure compensation |
+1 EV |
Adjusting Exposure Compensation
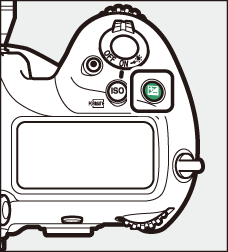
Hold the E button and rotate the main command dial.
-
The selected value is displayed in the viewfinder and top control panel.

-
Choose from values between –5 EV (underexposure) and +5 EV (overexposure).
-
By default, changes are made in increments of 1/3 EV. The size of the increments can be changed using Custom Setting b3 [].
-
In general, positive values make the subject brighter while negative values make it darker.
-
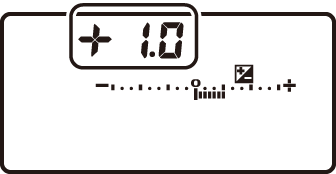
The current value is displayed in the viewfinder and top control panel when the E button is pressed.
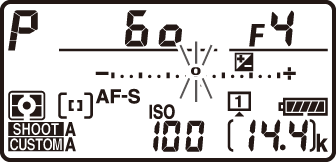
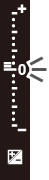
Display
No exposure compensation (E button pressed)
−0.3 EV
+2 EV
Top control panel


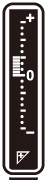
Viewfinder

-
E icons and exposure indicators appear in the viewfinder and top control panel. In modes other than M, the zero (“0”) at the center of the exposure indicator flashes.
-
Normal exposure can be restored by setting exposure compensation to ±0.0. Exposure compensation is not reset when the camera is turned off.
In mode M, exposure compensation affects only the exposure indicator; shutter speed and aperture do not change.
When an optional flash is used, exposure compensation affects both flash level and exposure, altering the brightness of both the main subject and the background; if desired, the effect can be restricted to the background using Custom Setting e3 [].