Other Accessories
Availability may vary with country or region. See our website or brochures for the latest information.
The HDMI/USB Cable Clip
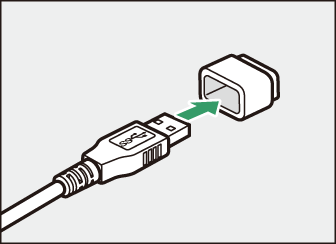
To prevent accidental disconnection, attach the supplied clip to HDMI cables or to the supplied USB cable as shown (the illustration shows the USB cable; note that the clip may not fit all third-party HDMI cables). Keep the monitor in the storage position when using the cable clip.
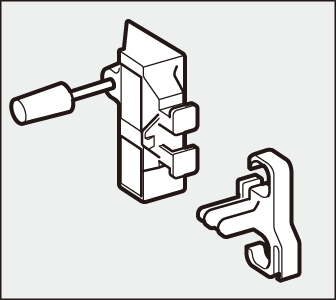

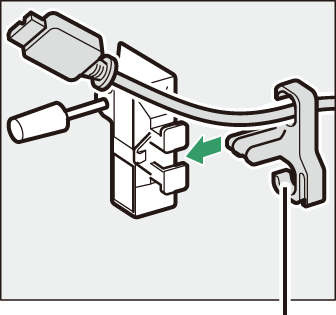
HDMI cable goes here

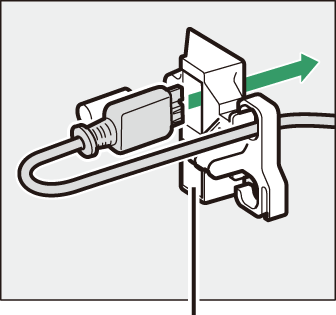
HDMI cable goes here

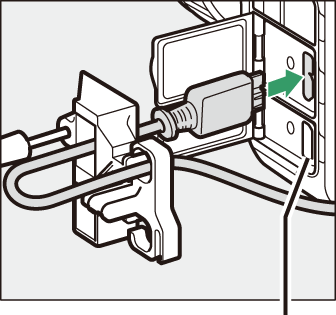
HDMI cable goes here

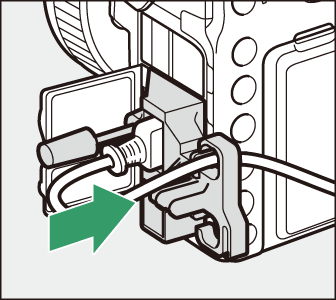

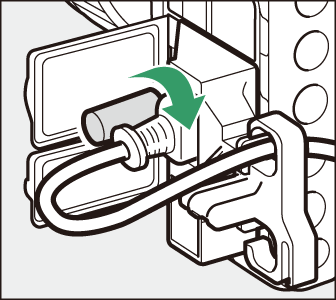

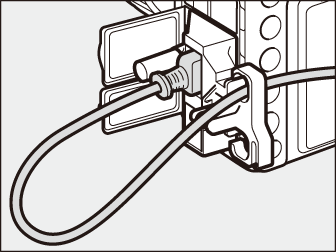
USB cable
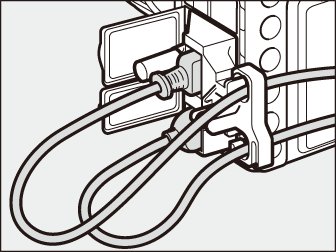
HDMI cable and USB cable used simultaneously
Attaching and Removing the Accessory Shoe Cover
The accessory shoe cover (available separately) slides into the accessory shoe as shown.
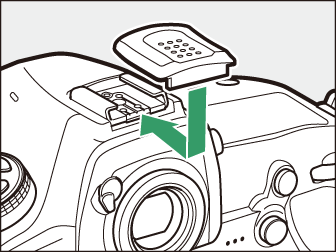
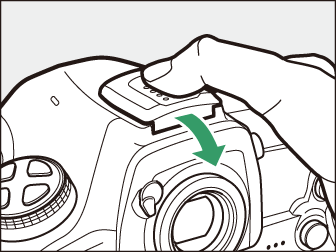
To remove the cover, hold the camera firmly, press the cover down with a thumb and slide it in the direction shown.
Attaching and Removing the Supplied Eyepiece
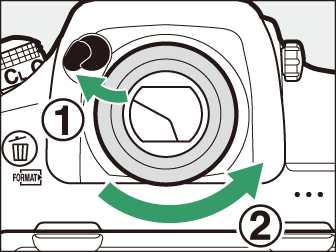
After closing the eyepiece shutter and releasing the latch ( ), lightly grasp the supplied DK-17F eyepiece in two fingers and rotate and remove as shown (
 ). To reattach, rotate the eyepiece in the opposite direction. Optional eyepieces can be attached and removed in the same fashion.
Attaching a Power Connector and AC Adapter
Turn the camera off before attaching an optional power connector and AC adapter.
-
Ready the camera.
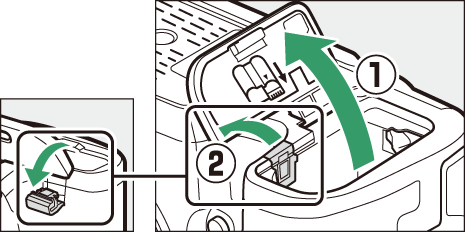
Open the battery-chamber (
 ) and power connector (
 ) covers.
-
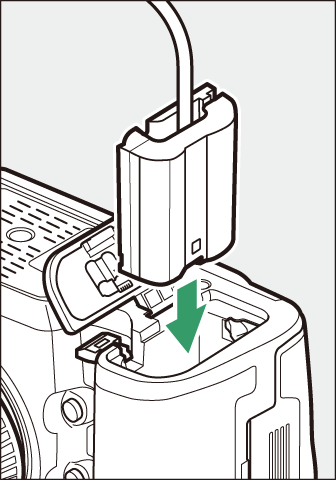
Insert the EP-5B power connector.
Be sure to insert the connector in the orientation shown, using the connector to keep the orange battery latch pressed to one side. The latch locks the connector in place when the connector is fully inserted.
-
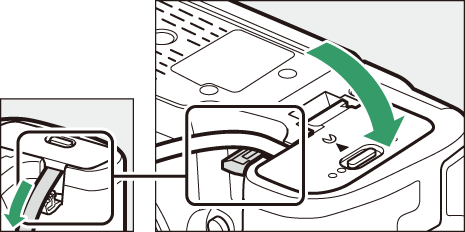
Close the battery-chamber cover.
Position the power connector cable so that it passes through the power connector slot and close the battery-chamber cover.
-
Connect the EH-5c/EH-5b AC adapter.
Connect the AC adapter power cable to the AC socket on AC adapter (
 ) and the power cable to the DC socket (
 ). A P icon is displayed in the monitor when the camera is powered by the AC adapter and power connector.

