Optional MB-D18 Battery Packs
The MB-D18 takes one EN-EL15a or EN-EL18c rechargeable battery or eight AA batteries (alkaline, Ni-MH, or lithium) and features controls for taking pictures in “tall” (portrait) orientation: shutter-release, AF-ON, and Fn buttons, a multi selector, and main and sub-command dials.
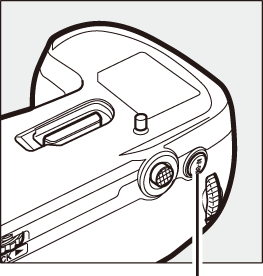
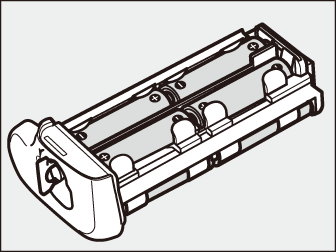
Parts of the MB-D18
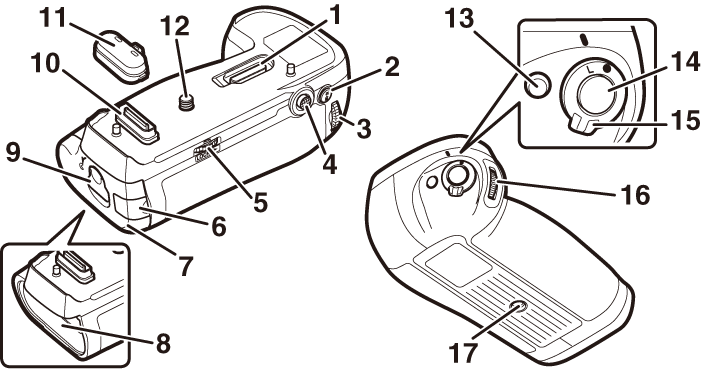
| 1 | Contact cover holder |
|---|---|
| 2 | AF-ON button |
| 3 | Main command dial |
| 4 | Multi selector |
| 5 | Attachment wheel |
| 6 | Holder power connector cover |
| 7 | Battery-chamber cover |
| 8 | Battery chamber |
| 9 | Battery-chamber latch |
| 10 | Power/signal contacts |
|---|---|
| 11 | Contact cap |
| 12 | Mounting screw |
| 13 | Fn button |
| 14 | Shutter-release button |
| 15 | Control lock |
| 16 | Sub-command dial |
| 17 | Tripod socket |
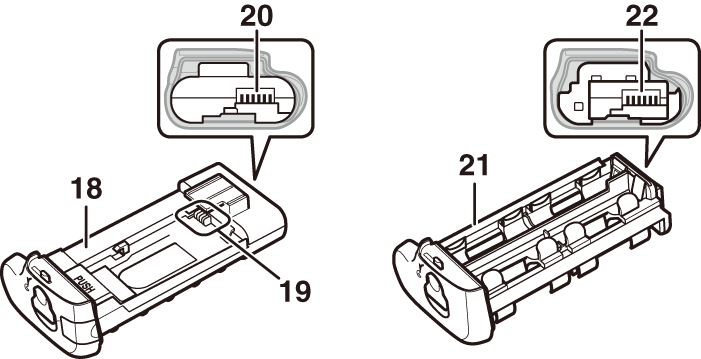
| 18 | MS-D12EN holder for EN-EL15a batteries * |
|---|---|
| 19 | Power terminals |
| 20 | Power terminals (MS-D12EN battery holder) |
| 21 | MS-D12 holder for AA batteries |
|---|---|
| 22 | Power terminals (MS-D12 battery holder) |
The MS-D12EN is inserted in the MB-D18 at shipment.
Using an AC Adapter and Power Connector
The optional EH-5c/EH-5b AC adapter and EP-5B power connector can be used with the MB-D18 to provide a reliable power source when the camera is used for extended periods (0 The EP-5B Power Connector). Insert the EP-5B power connector in the MS-D12EN battery holder and connect the AC adapter.
The Shutter-Release Button, Multi Selector, and Command Dials
These controls perform the same functions as the matching controls on the camera body, with the exception that, regardless of the option chosen for Custom Setting f5 (Multi selector, 0 Multi Selector), the MB-D18 multi selector cannot be used to start the standby timer.
Shutter-release button
Sub-command dial
Multi selector
Main command dial
The Fn and AF-ON Buttons
The functions performed by these controls can be selected using Custom Setting f10 (Assign MB-D18 buttons, 0 Assign MB-D18 Buttons).
Fn button
AF-ON button
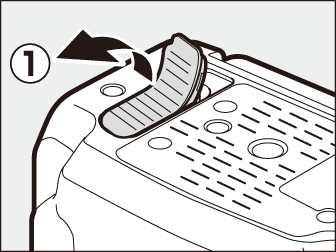
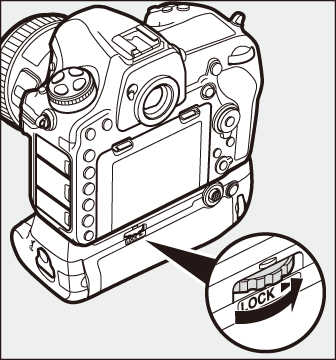
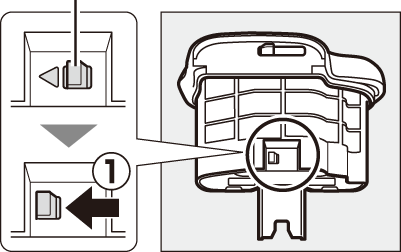
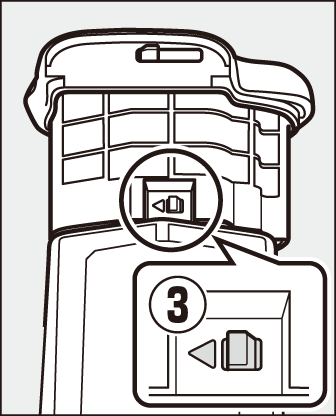
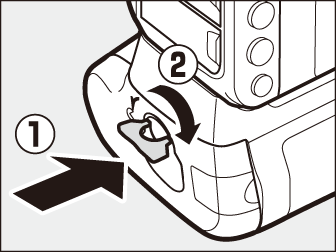
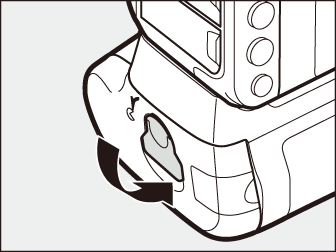
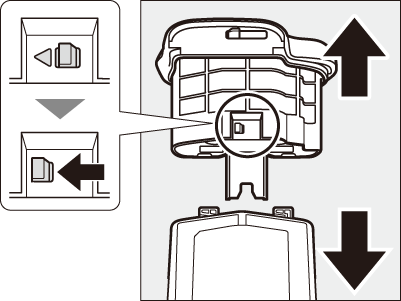
The MB-D18 Control Lock
The control lock locks the controls on the MB-D18 to prevent unintended use. Before using these controls to take photographs in “tall” (portrait) orientation, release the lock as shown. The control lock is not a power switch. Use the camera power switch to turn the camera on and off.
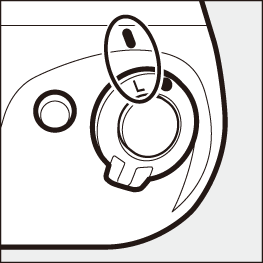
Locked
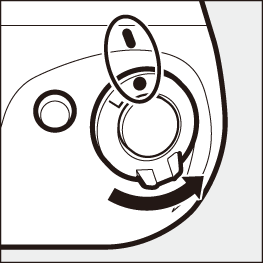
Unlocked
Using the Battery Pack
Attaching the Battery Pack
Before attaching the battery pack, be sure that the camera is off and that the MB-D18 control lock is in the L position.
-
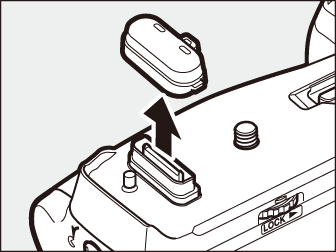
Remove the contact cap from the battery pack.
-
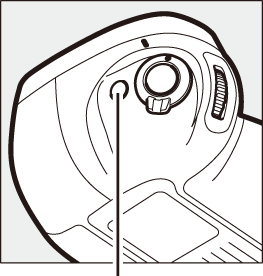
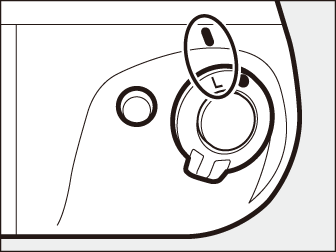
The contacts for the MB-D18 are in the base of the camera, where they are protected by a contact cover. Remove the contact cover (
 ) and place it in the contact cover holder on the MB-D18 (
 ).
).

-
Position the MB-D18, keeping the MB-D18 mounting screw (
) aligned with the camera tripod socket (), and tighten the attachment wheel by rotating it in the direction shown by the LOCK arrow.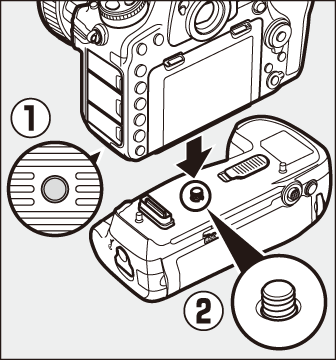
There is no need to remove the battery from the camera before connecting the MB-D18. At default settings, the battery inserted in the camera will be used only after the battery in the MB-D18 is exhausted. The Battery order option in the camera setup menu can be used to change the order in which the batteries are used.
Attaching the Battery Pack
Be sure to place the camera contact cover in the contact cover holder and to keep the MB-D18 contact cap in a safe place to prevent loss. A PB-6D bellows spacer and PK-13 auto extension ring are required when using PB-6 bellows focusing attachment with the MB-D18.
Removing the Battery Pack
To remove the MB-D18, turn the camera off and set the control lock on the MB-D18 to L, then loosen the attachment wheel by rotating it in the direction opposite to that shown by the LOCK arrow and remove the MB-D18.
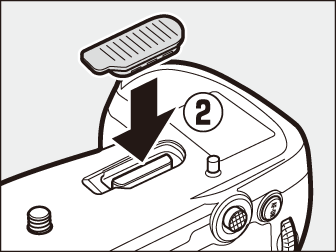
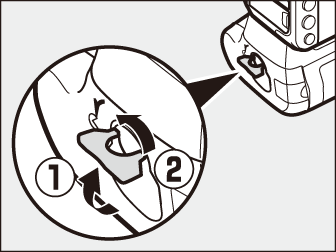
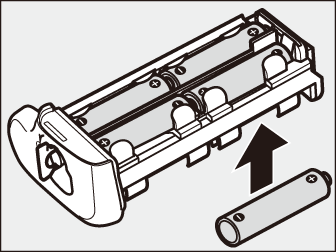
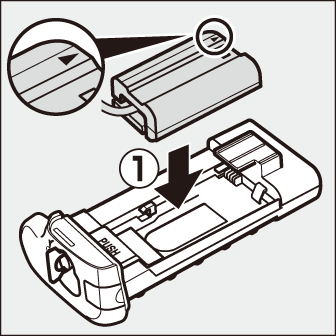
Inserting Batteries
The MB-D18 can be used with one EN-EL15a or EN-EL18c rechargeable battery or with eight AA batteries. Before inserting batteries, be sure that the camera is off and that the MB-D18 control lock is in the L position.
-
Unlatch the MB-D18 by rotating the battery-chamber latch to A and remove the battery holder.
-
Ready the batteries as described below.
EN-EL15a: Matching the indentations on the battery to the projections on the MS-D12EN holder, insert the battery with the arrow (E) on the battery toward the battery holder power terminals (
). Press the battery lightly downward and slide it in the direction of the arrow until the power terminals click into place ().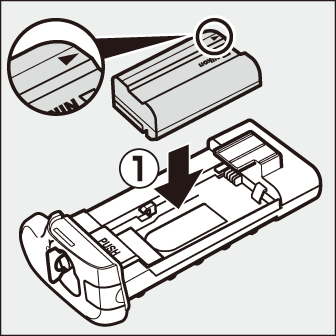
EN-EL18c: If the battery release on the optional BL-5 battery-chamber cover is positioned so that the arrow G is visible, slide the battery release to cover the arrow (
). Insert the two projections on the battery into the matching slots on the BL-5 () and confirm that the battery release has slid aside to reveal the arrow ( ).
).Battery release

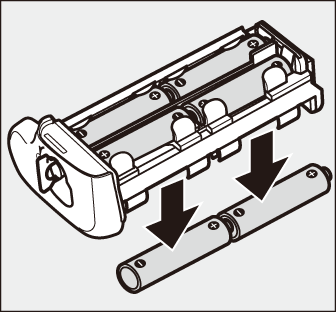
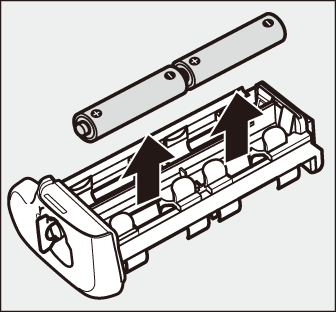
AA batteries: Place eight AA batteries in the MS-D12 battery holder as shown, making sure that the batteries are in the correct orientation.

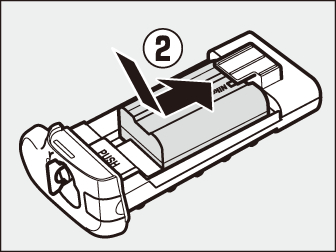
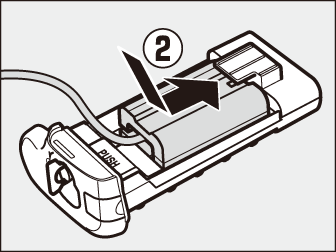
-
Insert the battery holder or EN-EL18c in the MB-D18 and latch the battery-chamber cover. Make sure the holder or battery is inserted before turning the latch; power will only be supplied if the cover is securely latched.
-
Turn the camera on and check the battery level in the control panel or viewfinder (0 The Battery Level and Number of Exposures Remaining). If the camera does not turn on, check that the battery is correctly inserted.
Match the option selected for MB-D18 battery type in the setup menu to the type of battery inserted in the battery pack (0 MB-D18 Battery Type). Information about the batteries can be displayed by selecting Battery info in the setup menu (0 Battery Info).
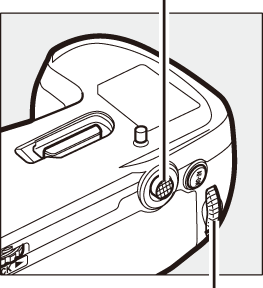
The EP-5B Power Connector
When using the EP-5B power connector, insert it into the MS-D12EN holder with the arrow (E) on the connector toward the battery holder power terminals (). Press the connector lightly downward and slide it in the direction of the arrow until the power terminals click into place (). Open the holder power connector cover and pass the EP-5B power cable through the opening ().
![]()
![]()

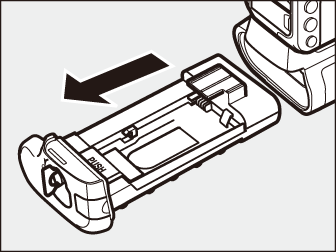
Removing Batteries
Be careful not to drop batteries or the holder.
-
Unlatch the MB-D18 by rotating the battery-chamber latch to A and remove the battery or battery holder.
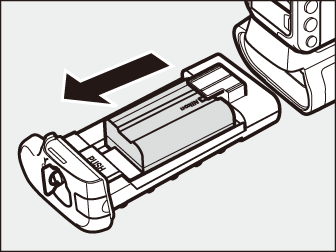
-
Remove the battery or batteries from the holder or BL-5 battery-chamber cover.
EN-EL15a: While pressing the holder PUSH button, slide the battery toward the button. The battery can then be removed as shown.

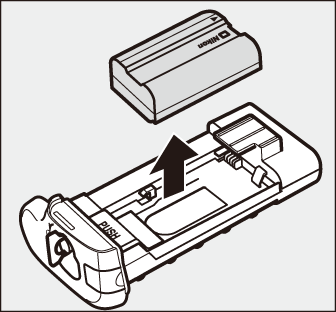
The procedure for removing the EP-5B power connector is the same as that for the EN-EL15a.
EN-EL18c: Slide the battery release in the direction indicated by the arrow (G) and remove the BL-5.
AA batteries: Remove the batteries as shown. Be careful not to drop the batteries when removing them from the holder.
Specifications
Nikon reserves the right to change the appearance and specifications of the hardware and software described in this manual at any time and without prior notice. Nikon will not be held liable for damages that may result from any mistakes that this manual may contain.
Buffer Capacity
Substituting an EN-EL18c battery inserted in an optional MB-D18 multi-power battery pack for an EN-EL15a changes the buffer capacity. The following table shows the maximum number of exposures (as of September 2017) that can be stored in the buffer in release mode Ch at an ISO sensitivity of ISO 100 when a 64 GB Sony QD-G64E XQD card is inserted; actual capacity varies with the card type and shooting conditions (for example, buffer capacity may drop at image qualities marked with “” or if auto distortion control is on).
FX (36×24) Image Area *
| Image quality | Image size | Power source | |
|---|---|---|---|
| EN-EL15a | EN-EL18c | ||
| NEF (RAW), Lossless compressed, 12-bit |
Large | 170 | 54 |
| Medium | 94 | 40 | |
| Small | 56 | 35 | |
| NEF (RAW), Lossless compressed, 14-bit |
Large | 51 | 29 |
| NEF (RAW), Compressed, 12-bit |
Large | 200 | 56 |
| NEF (RAW), Compressed, 14-bit |
Large | 74 | 31 |
| NEF (RAW), Uncompressed, 12-bit |
Large | 55 | 39 |
| NEF (RAW), Uncompressed, 14-bit |
Large | 29 | 24 |
| TIFF (RGB) | Large | 32 | 29 |
| Medium | 35 | 28 | |
| Small | 39 | 31 | |
| JPEG fine | Large | 200 | 79 |
| Medium | 200 | 86 | |
| Small | 200 | 56 | |
| JPEG normal | Large | 200 | 86 |
| Medium | 200 | 92 | |
| Small | 200 | 57 | |
| JPEG basic | Large | 200 | 108 |
| Medium | 200 | 102 | |
| Small | 200 | 59 | |
Includes images taken with non-DX lenses when On is selected for Auto DX crop.
DX (24 × 16) Image Area *
| Image quality | Image size | Power source | |
|---|---|---|---|
| EN-EL15a | EN-EL18c | ||
| NEF (RAW), Lossless compressed, 12-bit |
Large | 200 | 91 |
| Medium | 200 | 56 | |
| Small | 200 | 54 | |
| NEF (RAW), Lossless compressed, 14-bit |
Large | 200 | 45 |
| NEF (RAW), Compressed, 12-bit |
Large | 200 | 102 |
| NEF (RAW), Compressed, 14-bit |
Large | 200 | 48 |
| NEF (RAW), Uncompressed, 12-bit |
Large | 200 | 72 |
| NEF (RAW), Uncompressed, 14-bit |
Large | 200 | 43 |
| TIFF (RGB) | Large | 113 | 54 |
| Medium | 200 | 71 | |
| Small | 200 | 73 | |
| JPEG fine | Large | 200 | 138 |
| Medium | 200 | 152 | |
| Small | 200 | 135 | |
| JPEG normal | Large | 200 | 165 |
| Medium | 200 | 158 | |
| Small | 200 | 143 | |
| JPEG basic | Large | 200 | 176 |
| Medium | 200 | 166 | |
| Small | 200 | 145 | |
Includes images taken with DX lenses when On is selected for Auto DX crop.