Connect to computers via Ethernet or wireless LAN.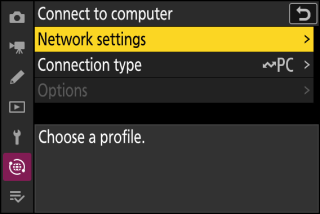
Network Settings
Add camera network profiles. This item can also be used to choose from existing network profiles.
Create Profile
Create new network profiles (Wireless LAN, Ethernet Connections).
-
If more than one profile already exists, you can press J to choose a profile and connect to the selected network.
-
To edit an existing profile, highlight it and press 2.
|
Option |
Description |
|---|---|
|
[] |
|
|
[] |
Display connection settings for connection to wireless networks.
|
|
[] |
Adjust TCP/IP settings for infrastructure connections. An IP address is required.
|
Copy to/from Card
Share network profiles.
-
If two memory cards are inserted, the profiles will be copied to and from the card in Slot 1.
|
Option |
Description |
|---|---|
|
[] |
Copy profiles from the root directory of the memory card to the camera profile list. |
|
[] |
Copy profiles from the camera to the memory card. Highlight a profile and press J to copy it to the memory card.
|
End Current Connection
End the connection to the current network.
Connection Type
Choose an operating mode for use when the camera is connected to a network.
|
Option |
Description |
|---|---|
|
[] |
Upload photos to a computer as they are taken or upload existing pictures from the camera memory card. |
|
[] |
Use Camera Control Pro 2 (available separately) or free NX Tether software to control the camera and take pictures remotely from a computer. |
Options
Adjust upload settings.
Auto Upload
Select [] to mark new photos for upload as they are taken.
-
Upload begins only after the photo has been recorded to the memory card. Be sure a memory card is inserted in the camera.
-
Videos will not be uploaded automatically when recording is complete. They must instead be uploaded from the playback display (Selecting Pictures for Upload).
Delete After Upload
Select [] to delete photographs from the camera memory card automatically once upload is complete.
-
Files marked for transfer before you selected [] are not deleted.
-
Deletion may be suspended during some camera operations.
Upload RAW + JPEG As
When uploading RAW + JPEG pictures, choose whether to upload both the NEF (RAW) and JPEG files or only the JPEG copy.
-
When [] is selected for [] in the photo shooting menu, the option chosen for [] applies only to photos uploaded automatically by selecting [] for [].
JPEG + JPEG Slot Selection
Choose a source slot for auto upload when taking pictures with [] selected for [] in the photo shooting menu.
Upload RAW Video As
When uploading videos shot with [] or [] selected for [] in the video recording menu, choose whether to upload both the RAW and MP4 files or only the MP4 copy.
Upload Folder
Mark all photos in a selected folder for upload. Marking will be applied to all photos, regardless of whether they have been uploaded previously.
Videos will not be marked for upload. They must instead be uploaded from the playback display.
Deselect All?
Remove upload marking from all pictures. Upload of pictures with an “uploading” icon will immediately be terminated.