Choosing a Shooting Mode
Keeping the mode dial lock release pressed, rotate the mode dial to choose from the
following modes: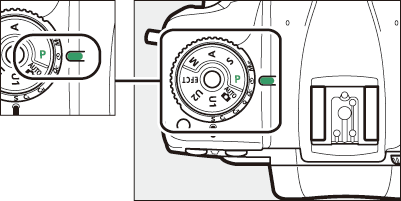
|
Mode |
Description |
|
|---|---|---|
|
b |
Auto ( Taking Photographs (b Mode) , Recording Movies (b Mode) ) |
A simple, “point-and-shoot” mode that leaves the camera in charge of settings. |
|
P |
Programmed auto ( P (Programmed Auto) ) |
Camera sets shutter speed and aperture for optimal exposure. Recommended for snapshots and in other situations in which there is little time to adjust camera settings. |
|
S |
Shutter-priority auto ( S (Shutter-Priority Auto) ) |
User chooses shutter speed; camera selects aperture for best results. Use to freeze or blur motion. |
|
A |
Aperture-priority auto ( A (Aperture-Priority Auto) ) |
User chooses aperture; camera selects shutter speed for best results. Use to blur background or bring both foreground and background into focus. |
|
M |
Manual ( M (Manual) ) |
User controls both shutter speed and aperture. Set shutter speed to Bulb or Time for long time-exposures. |
|
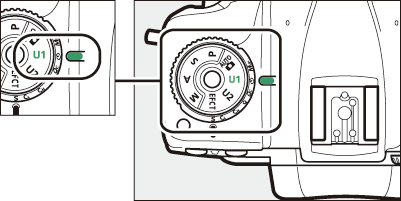
U1/U2 |
User settings modes ( User Settings: U1 and U2 Modes ) |
Assign frequently-used settings to these positions for quick recall. |
|
EFCT |
Special effects mode (Using Special Effects Modes) |
Take pictures with added special effects. |
-
When using a CPU lens of a type other than G or E, lock the aperture ring at the minimum aperture (highest f-number).
-
Mode A will be selected automatically if a non-CPU lens is attached in mode P or S. “A” will appear in the information display.
Shooting in Modes P, S, A, and M
P (Programmed Auto)
In this mode, the camera automatically adjusts shutter speed and aperture according to a built-in program to ensure optimal exposure in most situations. You also have the option of choosing different combinations of shutter speed and aperture without altering exposure (“flexible program”).
Mode P offers “flexible program”, in which although the camera chooses the initial shutter
speed and aperture, while the standby timer is on the main command dial can be rotated
to select different combinations without altering exposure from the value chosen by
the camera. While flexible program is in effect, a flexible program indicator (“A”) appears in the viewfinder.
-
To restore default shutter speed and aperture settings, rotate the dial until the flexible program indicator is no longer displayed, choose another mode, or turn the camera off.
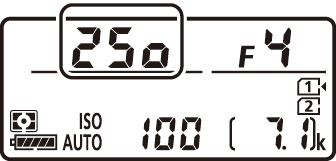
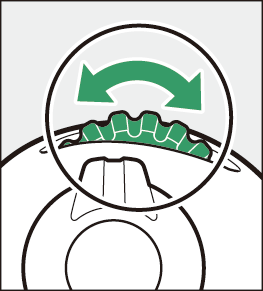
S (Shutter-Priority Auto)
In shutter-priority auto, you choose the shutter speed while the camera automatically
selects the aperture that will produce the optimal exposure. To choose a shutter speed,
rotate the main command dial while the exposure meters are on.
|
|
|

-
Shutter speed can be set to “s” or to values between 30 s (q) and 1/8000 s (o).
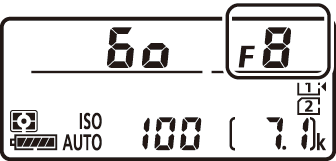
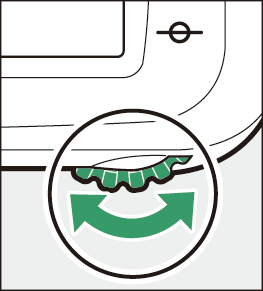
A (Aperture-Priority Auto)
In aperture-priority auto, you choose the aperture while the camera automatically
selects the shutter speed that will produce the optimal exposure. To adjust aperture,
rotate the sub-command dial while the exposure meters are on.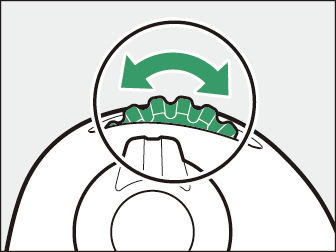
|
|
|

-
Aperture can be set to values between the minimum and maximum values for the lens.
Use the lens aperture ring to adjust aperture. If the maximum aperture of the lens has been specified using the [] item in setup menu when a non-CPU lens is attached, the current f-number will be displayed in the viewfinder and control panel, rounded to the nearest full stop.
-
Otherwise the aperture displays will show only the number of stops (F, with maximum aperture displayed as F0) and the f-number must be read from the lens aperture ring.
|
|
|


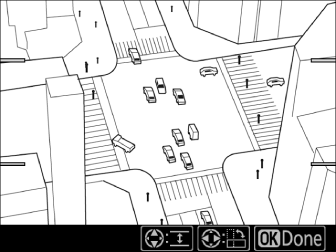
Aperture can be stopped down by pressing and holding the Pv button. Depth of field (the range of distances that appears to be in focus) can then
be previewed in the viewfinder.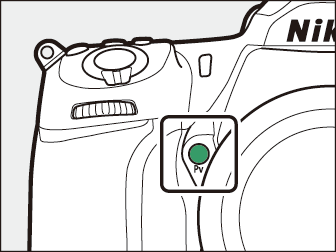
M (Manual)
You control both shutter speed and aperture. Choose this mode for long time-exposures of such subjects as fireworks or the night sky (Bulb or Time photography, Long Time-Exposures (M Mode Only) ). Shutter speed and aperture can be adjusted with reference to the exposure indicators by rotating the command dials as follows while the standby timer is on:
-
Rotate the main command dial to choose the shutter speed. Shutter speed can be set to values between 1/8000 s (o) and 30 s (q), to A (Bulb) or % (Time), or to s.
-
Aperture can be adjusted by rotating the sub-command dial.
-
The minimum and maximum values for aperture vary with the lens.
Shutter speed:
|
|
|
|

Aperture:
|
|
|
|

Provided that an external exposure meter is used, the exposure ratio need only be taken into account when the lens aperture ring is used to set aperture.
For shutter speeds as slow as 900 s (15 minutes), select [] for Custom Setting d6 [].
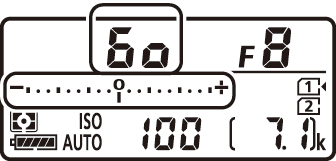
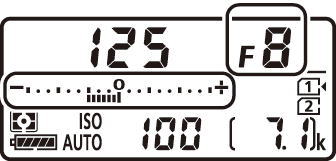
The exposure indicators in the viewfinder and control panel show whether the photograph would be under- or over-exposed at current settings. Depending on the option chosen for Custom Setting b1 [], the amount of under- or overexposure is shown in increments of 1/3 EV or 1/2 EV.
|
Custom Setting b1 set to 1/3 step |
|||
|---|---|---|---|
|
Optimal exposure |
Underexposed by 1/3 EV |
Overexposed by over 3 EV |
|
|
Control panel |
|
|
|
|
Viewfinder |
|
|
|


-
The orientation of the exposure indicators can be reversed using Custom Setting f7 [].
If the limits of the exposure metering system are exceeded, the displays will flash.
User Settings: U1 and U2 Modes
Assign frequently-used settings to the U1 and U2 positions on the mode dial.
Saving User Settings
Follow the steps below to save settings:
-
Adjust settings.
Make the desired adjustments to camera settings, including:
-
photo shooting menu options (some settings excluded),
-
movie shooting menu options (some settings excluded),
-
Custom Settings, and
-
shooting mode, shutter speed (modes S and M), aperture (modes A and M), flexible program (mode P), exposure and flash compensation.
-
-
Select [].
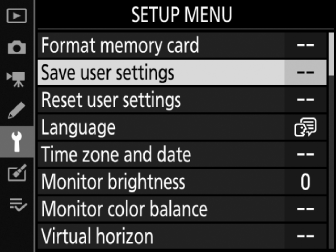
Press the G button to display the menus. Highlight [] in the setup menu and press 2.
-
Select a position.
Highlight [] or [] and press 2.
-
Save user settings.
Highlight [] using 1 and 3 and press J to assign current settings to the selected user settings mode.
-
Take pictures using saved settings.
Rotate the mode dial to U1 or U2 to recall the settings last saved to the selected position.
The following cannot be saved to U1 or U2.
-
Photo shooting menu:
-
[]
-
[]
-
[]
-
[]
-
[]
-
[]
-
[]
-
-
Movie shooting menu:
-
[]
-
[]
-
Resetting User Settings
To reset settings for U1 or U2 to default values:
-
Select [].

Press the G button to display the menus. Highlight [] in the setup menu and press 2.
-
Select a position.
Highlight [] or [] and press 2.
-
Reset user settings.
Highlight [] and press J to restore default settings for the selected position. The camera will function in mode P.
Using Special Effects Modes
Choosing an Effect
To choose an effect, rotate the mode dial to EFCT and then rotate the main command dial to choose the desired option.
|
|
|
|

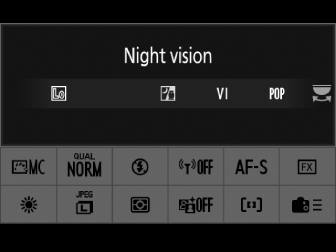
Special Effects
|
Option |
Description |
|
|---|---|---|
|
j |
[] |
Use under conditions of darkness to record monochrome images at high ISO sensitivities.
|
|
f |
[] |
Overall saturation and contrast are increased for a more vibrant image. |
|
d |
[] |
Overall saturation is increased for a more lively image. |
|
e |
[] |
Sharpen outlines and simplify coloring for a poster effect.
|
|
k |
[] |
Create photos and movies with saturation and peripheral illumination similar to pictures shot with a toy camera.
|
|
l |
[] |
Create photos that appear to be pictures of dioramas. Works best when shooting from a high vantage point.
|
|
m |
[] |
All colors other than the selected colors are recorded in black and white.
|
|
8 |
[] |
Silhouette subjects against bright backgrounds. |
|
9 |
[] |
Use with bright scenes to create bright images that seem filled with light. |
|
! |
[] |
Use with dark scenes to create dark, low-key images with prominent highlights. |
Use a tripod to prevent blur caused by camera shake at slow shutter speeds.
-
Pictures taken in j, f, d, e, k, l, or m mode with [] selected for image quality will be recorded at an image quality of [], while in the case of pictures taken at a setting of NEF (RAW) + JPEG, only the JPEG copy will be recorded.
-
If [] is selected for Custom Setting d8 [], the camera will save two copies of each picture shot in f, d, e, k, l, and m modes: an unprocessed NEF(RAW) copy and a JPEG copy to which the effect has been applied. If [] is selected, only the JPEG copy will be saved.
-
Effects cannot be adjusted during movie recording.
-
The frame advance rates for
Cl(Continuous low speed) andCh(Continuous high speed) slow when e or l is selected. -
In e and l modes, the live view display refresh rate will drop.
Adjusting e (Photo Illustration) Settings
When e is selected, the effect can be adjusted in live view:
-
Press the a button.
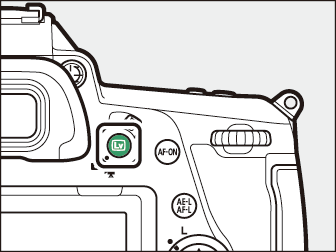
The view through the lens will be displayed in the monitor.
-
Press J.
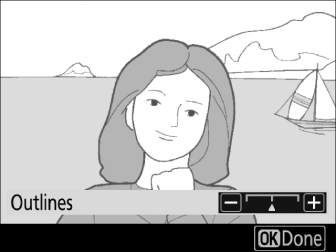
Photo illustration options will be displayed.
-
Adjust outline thickness.

Press 4 to thin outlines or 2 to make them thicker.
-
Press J.
Press J to save changes; the selected effect will be applied during shooting.
Adjusting k (Toy Camera Effect) Settings
When k is selected, the effect can be adjusted in live view:
-
Press the a button.
The view through the lens will be displayed in the monitor.
-
Press J.
Toy camera effect options will be displayed.
-
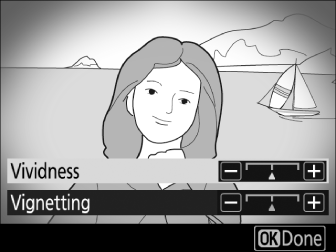
Adjust options.

-
Press 1 or 3 to highlight the desired setting.
-
[]: Press 2 for more saturation, 4 for less.
-
[]: Press 2 for more vignetting, 4 for less.
-
-
Press J.
Press J to save changes; the selected effect will be applied during shooting.
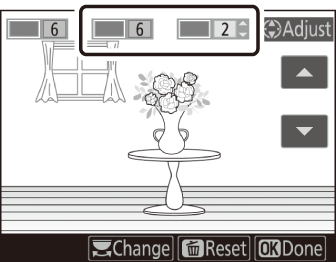
Adjusting l (Miniature Effect) Settings
When l is selected, the effect can be adjusted in live view:
-
Press the a button.
The view through the lens will be displayed in the monitor.
-
Position the focus point.

-
Use the multi selector to position the focus point in the area that you want to be in focus.
-
To check focus, press the shutter-release button halfway.
-
To temporarily clear miniature effect options from the display and enlarge the view in the monitor for precise focus, press X (T). Press W (Y) to restore the miniature effect display.
-
-
Display options.
Press J to display miniature effect options.
-
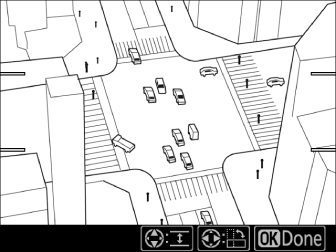
Choose the orientation and size of the area that will be in focus.
-
Press 4 or 2 to choose the orientation of the area that will be in focus.
-
Press 1 or 3 to choose the width of the area that will be in focus.
-
-
Press J.
Press J to save changes; the selected effect will be applied during shooting.
Miniature effect movies play back at high speed. For example, approximately 15 minutes of footage shot with 1920 × 1080/30p selected for [] in the movie shooting menu will play back in about a minute.
Adjusting m (Selective Color) Settings
When m is selected, the effect can be adjusted in live view:
-
Press the a button.
The view through the lens will be displayed in the monitor.
-
Press J.
Selective color options will be displayed.
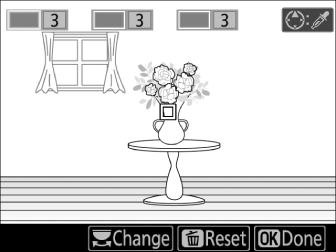
-
Select colors.
-
Frame an object of the desired color in the white square at the center of the display.
-
To zoom in for more precise color selection, press X (T). Press W (Y) to zoom out.
-
Press 1 to choose the color of the object in the white square as one that will be recorded in color when photographs are taken; the selected color will appear in the first of the numbered color boxes.
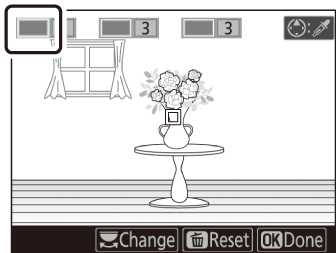
-
All colors other than those selected in the color boxes will appear in black and white.
-
-
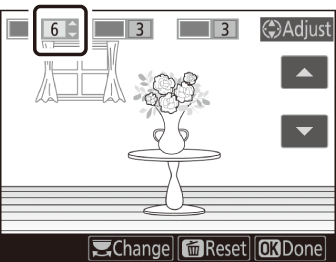
Choose the color range.
Press 1 or 3 to increase or decrease the range of similar hues that will be included in photographs; choose from values between [] and []. The higher the value, the wider the range of colors that will be included; the lower the value, the lower the range of colors that will be included.
-
Select additional colors.
-
To select additional colors, rotate the main command dial to highlight another of the numbered color boxes and repeat Steps 3 and 4.
-
Up to 3 colors can be selected.
-
To deselect the highlighted color, press O (Q).
-
To remove all colors, press and hold O (Q). A confirmation dialog will be displayed; select [].
-
-
Press J.
Press J to save changes; the selected effect will be applied during shooting.
-
The camera may have difficulty detecting some colors. Saturated colors are recommended.
-
Higher values for color range may include hues from other colors.