Connecting to Computers
To upload pictures to a computer, connect the camera via a wireless network or using the supplied USB cable.
Connecting via USB
Connect the camera using the supplied USB cable. You can then use NX Studio software to copy pictures to the computer for viewing and editing.
Installing NX Studio
You will need an Internet connection when installing NX Studio. Visit the Nikon website for the latest information, including system requirements.
-
Download the latest NX Studio installer from the website below and follow the on-screen instructions to complete installation.
https://downloadcenter.nikonimglib.com/ -
Note that you may be unable to download pictures from the camera using earlier versions of NX Studio.
Copying Pictures to a Computer Using NX Studio
See online help for detailed instructions.
-
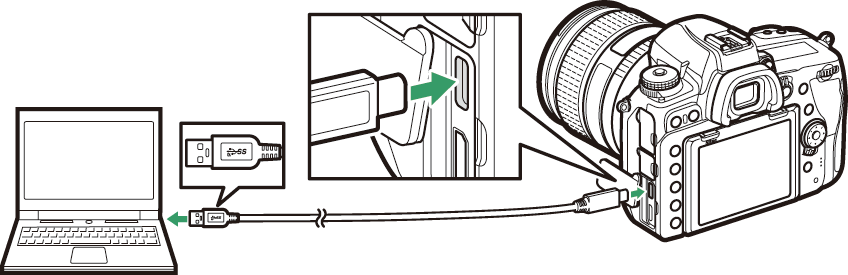
Connect the camera to the computer.
After turning the camera off and ensuring that a memory card is inserted, connect the supplied USB cable as shown.
Using a Card ReaderPictures can also be copied from a memory card inserted in a third-party card reader. You should however check that the card is compatible with the card reader.
-
Turn the camera on.
-
The Nikon Transfer 2 component of NX Studio will start. Nikon Transfer 2 image transfer software is installed as part of NX Studio.
-
If a message is displayed prompting you to choose a program, select Nikon Transfer 2.
-
If Nikon Transfer 2 does not start automatically, launch NX Studio and click the “Import” icon.
-
-
Click [].
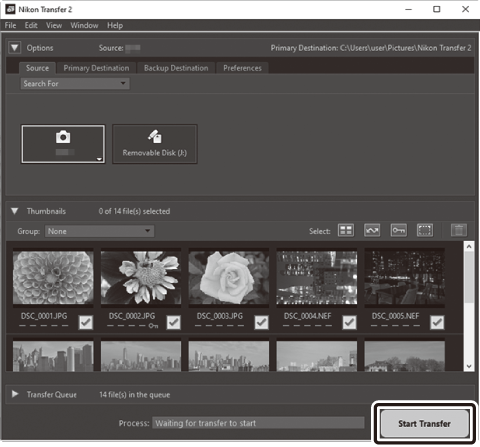
Pictures on the memory card will be copied to the computer.
-
Turn the camera off.
Disconnect the USB cable when transfer is complete.
Windows 10 and Windows 8.1 may display an AutoPlay prompt when the camera is connected.![]()
Click the dialog and then click [] to select Nikon Transfer 2.![]()
If Nikon Transfer 2 does not start automatically, confirm that the camera is connected and then launch Image Capture (an application that comes with macOS) and select Nikon Transfer 2 as the application that opens when the camera is detected.
Do not attempt to transfer videos from the memory card while it is inserted in a camera of a different make or model. Doing so could result in the videos being deleted without being transferred.
-
Do not turn the camera off or disconnect the USB cable while transfer is in progress.
-
Do not use force or attempt to insert the connectors at an angle. Be sure also to keep the connectors straight when disconnecting the cable.
-
Always turn the camera off before connecting or disconnecting a cable.
-
To ensure that data transfer is not interrupted, be sure the camera battery is fully charged.
Connect the camera directly to the computer; do not connect the cable via a USB hub or keyboard. Connect the camera to a pre-installed USB port.
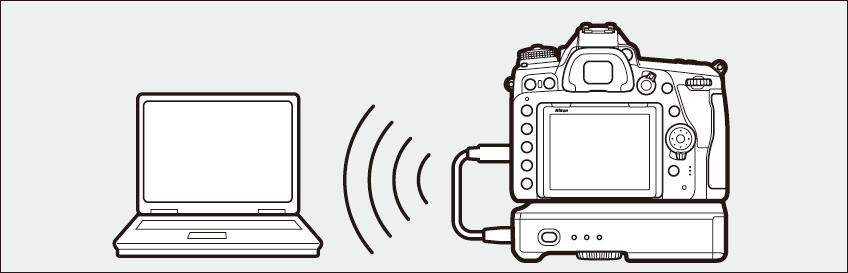
Wireless Networks (Wi‑Fi)
The following methods can be used to connect to a computer via Wi‑Fi. For more information, see “Network Connections” (Network Connections).
Built-in Wi‑Fi
Use the [] item in the camera setup menu to connect to computers either directly or via a wireless router.
|
Connection via a wireless router |
Direct wireless connection |


The WT-7 Wireless Transmitter
Connecting a WT-7 wireless transmitter enables the [] item in the setup menu. With Camera Control Pro 2 (available separately), the camera can be controlled and pictures saved to the computer as they are taken.
-
The WT-7 can be used to upload pictures to computers or ftp servers.
-
You can also connect via Ethernet.
-
Use the WT-7 for connections that are more reliable than those offered by the camera’s built-in Wi-Fi.