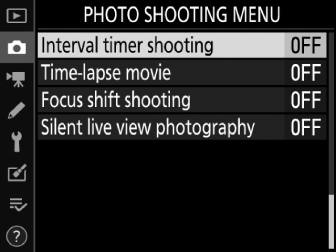
Taking Photos at a Set Interval (Interval Timer Shooting)
Use the [] item in the photo shooting menu to take photographs at a selected interval until a specified number of shots has been recorded. Select a release mode other than E and Mup when using the interval timer.
- Interval Timer Shooting Options
- Interval-Timer Photography
- Pausing Interval-Timer Photography
- Resuming Interval-Timer Photography
- Ending Interval-Timer Photography
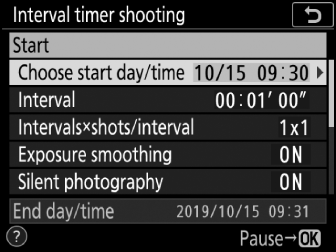
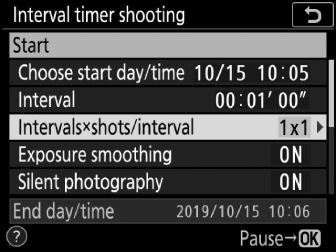
Interval Timer Shooting Options
|
Option |
Description |
|---|---|
|
[] |
Start interval-timer photography, either after 3 s ([] selected for []) or at a selected date and time []. Shooting will continue at the selected interval until all shots have been taken. |
|
[] |
Choose a start option. To start shooting immediately, select []. To start shooting at a chosen date and time, select []. |
|
[] |
Choose the interval (hours, minutes, and seconds) between shots. |
|
[] |
Choose the number of intervals and the number of shots per interval. |
|
[] |
Selecting [] allows the camera to adjust exposure to match the previous shot.
|
|
[] |
Select [] to silence the shutter and eliminate the vibrations it produces during shooting.
|
|
[] |
|
|
[] |
If [] is selected, the camera will focus before each shot after the first. |
|
[] |
Combine interval-timer photography with other options.
|
|
[] |
Highlight either of the following options and press 2 to select or deselect:
|
-
Before beginning interval-timer photography, take a test shot at current settings.
-
Select [] in the setup menu and make sure that the camera clock is set to the correct time and date.
-
We recommend using a tripod and disabling lens vibration reduction (VR). Mount the camera on a tripod before shooting begins.
-
To ensure that shooting is not interrupted, be sure the camera battery is fully charged. If in doubt, charge the battery before use or use an AC adapter and power connector (available separately).
-
When taking photos with your eye from the viewfinder and [] selected for [], remove the rubber eyecup and cover the viewfinder with the supplied eyepiece cap to prevent light entering via the viewfinder interfering with photographs and exposure (Cover the Viewfinder).
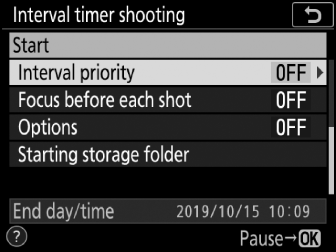
Interval-Timer Photography
-
Highlight [] in the photo shooting menu and press 2.
-
Adjust interval timer settings.
Adjust interval timer settings as described below.
-
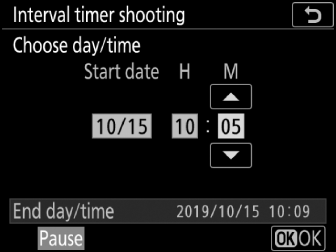
To choose a start day and time:
Highlight [] and press 2.

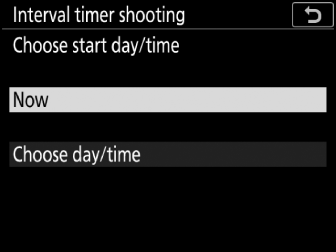
Highlight an option and press J.
-
To start shooting immediately, select []. To start shooting at a chosen date and time, select [], then choose the date and time and press J.
-
-
To choose the interval between shots:
Highlight [] and press 2.

Choose an interval (hours, minutes, and seconds) and press J.
-
To choose the number of shots per interval:
Highlight [] and press 2.

Choose the number of intervals and the number of shots per interval and press J.
-
In S (single frame) mode, the photographs for each interval will be taken at the rate for
Chrelease mode. -
When [] is selected for [], the maximum number of intervals will vary with the number of shots per interval.
-
-
To enable or disable exposure smoothing:
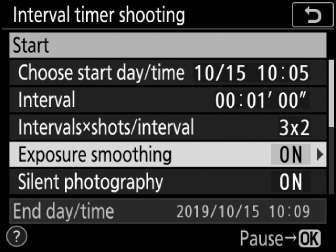
Highlight [] and press 2.
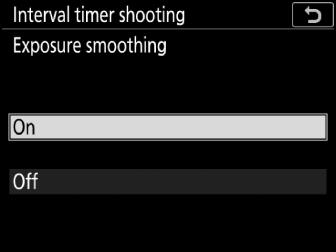
Highlight an option and press J.
-
To enable or disable silent photography:
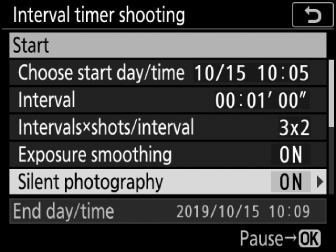
Highlight [] and press 2.
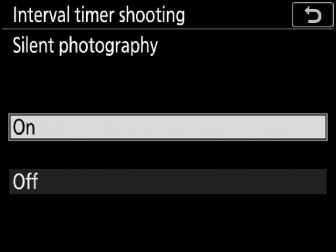
Highlight an option and press J.
-
If [] is selected, the only time the sound of the shutter or mirror will be heard is when the mirror is raised or lowered at the start and end of shooting.
-
-
To choose an interval priority option:
Highlight [] and press 2.
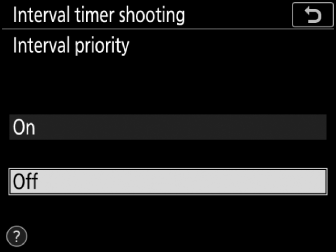
Highlight an option and press J.
-
Choose whether the camera focuses before each shot after the first:
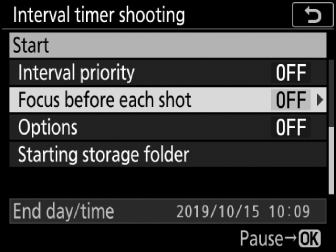
Highlight [] and press 2.
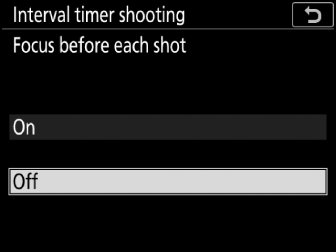
Highlight an option and press J.
-
To choose additional options:
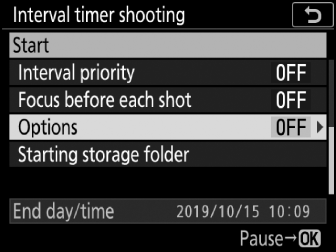
Highlight [] and press 2.
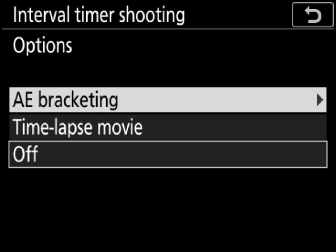
Highlight [] or [] and press 2.
-
Choose the [] and [] ([]) or the [] and [] ([]).
-
-
Choosing start folder options:
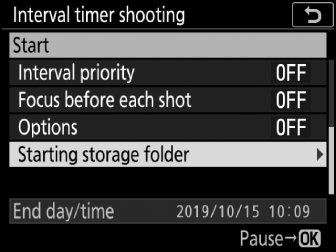
Highlight [] and press 2.
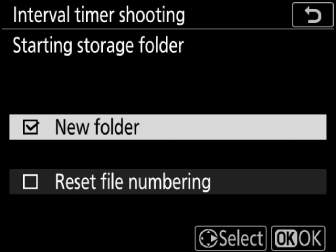
Highlight options and press 2 to select or deselect. Press J to proceed.
-
-
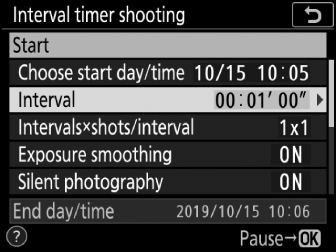
Start shooting.
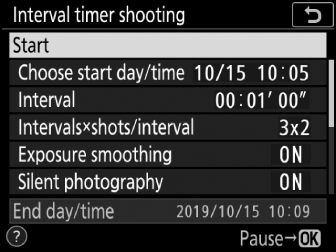
Highlight [] and press J. The first series of shots will be taken at the specified starting time, or after about 3 s if [] was selected for [] in Step 2. Shooting will continue at the selected interval until all shots have been taken.
-
Choose an interval longer than the time needed to take the selected number of shots at the predicted shutter speed. Note that during actual interval-timer photography, the camera must not only take shots at the selected interval but must also have sufficient time to complete the exposures and perform such tasks as processing the photographs. If the interval is too short to take the selected number of photos, the camera may skip to the next interval without shooting.
-
If the interval is too short, the total number of shots taken may be less than that selected for [].
-
If you are using a flash, choose an interval longer than the time need for the flash to charge. If the interval is too short, the flash may fire at less than the power needed for full exposure.
-
If shooting cannot proceed at current settings—for example, if shutter speed is set to A (Bulb) or % (Time), the interval is [], or the start time is in less than a minute—a warning will be displayed in the monitor.
-
If [] is selected for [] or [] is selected for [], the standby timer will not expire during interval-timer photography, regardless of the option selected for Custom Setting c2 [].
-
If the memory card is full, the interval timer will remain active but no pictures will be taken. Insert another memory card and resume shooting (Pausing Interval-Timer Photography).
-
Interval-timer photography will pause if:
-
The camera is turned off and then on again (when the camera is off, batteries and memory cards can be replaced without ending interval-timer photography)
-
E or
Mupis selected for release mode
-
-
Changing camera settings while the interval timer is active may cause shooting to end.
Regardless of the release mode selected, the camera will take the specified number of shots at each interval.
Pictures can be viewed and shooting and menu settings adjusted between shots. Note, however, that the monitor will turn off approximately 2 s before the next shot is taken.
Interval-timer photography cannot be combined with some camera features, including:
-
Live view
-
Movie recording
-
Long time-exposures (bulb or time photography)
-
The self-timer
-
Bracketing
-
Multiple exposure
-
HDR (high dynamic range)
-
Focus shift
-
The negative digitizer
Selecting [] for [] disables some camera features, including:
-
ISO sensitivities of Hi 0.3 through Hi 2
-
Flash photography
-
Exposure delay mode
-
Long exposure noise reduction
-
Flicker reduction
Turning the camera off or selecting a new release mode does not affect interval-timer photography settings.
During interval-timer photography, the memory card access lamp will flash. Immediately
before the next shooting interval begins, the shutter speed display will show the
number of intervals remaining, and the aperture display will show the number of shots
remaining in the current interval.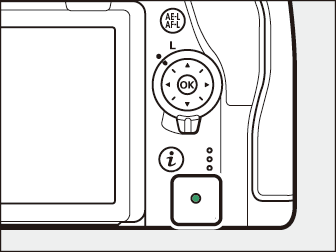
-
Between shots, the number of intervals remaining and the number of shots in each interval can be viewed by pressing the shutter-release button halfway.
-
If [] is selected for [], the memory card access lamp will remain lit during interval-timer photography.
Pausing Interval-Timer Photography
Interval-timer photography can be paused between intervals by pressing J or by selecting [] in the photo shooting menu, highlighting [], and pressing J. Note that the menus may not be displayed when the G button is pressed if the time selected for [] is very short.
-
If [] is selected for [], pressing J between intervals will end interval-timer photography.
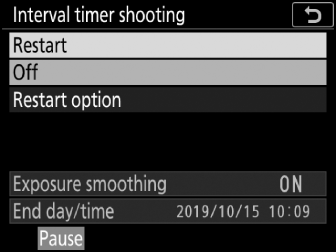
Resuming Interval-Timer Photography
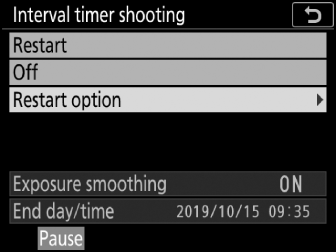
Shooting can be resumed using the [] item in the photo shooting menu. The procedure is as follows:
To resume shooting immediately:
|
Highlight [] and press J. |

To resume shooting at a specified time:
|
For [], highlight [] and press 2. |
|
Choose a starting date and time and press J. |
|
Highlight [] and press J. |
Ending Interval-Timer Photography
To end interval-timer photography before all the photos are taken, select [] for []. Note that the menus may not be displayed when the G button is pressed if the time selected for [] is very short. In this case you will need to press J to pause interval-timer photography and then select [] in the photo shooting menu, highlight [], and press J.