Viewing Pictures
- Full-Frame Playback
- Thumbnail Playback
- Calendar Playback
- Playback Controls
- Using the Touch Screen
- The i Button
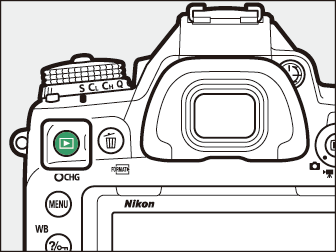
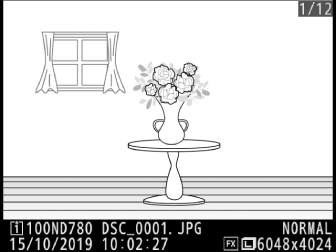
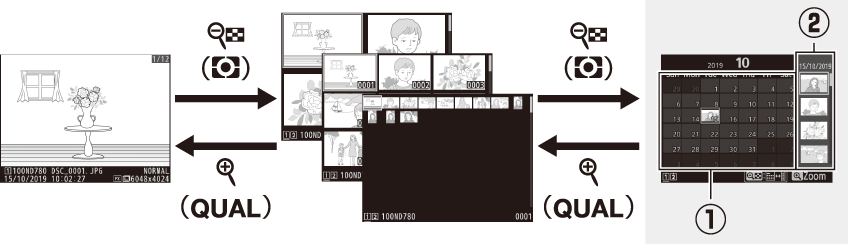
Full-Frame Playback
Press the K button to view the most recent picture full frame in the display.
|
|
|
-
Additional pictures can be displayed by pressing 4 or 2; to view additional information on the current photograph, press 1 or 3 ( Photo Information ).
Thumbnail Playback
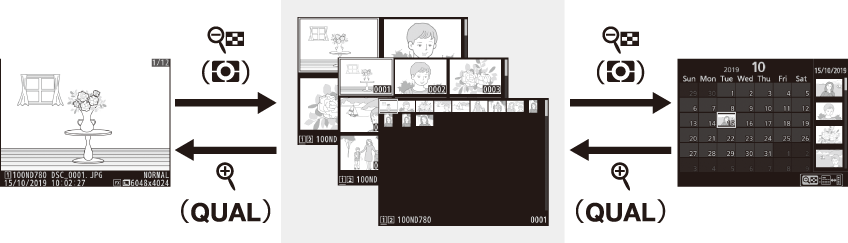
To view multiple images, press the W (Y) button when a picture is displayed full frame. 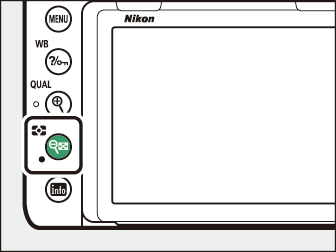
-
The number of images displayed increases from 4 to 9 to 72 each time the W (Y) button is pressed, and decreases with each press of the X (T) button. Use the multi selector to highlight images.
Calendar Playback
To view images taken on a selected date, press the W (Y) button when 72 images are displayed.
-
Use the multi selector (1, 3, 4, or 2) to highlight a date in the date list (q) and press W (Y) to place the cursor in the thumbnail list (w). Press 1 or 3 to highlight pictures in the thumbnail list. To return to the date list, press the W (Y) button a second time.
-
To zoom in on the picture highlighted in the thumbnail list, press and hold the X (T) button.
-
To exit to thumbnail playback, press X (T) when the cursor is in the date list.
Playback Controls
| 1 |
O (Q): Delete the current picture ( Deleting Pictures ) |
|---|---|
| 2 |
G: View the menus ( The G Button ) |
| 3 |
Q/g (U): Protect the current picture ( Protecting Photographs from Deletion ) |
| 4 |
X (T): Zoom in (Playback Zoom) |
|---|---|
| 5 |
W (Y): View multiple pictures ( Thumbnail Playback ) |
Touch controls can be used when pictures are displayed in the monitor ( Touch Controls ).
To display “tall” (portrait-orientation) photographs in tall orientation, select [] for [] in the playback menu.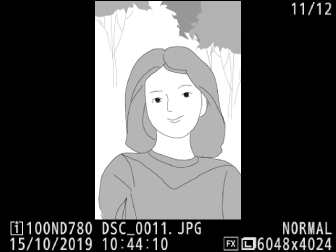
When [] is selected for [] in the playback menu, photographs are automatically displayed in the monitor after shooting (because the camera is already in the correct orientation, images are not rotated automatically during image review). In Cl, Ch, and Qc modes, display begins when shooting ends, with the first photograph in the current series displayed.
Using the Touch Screen
During playback, the touch sensitive monitor can be used for the following operations.
Viewing Other Pictures
Flick left or right to view other pictures.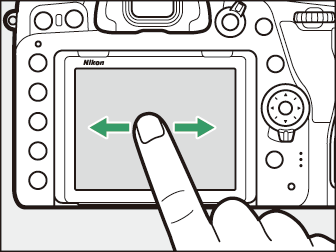
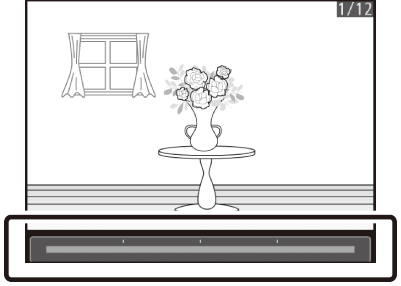
Scrolling Rapidly to Other Pictures
In full frame playback, you can touch the bottom of the display to display a frame
advance bar, then slide your finger left or right to scroll rapidly to other pictures.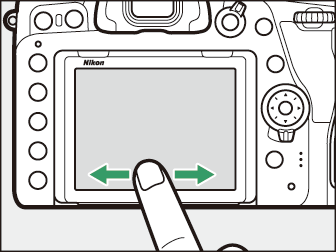
Zoom (Photos Only)
Use stretch and pinch gestures to zoom in and out and slide to scroll (
Taking a Closer Look: Playback Zoom
). You can also give the display two quick taps to zoom in from full-frame playback
or cancel zoom.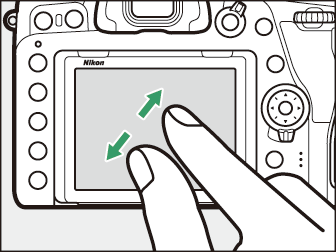
Viewing Thumbnails
To “zoom out” to a thumbnail view (
Thumbnail Playback
), use a pinch gesture in full-frame playback.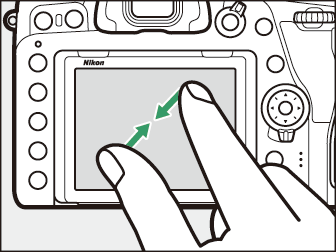
-
Use pinch and stretch to choose the number of images displayed from 4, 9, and 72 frames.
-
Using a pinch gesture when 72 frames are displayed takes you to calendar playback. To return to 72-frame playback, use a stretch gesture.
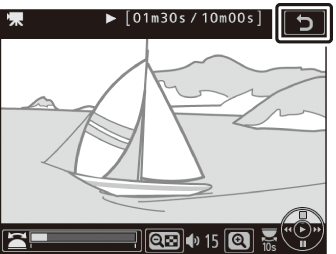
View Movies
Tap the on-screen guide to start movie playback (movies are indicated by a 1 icon). Tap the display to pause or resume, or tap Z to exit to full-frame playback (note that some of the icons in the movie playback
display do not respond to touch-screen operations).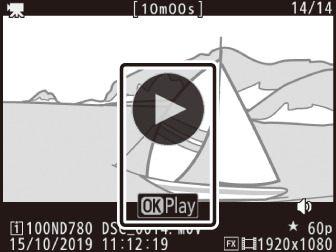
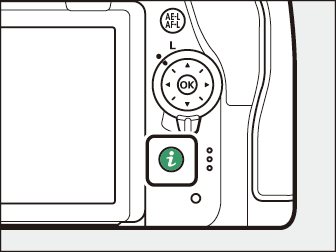
The i Button
Pressing the i button during playback zoom or full-frame or thumbnail playback displays the i menu for playback mode. Select options using the multi selector and J button and press the i button to exit the menu and return to playback.
|
|
|
Photos
|
Option |
Description |
|---|---|
|
[] 1 |
Save a copy of the current image cropped to the area visible in the display. This option is not available when histograms are displayed ( RGB Histogram ). |
|
[] |
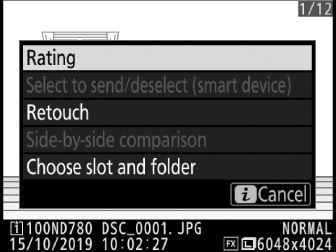
Rate the current picture ( Rating Pictures ). |
|
[] |
Select the current picture for upload ( Selecting Pictures for Upload ). The option displayed varies with the type of device connected. |
|
[] |
|
|
[] |
|
|
[] |
Use the options in the retouch menu ( N The Retouch Menu: Creating Retouched Copies ) to create a retouched copy of the current photograph. |
|
[] 2 |
Compare retouched copies to the original photographs. |
|
[] |
Choose a folder for playback. Highlight a slot and press 2 to list the folders on the selected card, then highlight a folder and press J to view the pictures in the highlighted folder. |
|
[] 3 |
Press 4 or 2 to choose the color channel for the highlight display. |
-
Displayed only during playback zoom.
-
Available only when a retouched copy (indicated by a N icon) or the source picture for a retouched copy is selected.
-
Available only when highlights or RGB histograms are displayed.
Choose [] to compare retouched copies with the unretouched originals.
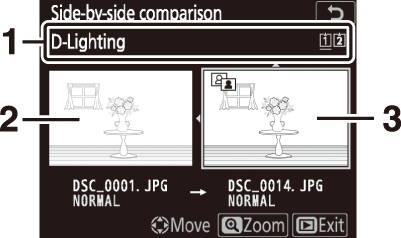
| 1 |
Options used to create copy |
|---|---|
| 2 |
Source image |
| 3 |
Retouched copy |
|---|
-
The source image is displayed on the left, the retouched copy on the right.
-
The options used to create the copy are listed at the top of the display.
-
Press 4 or 2 to switch between the source image and the retouched copy.
-
If the copy was created from multiple source images using [], press 1 or 3 to view the other images.
-
If the source has been copied multiple times, press 1 or 3 to view the other copies.
-
To view the highlighted picture full screen, press and hold the X (T) button.
-
Press J to return to playback with the highlighted image displayed full-frame.
-
To exit to playback, press the K button.
-
The source image will not be displayed if the copy was created from a photograph that is now protected.
-
The source image will not be displayed if the copy was created from a photograph that has since been deleted.
Movies
|
Option |
Description |
|---|---|
|
[] |
Rate the current movie ( Rating Pictures ). |
|
[] |
Select the current movie for upload ( Selecting Pictures for Upload ). The option displayed varies with the type of device connected. |
|
[] |
|
|
[] |
Adjust playback volume. |
|
[] |
Trim footage from the current movie and save the edited copy in a new file (Trimming Movies). |
|
[] |
Choose a folder for playback. Highlight a slot and press 2 to list the folders on the selected card, then highlight a folder and press J to view the pictures in the highlighted folder. |
|
[] * |
Press 4 or 2 to choose a color channel for the highlight display. |
-
Available in the highlight and RGB histogram displays only.
Movies (Playback Paused)
|
Option |
Description |
|
|---|---|---|
|
9 |
[] |
Trim footage from the current movie and save the edited copy in a new file (Trimming Movies). |
|
4 |
[] |
Save a selected frame as a JPEG still (Saving Selected Frames). |
|
r |
[] |
Add indices to movies during playback (Adding Indices to Movies). Indices can be used to quickly locate frames during playback and editing. |
|
o |
[] |
Delete indices (Deleting Indices). |