Image Recording Options (Image Area, Quality, and Size)
Adjusting Image Area Settings
Image area settings can be displayed by selecting [] in the photo shooting menu.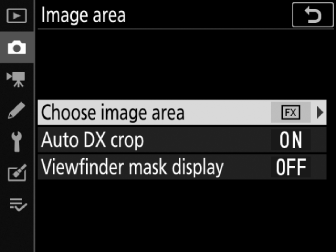
Choose Image Area
Choose the image area. The following options are available:
|
Option |
Description |
|
|---|---|---|
|
c |
[] |
Images are recorded in FX format with an angle of view equivalent to a NIKKOR lens on a 35 mm format camera. |
|
a |
[] |
Images are recorded in DX format. To calculate the approximate focal length of the lens in 35 mm format, multiply by 1.5. |
|
m |
[] |
Pictures are recorded with an aspect ratio of 1 : 1. |
|
Z |
[] |
Pictures are recorded with an aspect ratio of 16 : 9. |
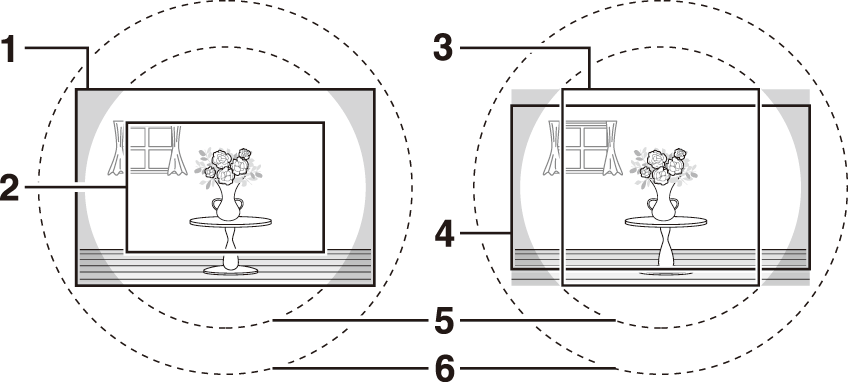
| 1 |
FX (36×24) |
|---|---|
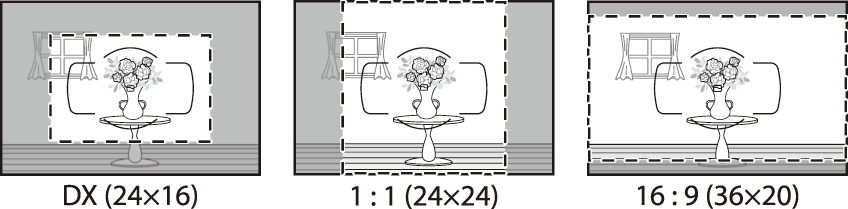
| 2 |
DX (24×16) |
| 3 |
1 : 1 (24×24) |
| 4 |
16 : 9 (36×20) |
|---|---|
| 5 |
DX format (24×16) image circle |
| 6 |
FX format (36×24) image circle |
DX lenses are designed for use with DX format cameras and have a smaller angle of view than lenses for 35 mm format cameras. If [] is off and an option other than [] (DX format) is selected for [] when a DX lens is attached, the edges of the image may be eclipsed. This may not be apparent in the viewfinder, but when the images are played back you may notice a drop in resolution or that the edges of the picture are blacked out.
If [] has been assigned to a button using Custom Setting f3 [], the image area can be selected by pressing the button and rotating a command dial.
-
The selected crop is displayed in the viewfinder (Choose Image Area).
-
The option currently selected for image area can be displayed in the control panel and viewfinder by pressing the button to which [] is assigned.
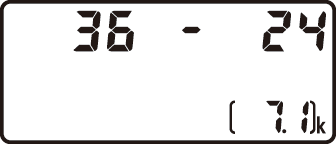
|
Image area |
Display |
|---|---|
|
[] |
|
|
[] |
|
|
[] |
|
|
[] |
|


-
Camera controls cannot be used to select image area when a DX lens is attached and [] is on.
Image size varies with the option selected for image area.
[]
Choose whether the camera automatically selects the [] (DX format) image area when a DX lens is attached.
|
Option |
Description |
|---|---|
|
[] |
The camera automatically selects the [] (DX format) image area when a DX lens is attached. |
|
[] |
Automatic image-area selection disabled. |
The Viewfinder Mask Display
If [] is selected, the area outside crop ([] excepted) will be shown in gray in the viewfinder.
Adjusting Image Quality
Choose the image quality option used when photographs are recorded.
|
Option |
Description |
|---|---|
|
[] |
Record two copies of each photo: an NEF (RAW) image and a JPEG copy.
|
|
[] |
|
|
[m] |
|
|
[] |
|
|
[] |
|
|
[] |
|
|
[] |
Record photos in NEF (RAW) format. |
|
[] |
Record photos in JPEG format. ”Fine” produces higher quality pictures than ”normal” and ”normal” higher quality pictures than “basic”.
|
|
[] |
|
|
[] |
|
|
[] |
|
|
[] |
|
|
[] |
-
NEF (RAW) files have the extension “*.nef”.
-
The process of converting NEF (RAW) pictures to other highly-portable formats such as JPEG is referred to as “NEF (RAW) processing”. During this process, Picture Controls and settings such as exposure compensation and white balance can be freely adjusted.
-
The RAW data themselves are unaffected by NEF (RAW) processing and their quality will remain intact even if the pictures are processed multiple times at different settings.
-
NEF (RAW) processing can be performed in-camera using the [] item in the retouch menu or on a computer using Nikon’s NX Studio software. NX Studio is available free-of-charge from the Nikon Download Center.
Choosing an Image Quality Option
During viewfinder photography, you can choose an image quality option by holding the X (T) button and rotating the main command dial.
|
|
|
|

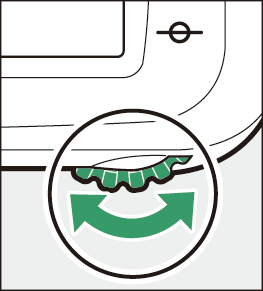
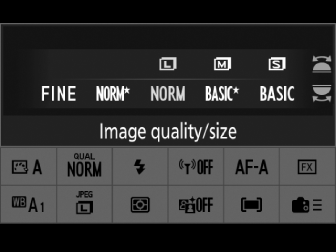
Image quality can also be adjusted using the [] item in the photo shooting menu. Use the [] item in the photo shooting menu to adjust image quality during live view.
If [] is selected for [] when photographs are taken at image quality settings of NEF (RAW) + JPEG, the NEF (RAW) copy will be saved to the card in Slot 1 and the JPEG copy to the card in Slot 2.
Choosing an Image Size
Choose a size for new JPEG pictures. The size for JPEG pictures can be selected from [], [], and []. The number of pixels in the image varies with the option selected for image area ( Adjusting Image Area Settings ).
|
Image area |
Option |
Size (pixels) |
Print size (cm/in.) * |
|---|---|---|---|
|
[] (FX format) |
Large |
6048 × 4024 |
51.2 × 34.1/20.2 × 13.4 |
|
Medium |
4528 × 3016 |
38.3 × 25.5/15.1 × 10.1 |
|
|
Small |
3024 × 2016 |
25.6 × 17.1/10.1 × 6.7 |
|
|
[] (DX format) |
Large |
3936 × 2624 |
33.3 × 22.2/13.1 × 8.7 |
|
Medium |
2944 × 1968 |
24.9 × 16.7/9.8 × 6.6 |
|
|
Small |
1968 × 1312 |
16.7 × 11.1/6.6 × 4.4 |
|
|
[] |
Large |
4016 × 4016 |
34.0 × 34.0/13.4 × 13.4 |
|
Medium |
3008 × 3008 |
25.5 × 25.5/10.0 × 10.0 |
|
|
Small |
2000 × 2000 |
16.9 × 16.9/6.7 × 6.7 |
|
|
[] |
Large |
6048 × 3400 |
51.2 × 28.8/20.2 × 11.3 |
|
Medium |
4528 × 2544 |
38.3 × 21.5/15.1 × 8.5 |
|
|
Small |
3024 × 1696 |
25.6 × 14.4/10.1 × 5.7 |
-
Approximate size when printed at 300 dpi. Print size in inches equals image size in pixels divided by printer resolution in dots per inch (dpi; 1 inch = approximately 2.54 cm).
Choosing an Image Size
During viewfinder photography, you can choose the image size by holding the X (T) button and rotating the sub-command dial.
|
|
|
|
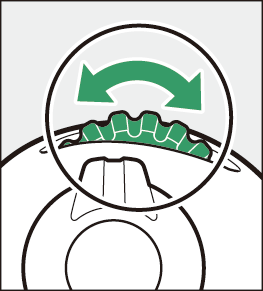
Image size for JPEG images can also be adjusted using the [] item in the photo shooting menu. Use the [] item in the photo shooting menu to adjust image size during live view.