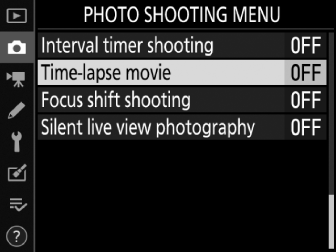
Creating a Movie from Photos (Time-Lapse Movie)
Use the [] item in the photo shooting menu to create silent time-lapse movies from photos taken automatically at a selected interval.
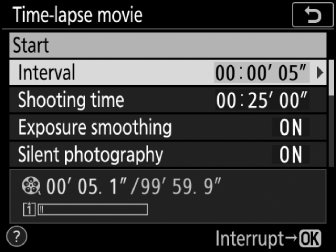
Time-Lapse Movie Options
|
Option |
Description |
|---|---|
|
[] |
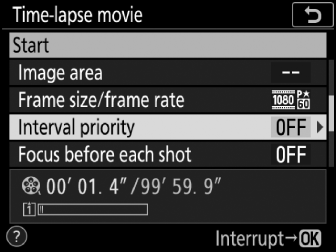
Start time-lapse recording. Shooting starts after about 3 s and continues at the selected interval for the selected shooting time. |
|
[] |
Choose the interval between shots in minutes and seconds. |
|
[] |
Choose how long the camera will continue to take pictures (hours and minutes). |
|
[] |
Selecting [] smooths abrupt changes in exposure in modes other than M (note that exposure smoothing only takes effect in mode M if auto ISO sensitivity control is on). Large changes in subject brightness during shooting may result in apparent variations in exposure, in which case it may be necessary to shorten the interval between shots. |
|
[] |
Select [] to silence the shutter and eliminate the vibrations it produces during shooting.
|
|
[] |
|
|
[] |
Choose the frame size and rate for the final movie. |
|
[] |
|
|
[] |
If [] is selected, the camera will focus before each shot after the first. |
|
[] |
Choose the slot used to record time-lapse movies when two memory cards are inserted. |
Recording Time-Lapse Movies
-
Choose a mode other than EFCT.
-
Before shooting a time-lapse movie, take a test shot at current settings and view the results.
-
Time-lapse movies are shot using the movie crop.
-
Select [] in the setup menu and make sure that the camera clock is set to the correct time and date.
-
We recommend using a tripod and disabling lens vibration reduction (VR). Mount the camera on a tripod before shooting begins.
-
To ensure that shooting is not interrupted, use an optional AC adapter and power connector or a fully-charged battery.
-
When taking photos with your eye from the viewfinder and [] selected for [], remove the rubber eyecup and cover the viewfinder with the supplied eyepiece cap to prevent light entering via the viewfinder interfering with photographs and exposure (Cover the Viewfinder).
-
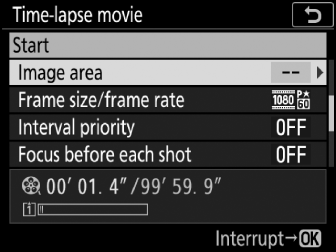
Highlight [] in the photo shooting menu and press 2.
-
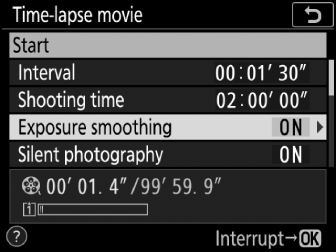
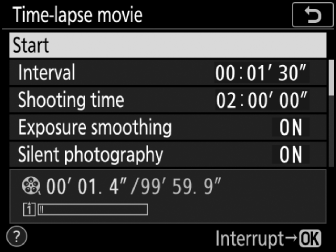
Adjust time-lapse movie settings.
Adjust time-lapse movie settings as described below.
-
To choose the interval between frames:
Highlight [] and press 2.

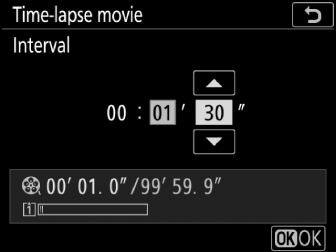
Choose an interval longer than the slowest anticipated shutter speed (minutes and seconds) and press J.
-
To choose the total shooting time:
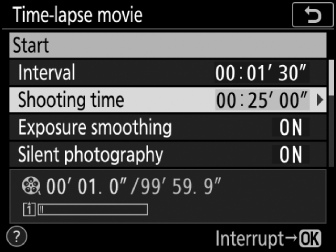
Highlight [] and press 2.
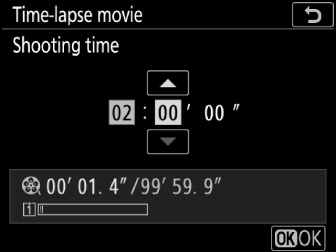
Choose shooting time (up to 7 hours 59 minutes) and press J.
-
To enable or disable exposure smoothing:
Highlight [] and press 2.
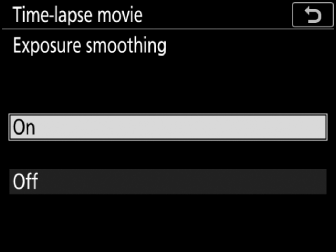
Highlight an option and press J.
-
Select [] to smooth changes in exposure for natural-looking footage.
-
-
To enable or disable silent photography:
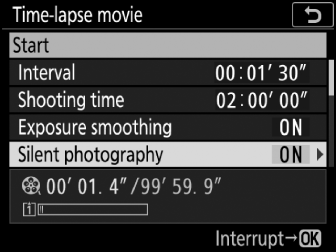
Highlight [] and press 2.
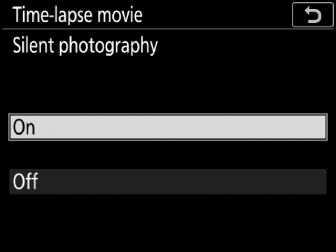
Highlight an option and press J.
-
If [] is selected, the only time the sound of the shutter or mirror will be heard is when the mirror is raised or lowered at the start and end of shooting.
-
-
To choose the image area:
Highlight [] and press 2.
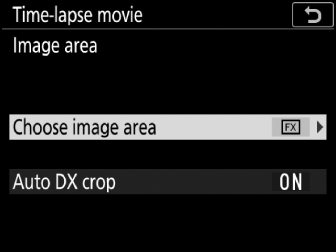
Highlight [] or [] and press 2.
-
If you selected [], choose [] or []; if you selected [], highlight [] or [] and press J.
-
-
To choose the frame size and rate:
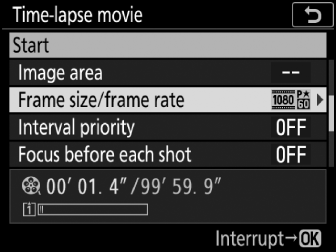
Highlight [] and press 2.
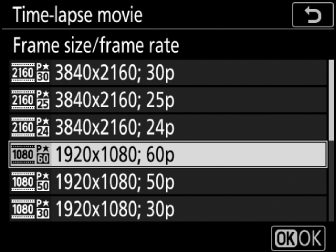
Highlight an option and press J.
-
To choose an interval priority option:
Highlight [] and press 2.
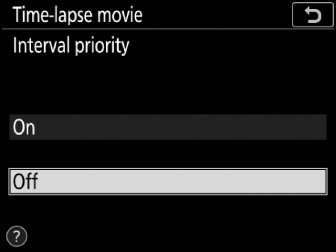
Highlight an option and press J.
-
Choose whether the camera focuses before each shot after the first:

Highlight [] and press 2.
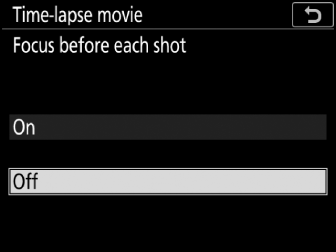
Highlight an option and press J.
-
If [] is selected for [], the camera will focus before each shot according to the option currently selected for autofocus mode.
-
-
Choose a destination:
Highlight [] and press 2.
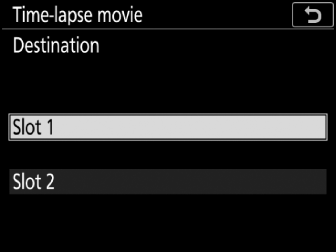
Highlight the slot that will be used to record time-lapse movies when two memory cards are inserted and press J.
-
-
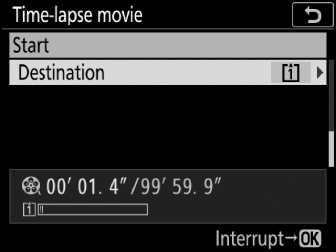
Highlight [] and press J.
-
Shooting starts after about 3 s.
-
The camera takes photographs at the [] and for the [] selected in Step 2.
-
Ending Shooting
To end shooting before all the photos are taken, press J or select [] in the photo shooting menu, highlight [], and press J. Note that the menus may not be displayed when the G button is pressed if the time selected for [] is very short.
-
A movie will be created from the frames shot to the point where shooting ended and normal photography will resume.
The total number of frames in the final movie can be calculated by dividing the shooting time by the interval, rounding up, and adding 1. The length of the final movie can then be calculated by dividing the number of shots by the frame rate selected for []. A 48-frame movie recorded at 1920 × 1080; 24p, for example, will be about two seconds long. The maximum length for time-lapse movies is 20 minutes.
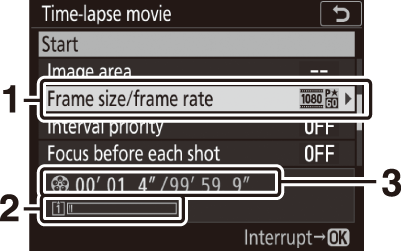
| 1 |
Frame size/frame rate |
|---|---|
| 2 |
Memory card indicator |
| 3 |
Length recorded/maximum length |
|---|
The K button cannot be used to view pictures while shooting is in progress, but the current frame will be displayed for a few seconds after each shot if [] is selected for [] in the playback menu (the frame may not be displayed if the interval is very short). Other playback operations cannot be performed while the frame is displayed.
-
Sound is not recorded with time-lapse movies.
-
The shutter speed and the time needed to record the image to the memory card may vary from shot to shot. As a result, the interval between a shot being recorded and the start of the next shot may vary.
-
Shooting will not begin if a time-lapse movie cannot be recorded at current settings, for example if:
-
The value selected for [] is longer than that selected for []
-
[] is selected for [] or []
-
The memory card is full
-
-
The K button cannot be used to view pictures while time-lapse recording is in progress.
-
For consistent coloration, choose a white balance setting other than 4 ([]) or D ([]) when recording time-lapse movies.
-
Regardless of the option selected for Custom Setting c2 [], the standby timer will not expire while recording is in progress.
-
Shooting may end if camera controls are used or settings are changed or HDMI cable is connected. A movie will be created from the frames shot to the point where shooting ended.
-
The following end shooting without a beep sounding or a movie being recorded:
-
Disconnecting the power source
-
Ejecting the memory card
-
-
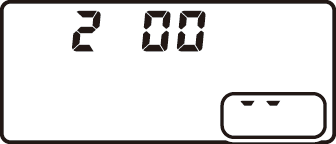
During shooting, the memory card access lamp will light and a time-lapse recording indicator will be displayed in the control panel. The time remaining (in hours and minutes) appears in the control panel shutter-speed display immediately before each frame is recorded.
-
At other times, the time remaining can be viewed by pressing the shutter-release button halfway.
Shooting and menu settings can be adjusted between shots. Note, however, that the monitor will turn off approximately 2 s before the next shot is taken.
Time-lapse movie recording cannot be combined with some camera features, including:
-
EFCT mode
-
Live view photography
-
Movie recording
-
Long time-exposures (bulb or time photography)
-
The self-timer
-
Bracketing
-
Multiple exposure
-
HDR (high dynamic range)
-
Interval-timer photography
-
Focus shift
-
The negative digitizer
Selecting [] for [] disables some camera features, including:
-
ISO sensitivities of Hi 0.3 through Hi 2
-
Flash photography
-
Exposure delay mode
-
Long exposure noise reduction
-
Flicker reduction