Choose the operations performed in video mode using camera or lens controls, including the camera buttons and sub-selector and the lens control ring.
-
Choose the roles played by the controls below. Highlight the desired control and press J.
|
Option |
|
|---|---|
|
w |
[] |
|
y |
[] |
|
1 |
[] |
|
n |
[] |
|
u |
[] |
|
V |
[] |
|
b |
[] |
|
p |
[] |
|
8 |
[] |
|
A |
[] |
|
X |
[] |
|
j |
[] |
|
F |
[] |
|
y |
[] |
|
G |
[] |
|
3 |
[] |
|
S |
[] |
|
l |
[] |
|
R |
[] |
|
S |
[] |
|
T |
[] |
-
The roles that can be assigned are listed below. The roles available vary with the control.
|
Role |
Description |
|
|---|---|---|
|
A |
[] |
Pressing the control initiates autofocus, duplicating the function of the AF-ON button.
|
|
G |
[] |
Pressing the control initiates autofocus, duplicating the function of the AF-ON button.
|
|
F |
[] |
Focus locks while the control is pressed. |
|
E |
[] |
Exposure locks when the control is pressed. Exposure lock does not end when recording begins. Exposure remains locked until the control is pressed a second time or the standby timer expires. |
|
N |
[] |
If [] or [] is selected for white balance, white balance will lock when the control is pressed (white-balance lock). White-balance lock does not end when recording begins. The lock will however be released when the control is pressed a second time or the standby timer expires. |
|
O |
[] |
Exposure locks when the control is pressed. White balance will also lock provided [] or [] is selected for white balance. Exposure and white-balance lock do not end when recording begins. The lock will however be released when the control is pressed a second time or the standby timer expires. |
|
C |
[] |
Exposure locks while the control is pressed. |
|
B |
[] |
Focus and exposure lock while the control is pressed. |
|
L |
[] |
Press the control to enable silent mode. Press again to disable. |
|
b |
[] |
Press the control to hide icons and other information in the shooting display. Press again to view. |
|
b |
[] |
Press the control to display a framing grid. To hide the grid, press the control again. The display type can be selected using Custom Setting g13 []. |
|
p |
[] |
Press the control to zoom the display in on the area around the current focus point. Press again to cancel zoom. |
|
D |
[] |
Press the control to enable the virtual horizon display. Press again to hide the display. The display type can be selected using Custom Setting d17 []. |
|
W |
[] |
Press the control once to enable focus peaking when MF is selected for focus mode. Press again to end focus peaking. |
|
O |
[] |
Press the control to display “MY MENU”. |
|
3 |
[] |
Press the control to jump to the top item in “MY MENU”. Select this option for quick access to a frequently-used menu item. |
|
K |
[] |
Press the control to start playback. |
|
l |
[] |
Press the control to view only pictures that meet the criteria selected for [] in the playback menu. |
|
t |
[] |
|
|
q |
[] |
|
|
i |
[] |
|
|
h |
[] |
|
|
B |
[] |
Rotate the lens Fn ring clockwise to increase ISO sensitivity. This option is enabled automatically when [] is selected for []. |
|
C |
[] |
Rotate the lens Fn ring counterclockwise to decrease ISO sensitivity. This option is enabled automatically when [] is selected for []. |
|
9 |
[] |
Press the control to cycle through zebra pattern tone range options. |
|
A |
[] |
Pressing the control selects a preset focus point.
|
|
K |
[] |
Pressing the control selects the center focus point. |
|
F |
[] |
Holding the control saves the current focus position.
|
|
H |
[] |
Pressing the control recalls a focus position saved using a control to which [] has been assigned.
|
|
e |
[] |
The control performs the role currently selected for the AF-ON button. |
|
1 |
[] |
Press the control to start recording. Press again to end recording. |
|
v |
[] |
Press the control and rotate the main command dial to choose a shooting mode. |
|
n |
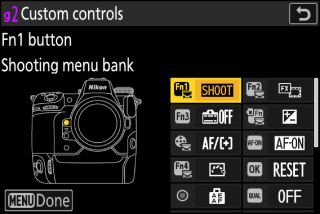
[] |
Press the control and rotate a command dial to choose a shooting menu bank. |
|
J |
[] |
Press the control and rotate a command dial to choose the image area for videos. Note that the image area cannot be changed while recording is in progress. |
|
h |
[] |
Press the control and rotate a command dial to choose a Picture Control. |
|
y |
[] |
Press the control and rotate a command dial to adjust Active D-Lighting for videos. |
|
w |
[] |
Press the control and rotate a command dial to choose a metering option for use during video recording. |
|
z |
[] |
Hold the control and rotate the main command dial to choose the focus mode, the sub-command dial to choose the AF-area mode. |
|
a |
[] |
|
|
H |
[] |
Press the control and rotate a command dial to adjust microphone sensitivity. |
|
X |
[] |
The lens control ring can be used for manual focus regardless of the option selected for focus mode. To refocus using autofocus, press the shutter-release button halfway or press a control to which AF-ON has been assigned. |
|
q |
[] |
Rotate the lens control ring to adjust aperture. |
|
E |
[] |
Adjust exposure compensation either by holding the control and rotating a command dial or by rotating the lens control ring. |
|
9 |
[] |
Adjust ISO sensitivity either by holding the control and rotating a command dial or by rotating the lens control ring. |
|
[] |
The control has no effect. |
|
-
Power aperture is available only in modes A and M.
-
The display may flicker while aperture is adjusted.
Command Dials
The following roles can be assigned to the command dials. To view options, highlight items and press 2.
|
Role |
Description |
|---|---|
|
[] |
Reverse the roles of the main and sub-command dials in selected modes. Press 4 or 2 to highlight a mode and 1 or 3 to switch roles. |
|
[] |
Switch the roles played by rotating the main and sub-command dials while the focus-mode button is pressed. |
|
[] |
Choose the role played by the sub-command dial in the zoom display.
|